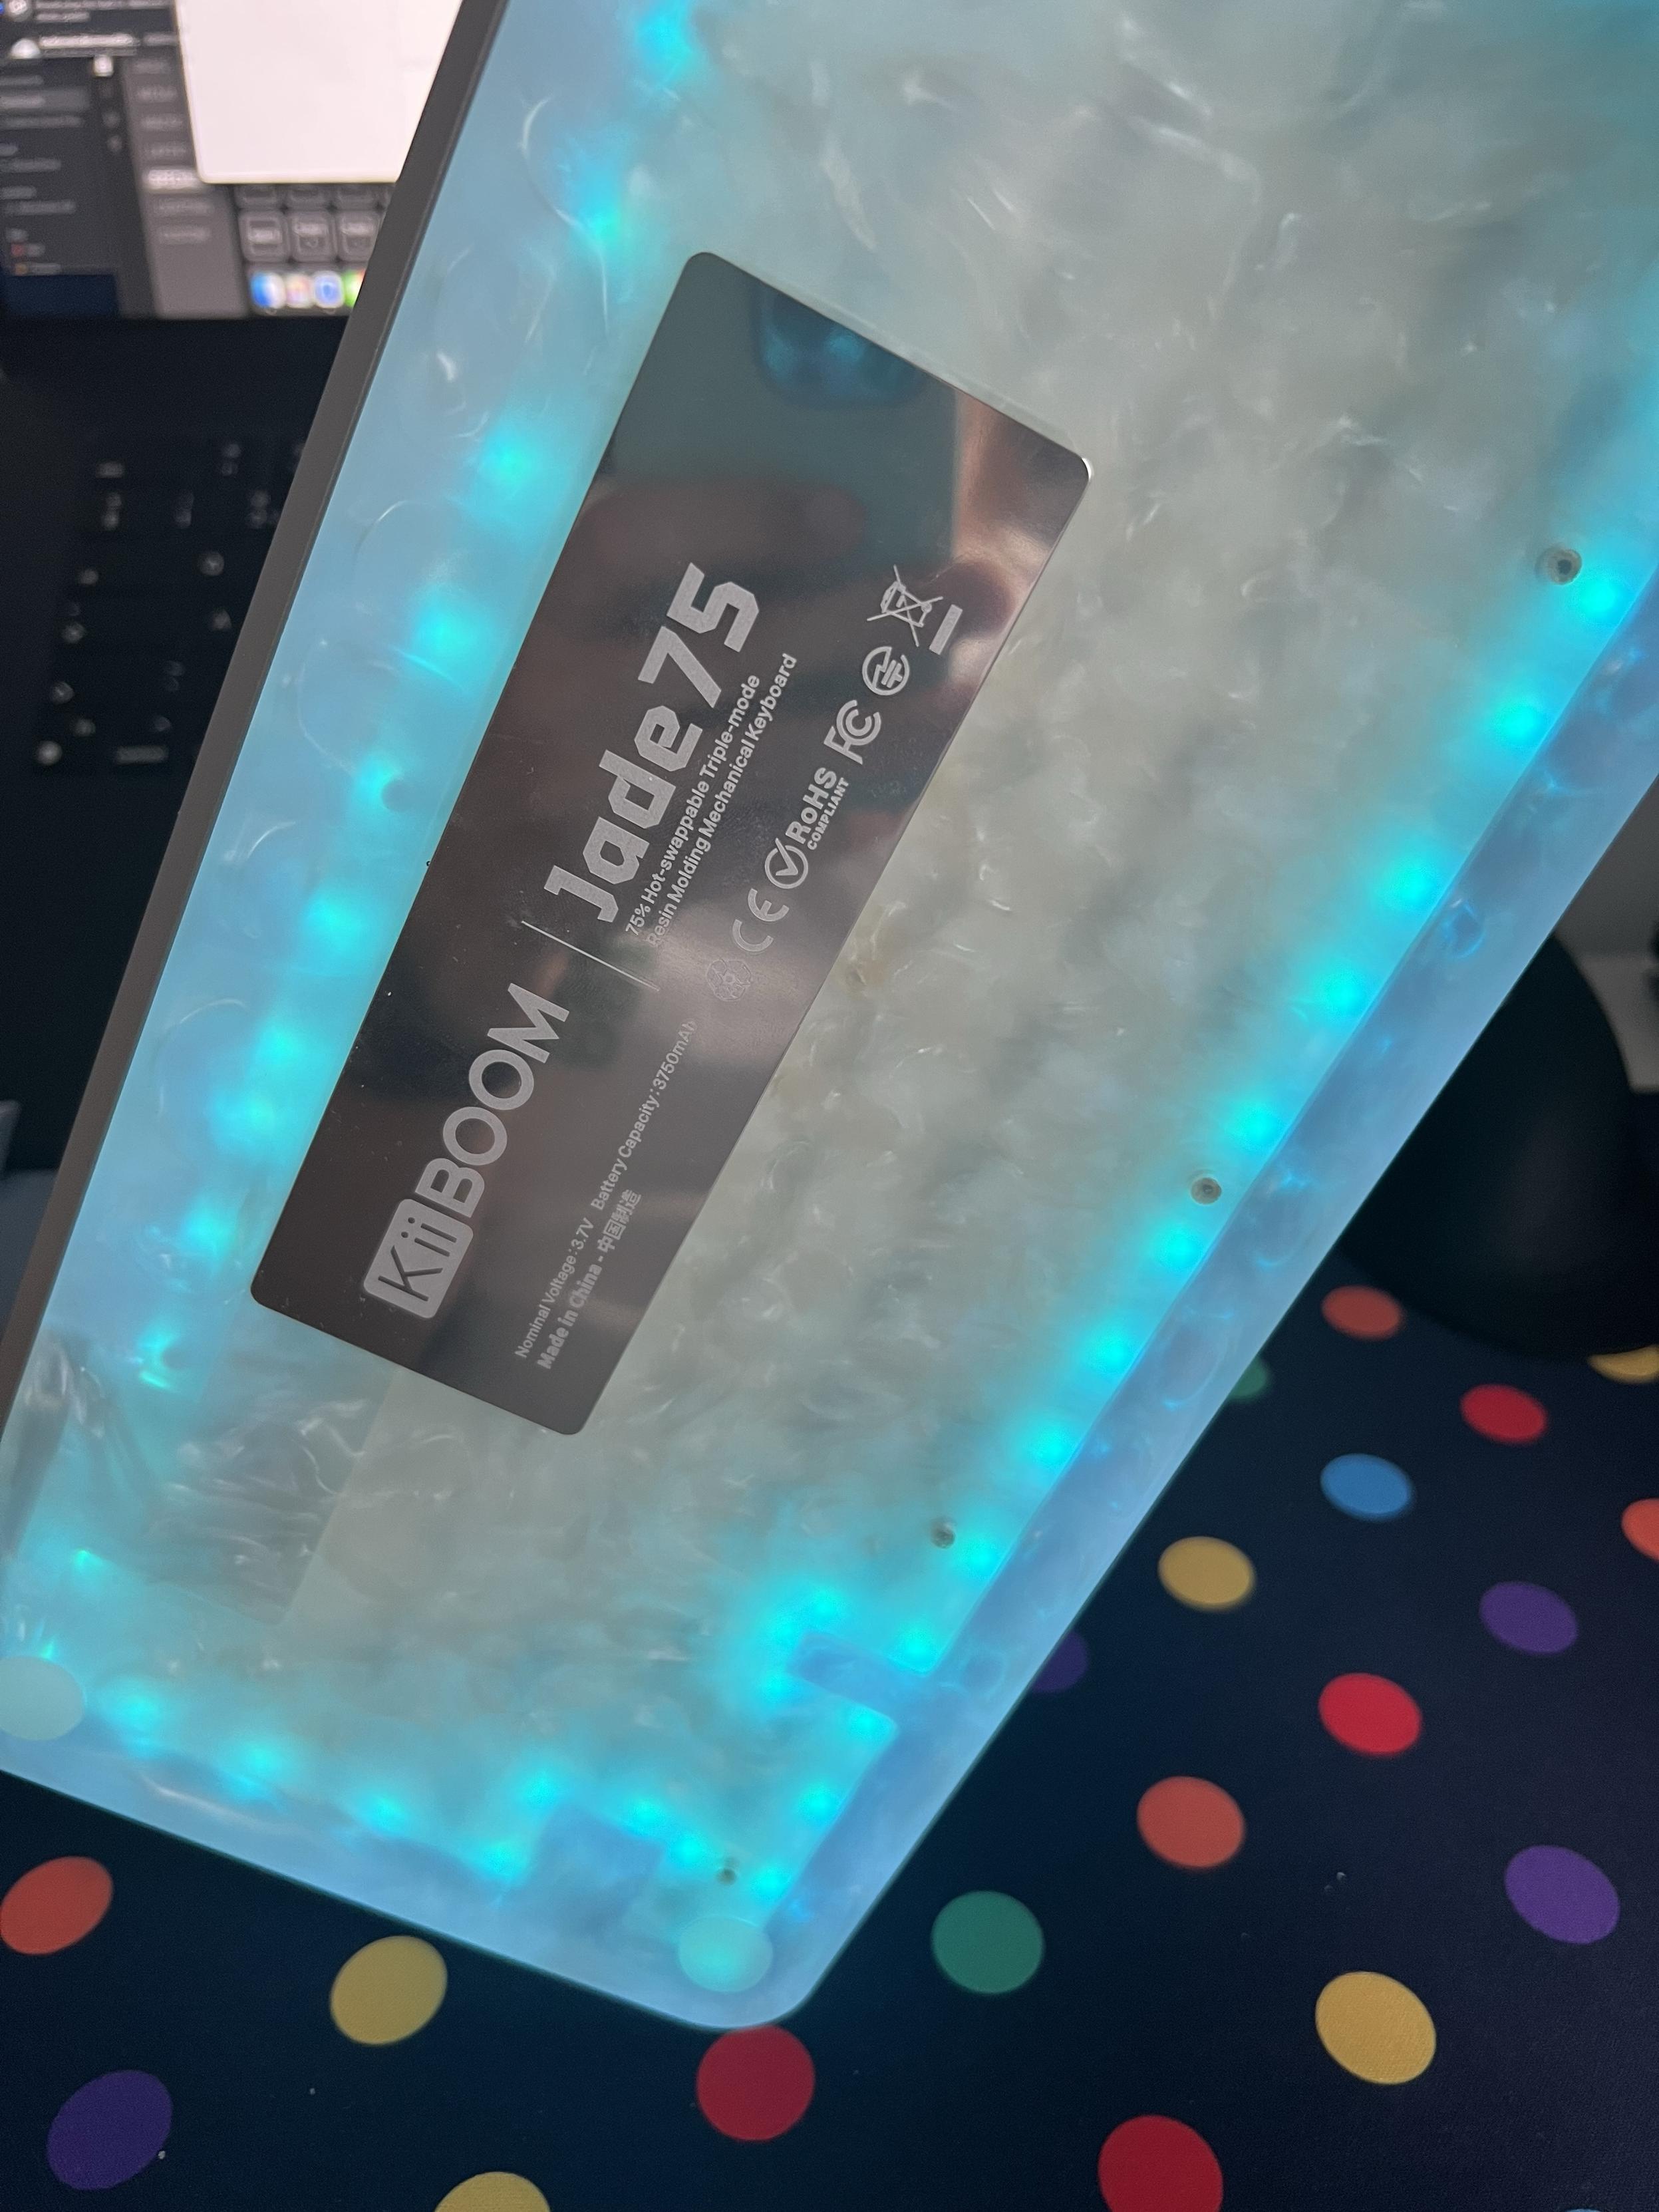
KiiBOOM Jade75 White Resin Mechanical Keyboard
Let’s be honest, I picked this keyboard not because I thought I’d love it, but because it’s so deeply weird it deserves a look.
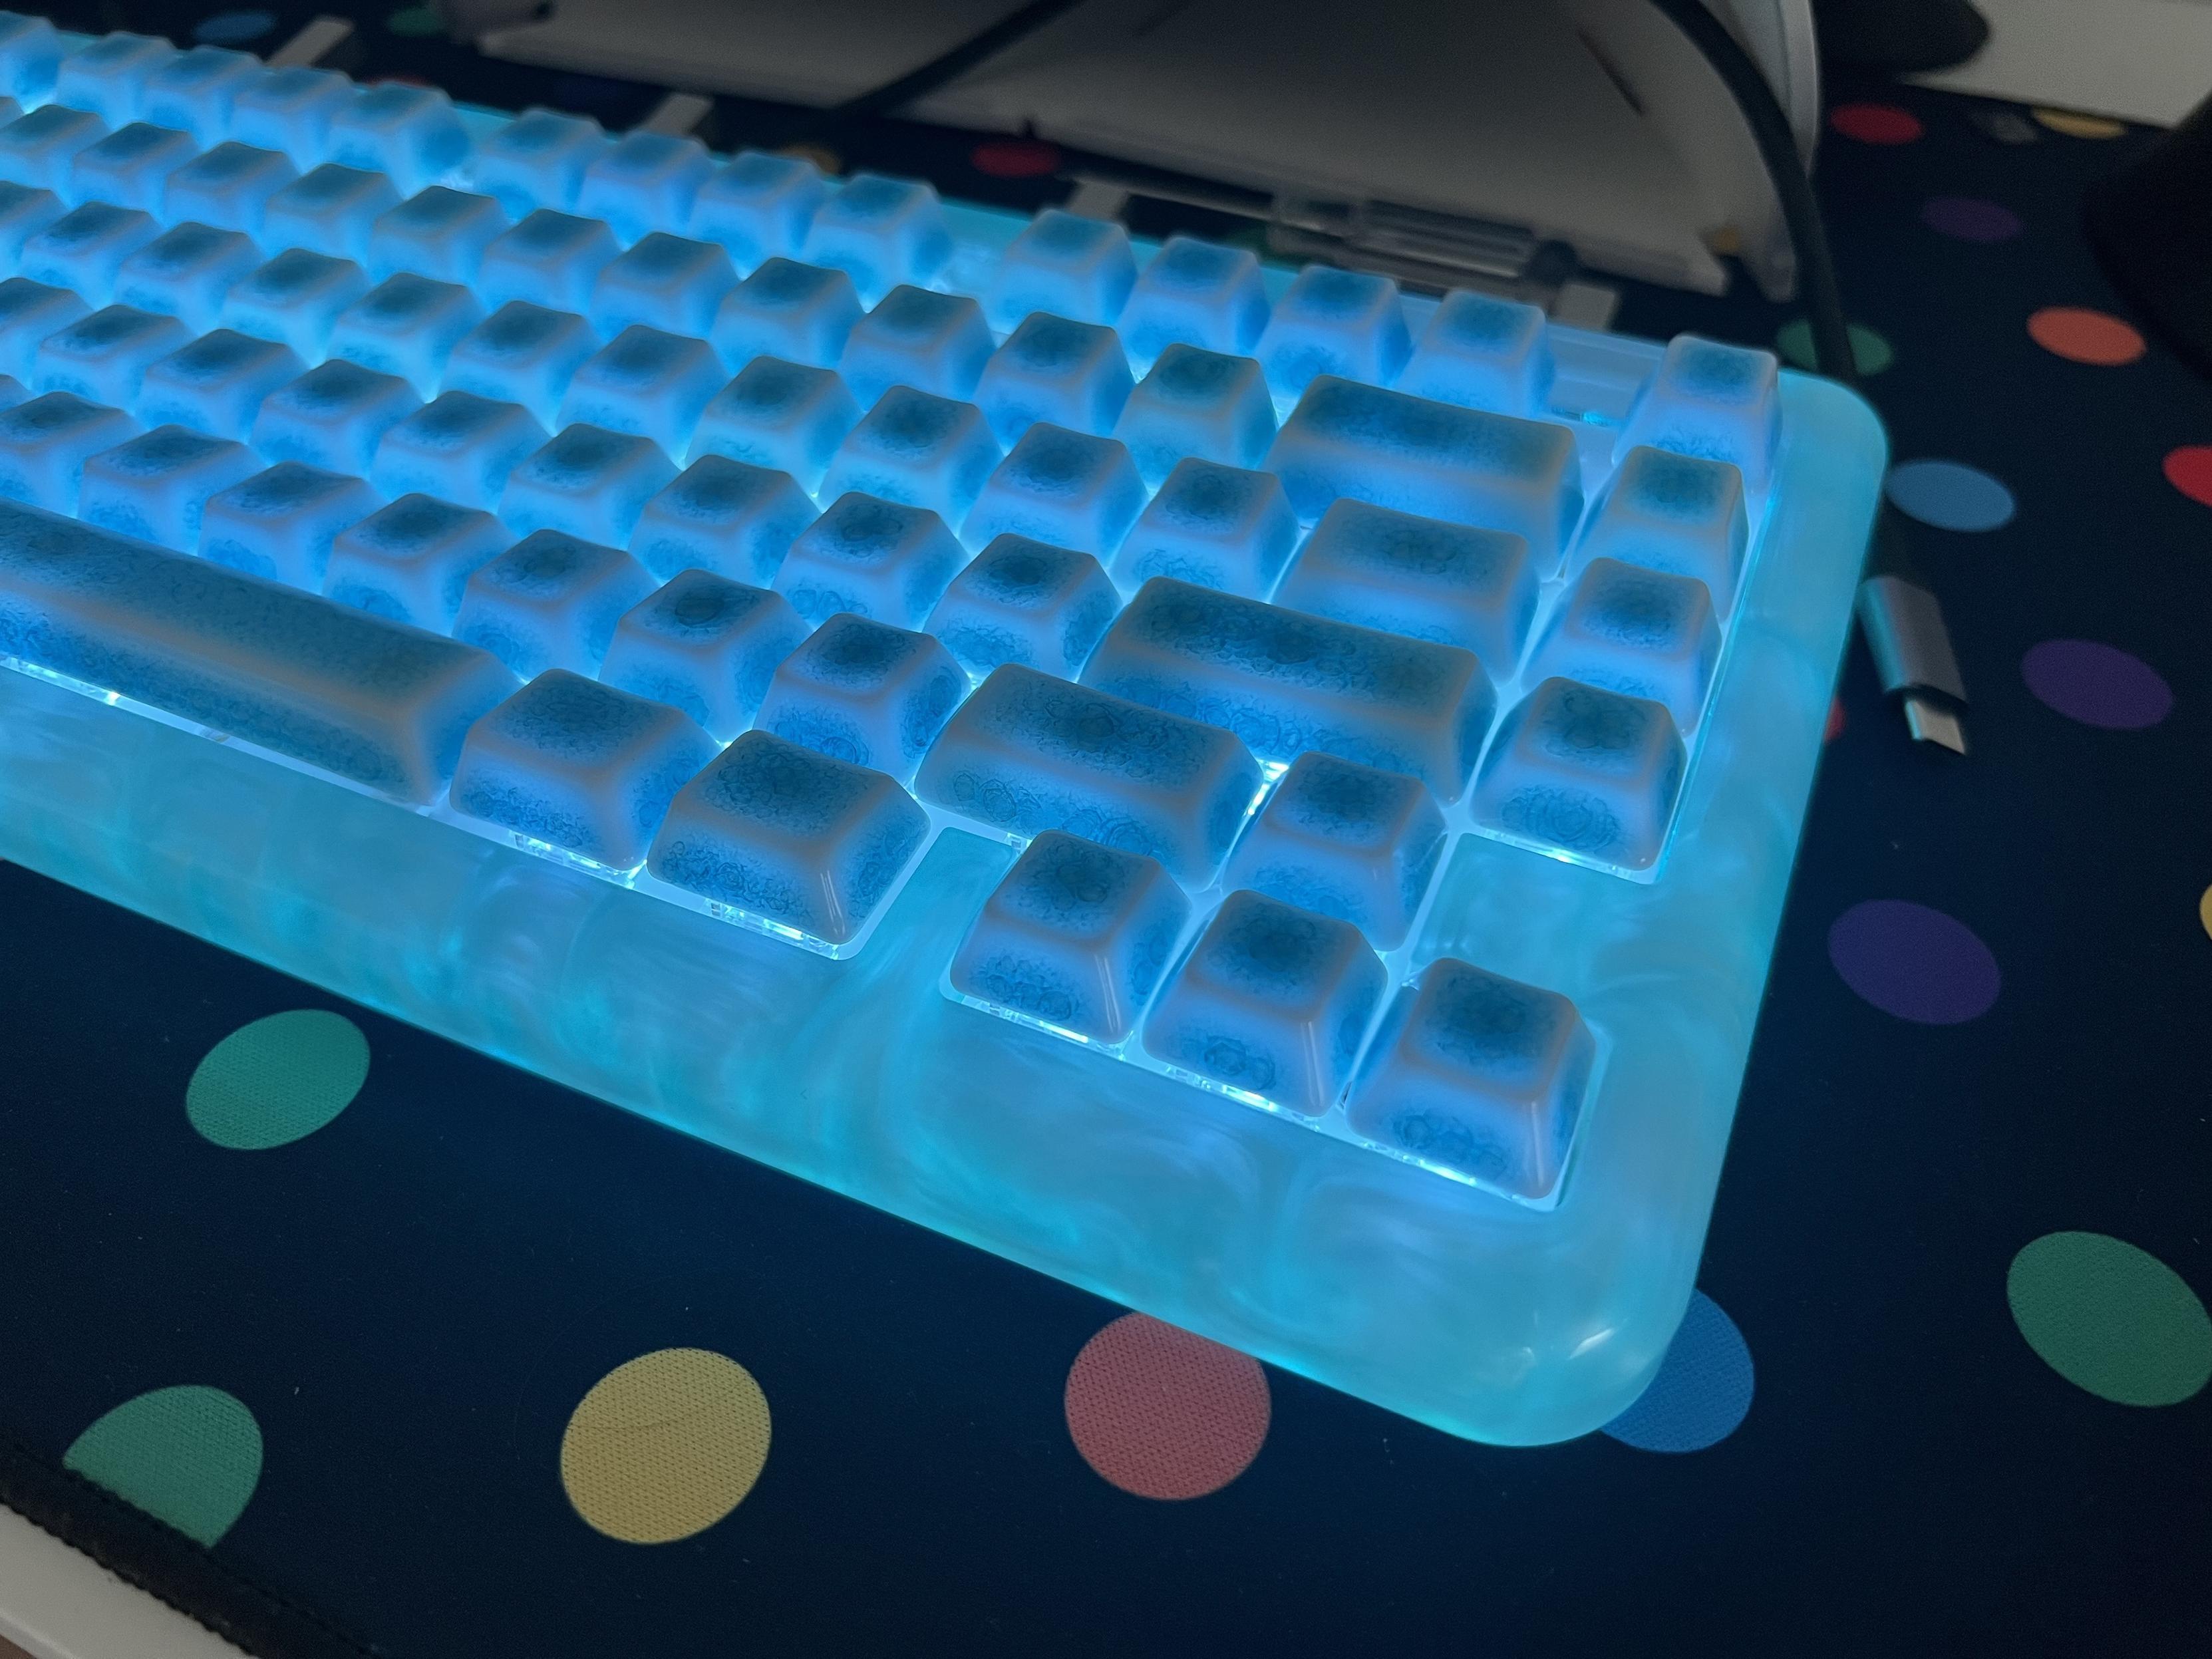
With the right caps and the right lighting and the aluminium trim removed you can pull off a really cohesive look!
KiiBOOM’s Jade75 is a wacky resin keyboard- y’know like that stuff they make river tables out of? The white variant, in particular, cranks the weirdness up a couple of notches and looks like someone’s hewn a keyboard from frozen hand-soap. It is characteristic of KiiBOOM, a bold look, with keen attention to detail. Unfortunately it’s let down somewhat by keycaps that can’t compete with the sheer striking absurdity of the board itself. It’s also juxtaposed by raw aluminium trim that looks out of place against the almost organic look of the milky resin.
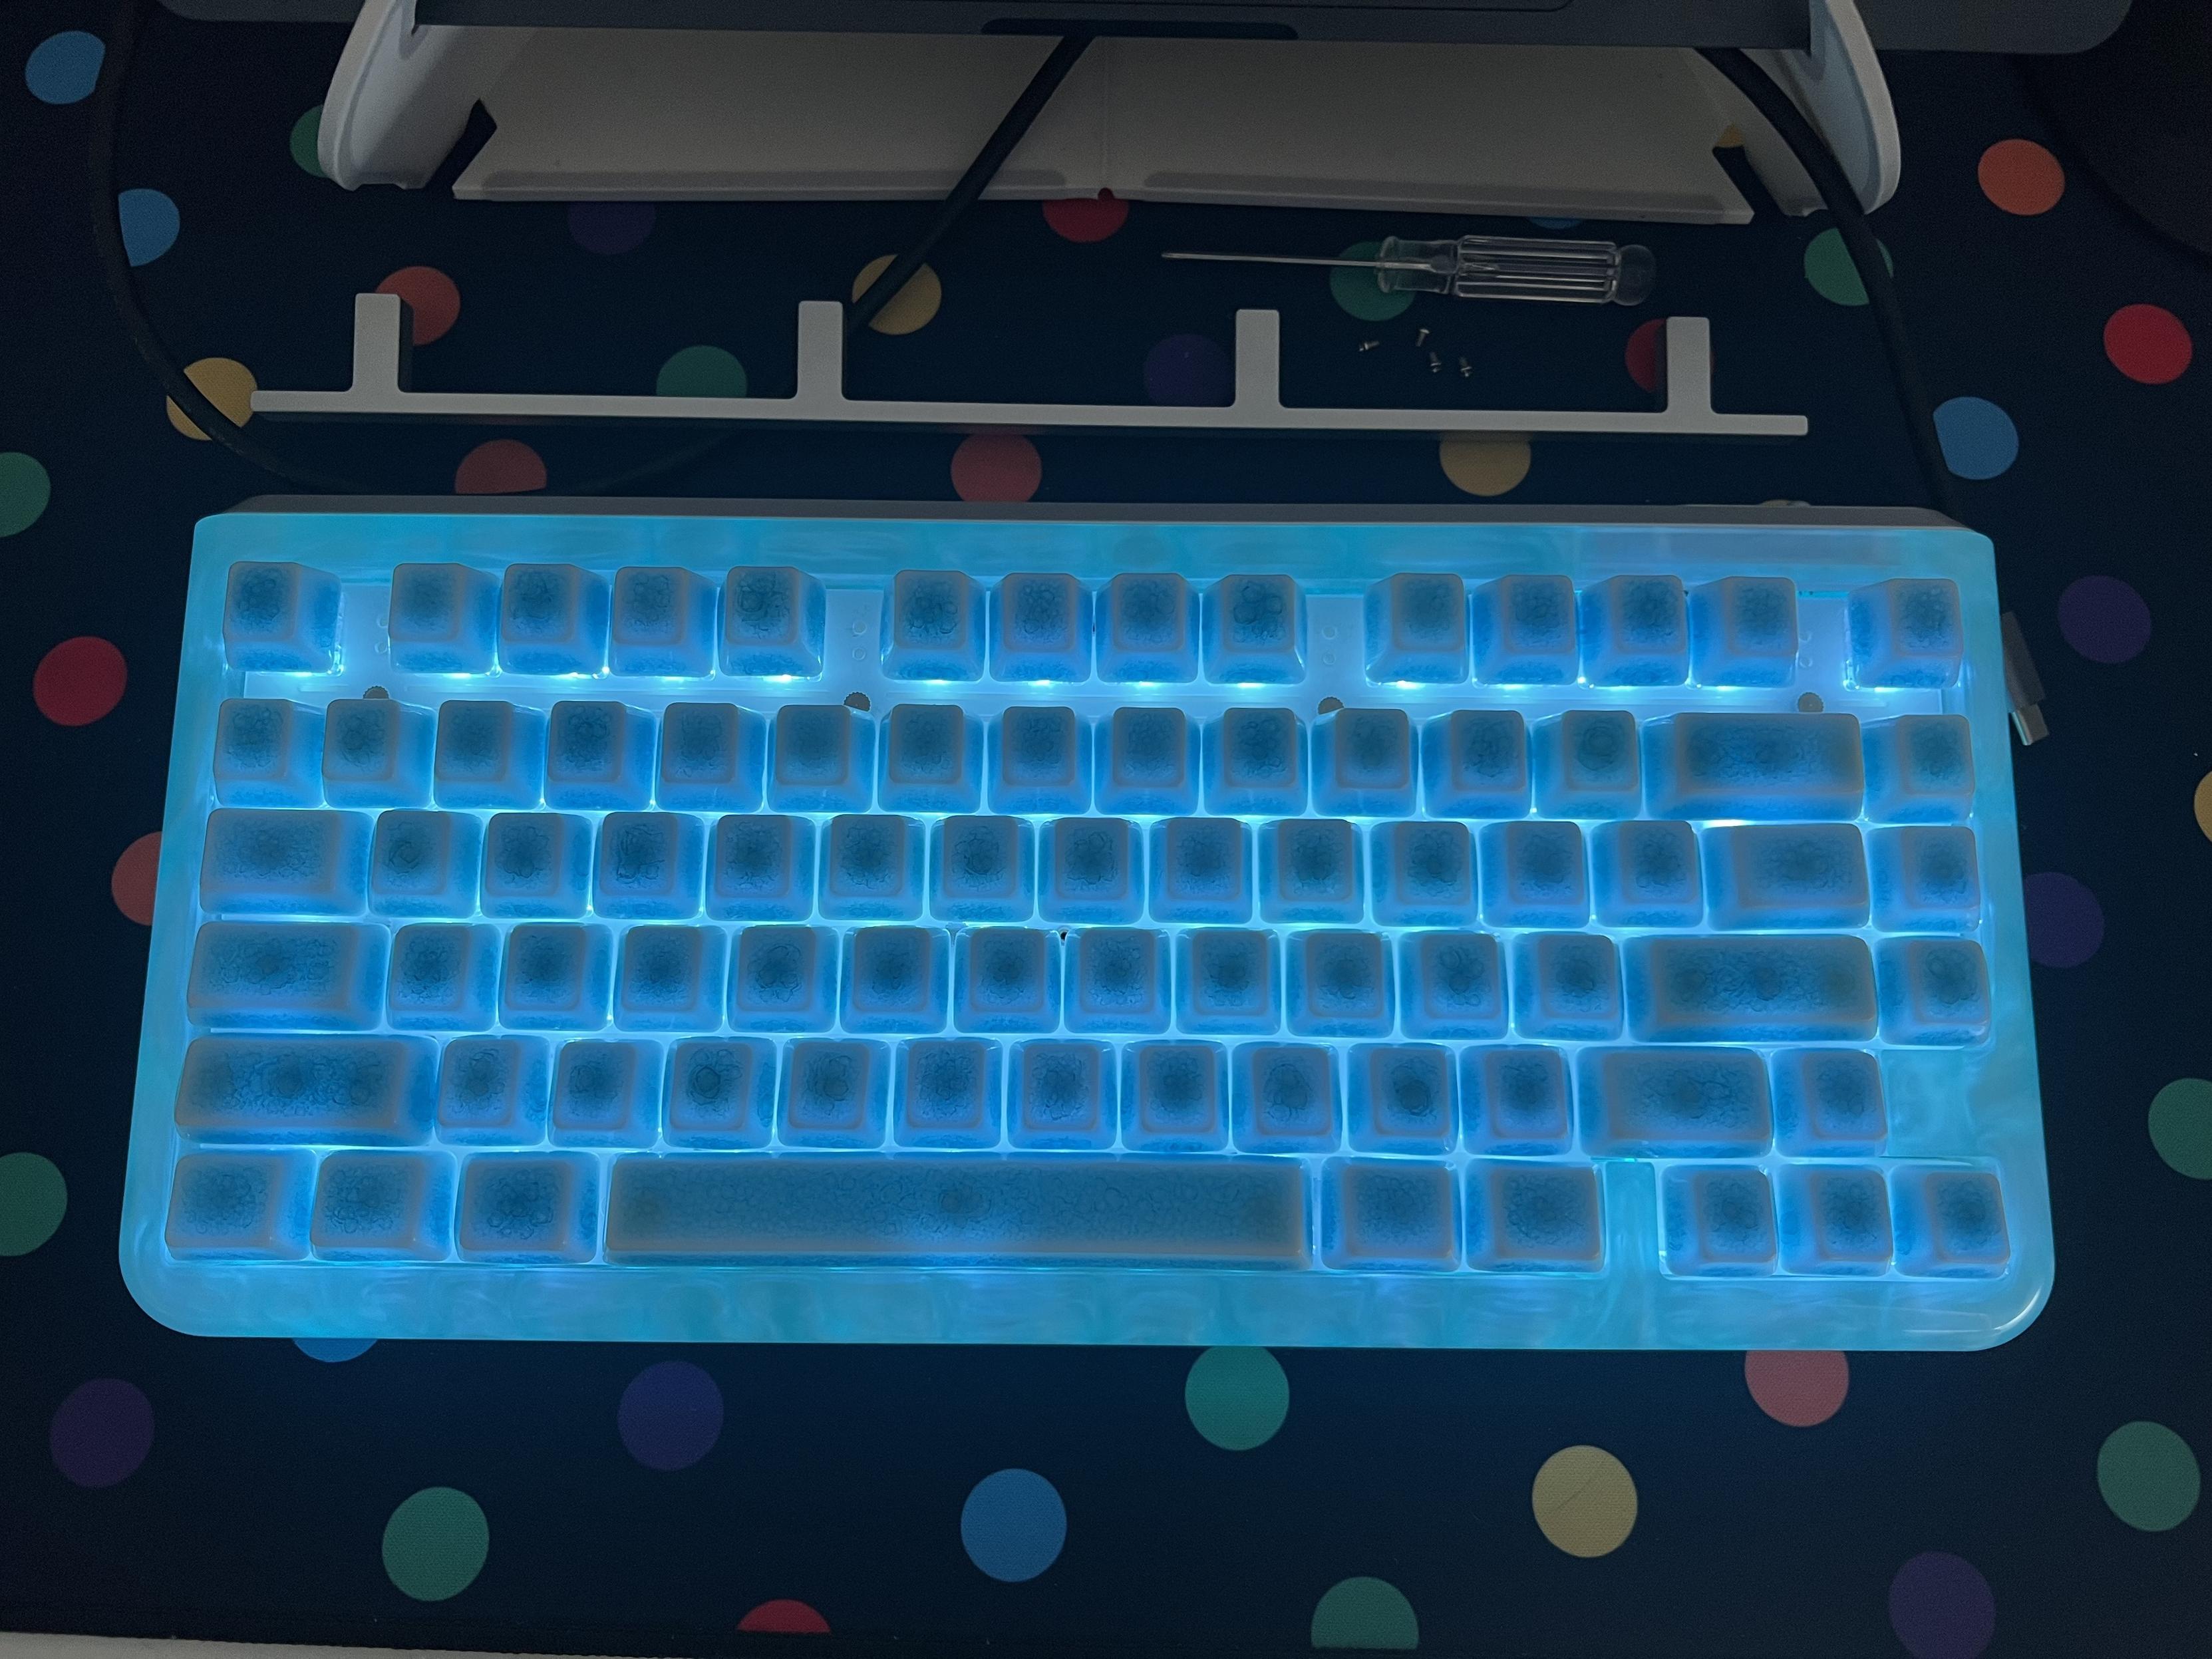
That’s not to say it’s a bad board. If you find the swirly, soapy texture alluring then you’ll like it even more lit up. The resin base is tough, too, offering far more heft, strength and rigidity than plastic but being just a bit more interesting than an opaque slab of aluminium. Who needs RGB side windows when your whole keyboard is translucent?
The stock keycaps are… a bit meh. The edge lighting is glorious though!
I’d love to see KiiBOOM experiment with this technique- include gold particles, unique dye swirls, or maybe even whole silly dioramas or badge details set into the resin itself. There’s a lot of scope here and the Jade75 feels like a toe dipped into the water of a great ocean of possibilities. The depths of which I’d very much like to see explored.
Build
Typical of KiiBOOM every detail has been carefully considered and executed with a level of quality and finesse befitting the Jade75’s price. It’s not perfect, but their liberal use of threaded inserts and hex bolts for visible fixings – not to mention including the tools needed to completely disassemble the board – makes this a very accessible board for modifications.
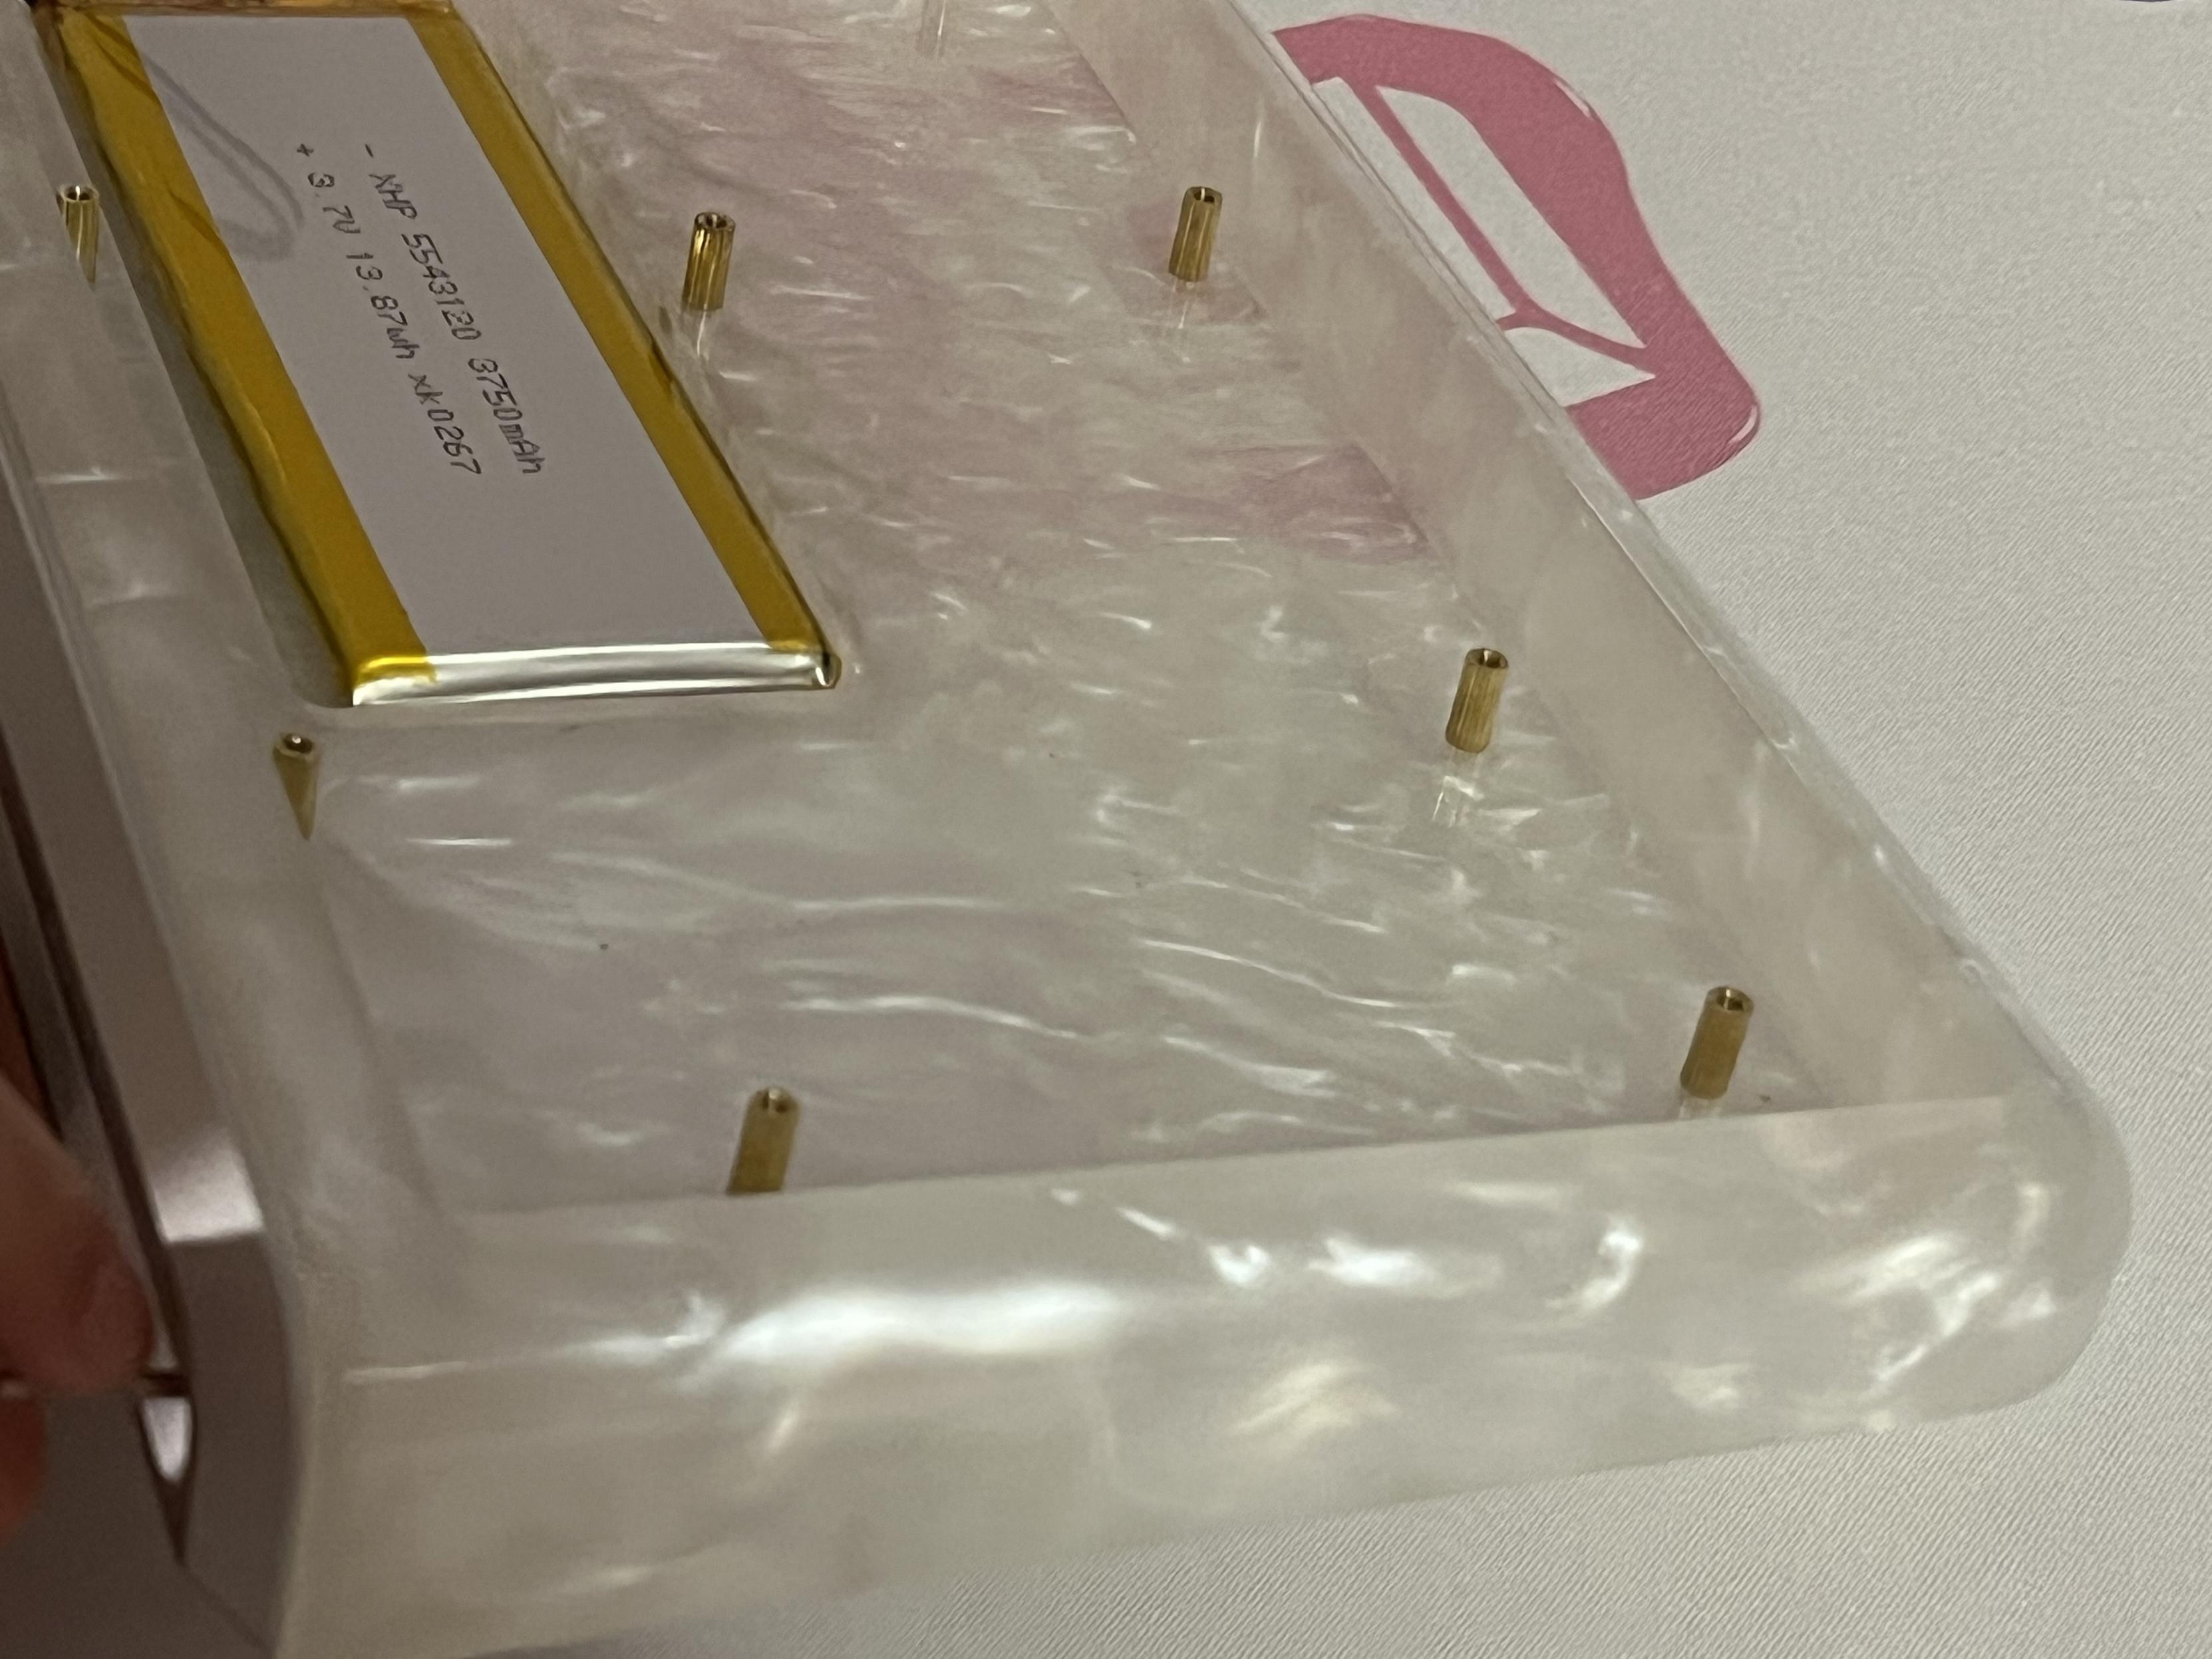
A whole bunch of screw posts welded into the resin base support the PCB. It’s a FIRM board.
It is effectively tray mount, with the PCB and plate assembly sitting atop 11 brass threaded risers moulded into the resin base itself. While you can, unfortunately, see these risers from outside the board they don’t look too wildly out of place. 11 crosshead screws- hidden under the keycaps and switches- fix this down securely.
The PCB and plate are also secured with screws and threaded inserts. Somehow those inserts are sunk into the polycarbonate plate itself which is a nice touch, but there are a number of problems with this setup. The plate is flex cut and indeed it flexes well into the foam layer immediately below it. The PCB, however, is not. Since the switches push through the plate and sit securely against the PCB there’s no flex afforded by this setup at all. The practical upshot, in fact, is that the plate does a terrible job of securing the switches and – in combination with the particularly stubborn keycaps on this board – result in them pulling out with the keycap during disassembly. It’s a weird choice and even if the plate flexing did afford some cushioning it would be stopped dead by the threaded inserts which abut the PCB and thus have no wiggle room. (Though they are really nice inserts.)

(Almost) Every, single, keycap, came out with the switch attached! Aaah.
If the PCB were flex cut there might be a little more give, but it would also be stopped dead by the threaded inserts supporting it, providing an inconsistent typing feel across the board. Perhaps this odd plate setup offers some acoustic benefits, but I would rather trade those for being able to pull the keycaps off without taking the switches with them. It’s worse than that, though, with all the switches and keycaps removed- still stuck together- I was unable to separate them by hand and – upon my first attempt with a switch and keycap puller – managed to pop the bottom off a switch. I finally figured out a system using two keycap pullers, one to grip the switch from the top and one to grip the key itself, which threatened to take hours of methodical separation.
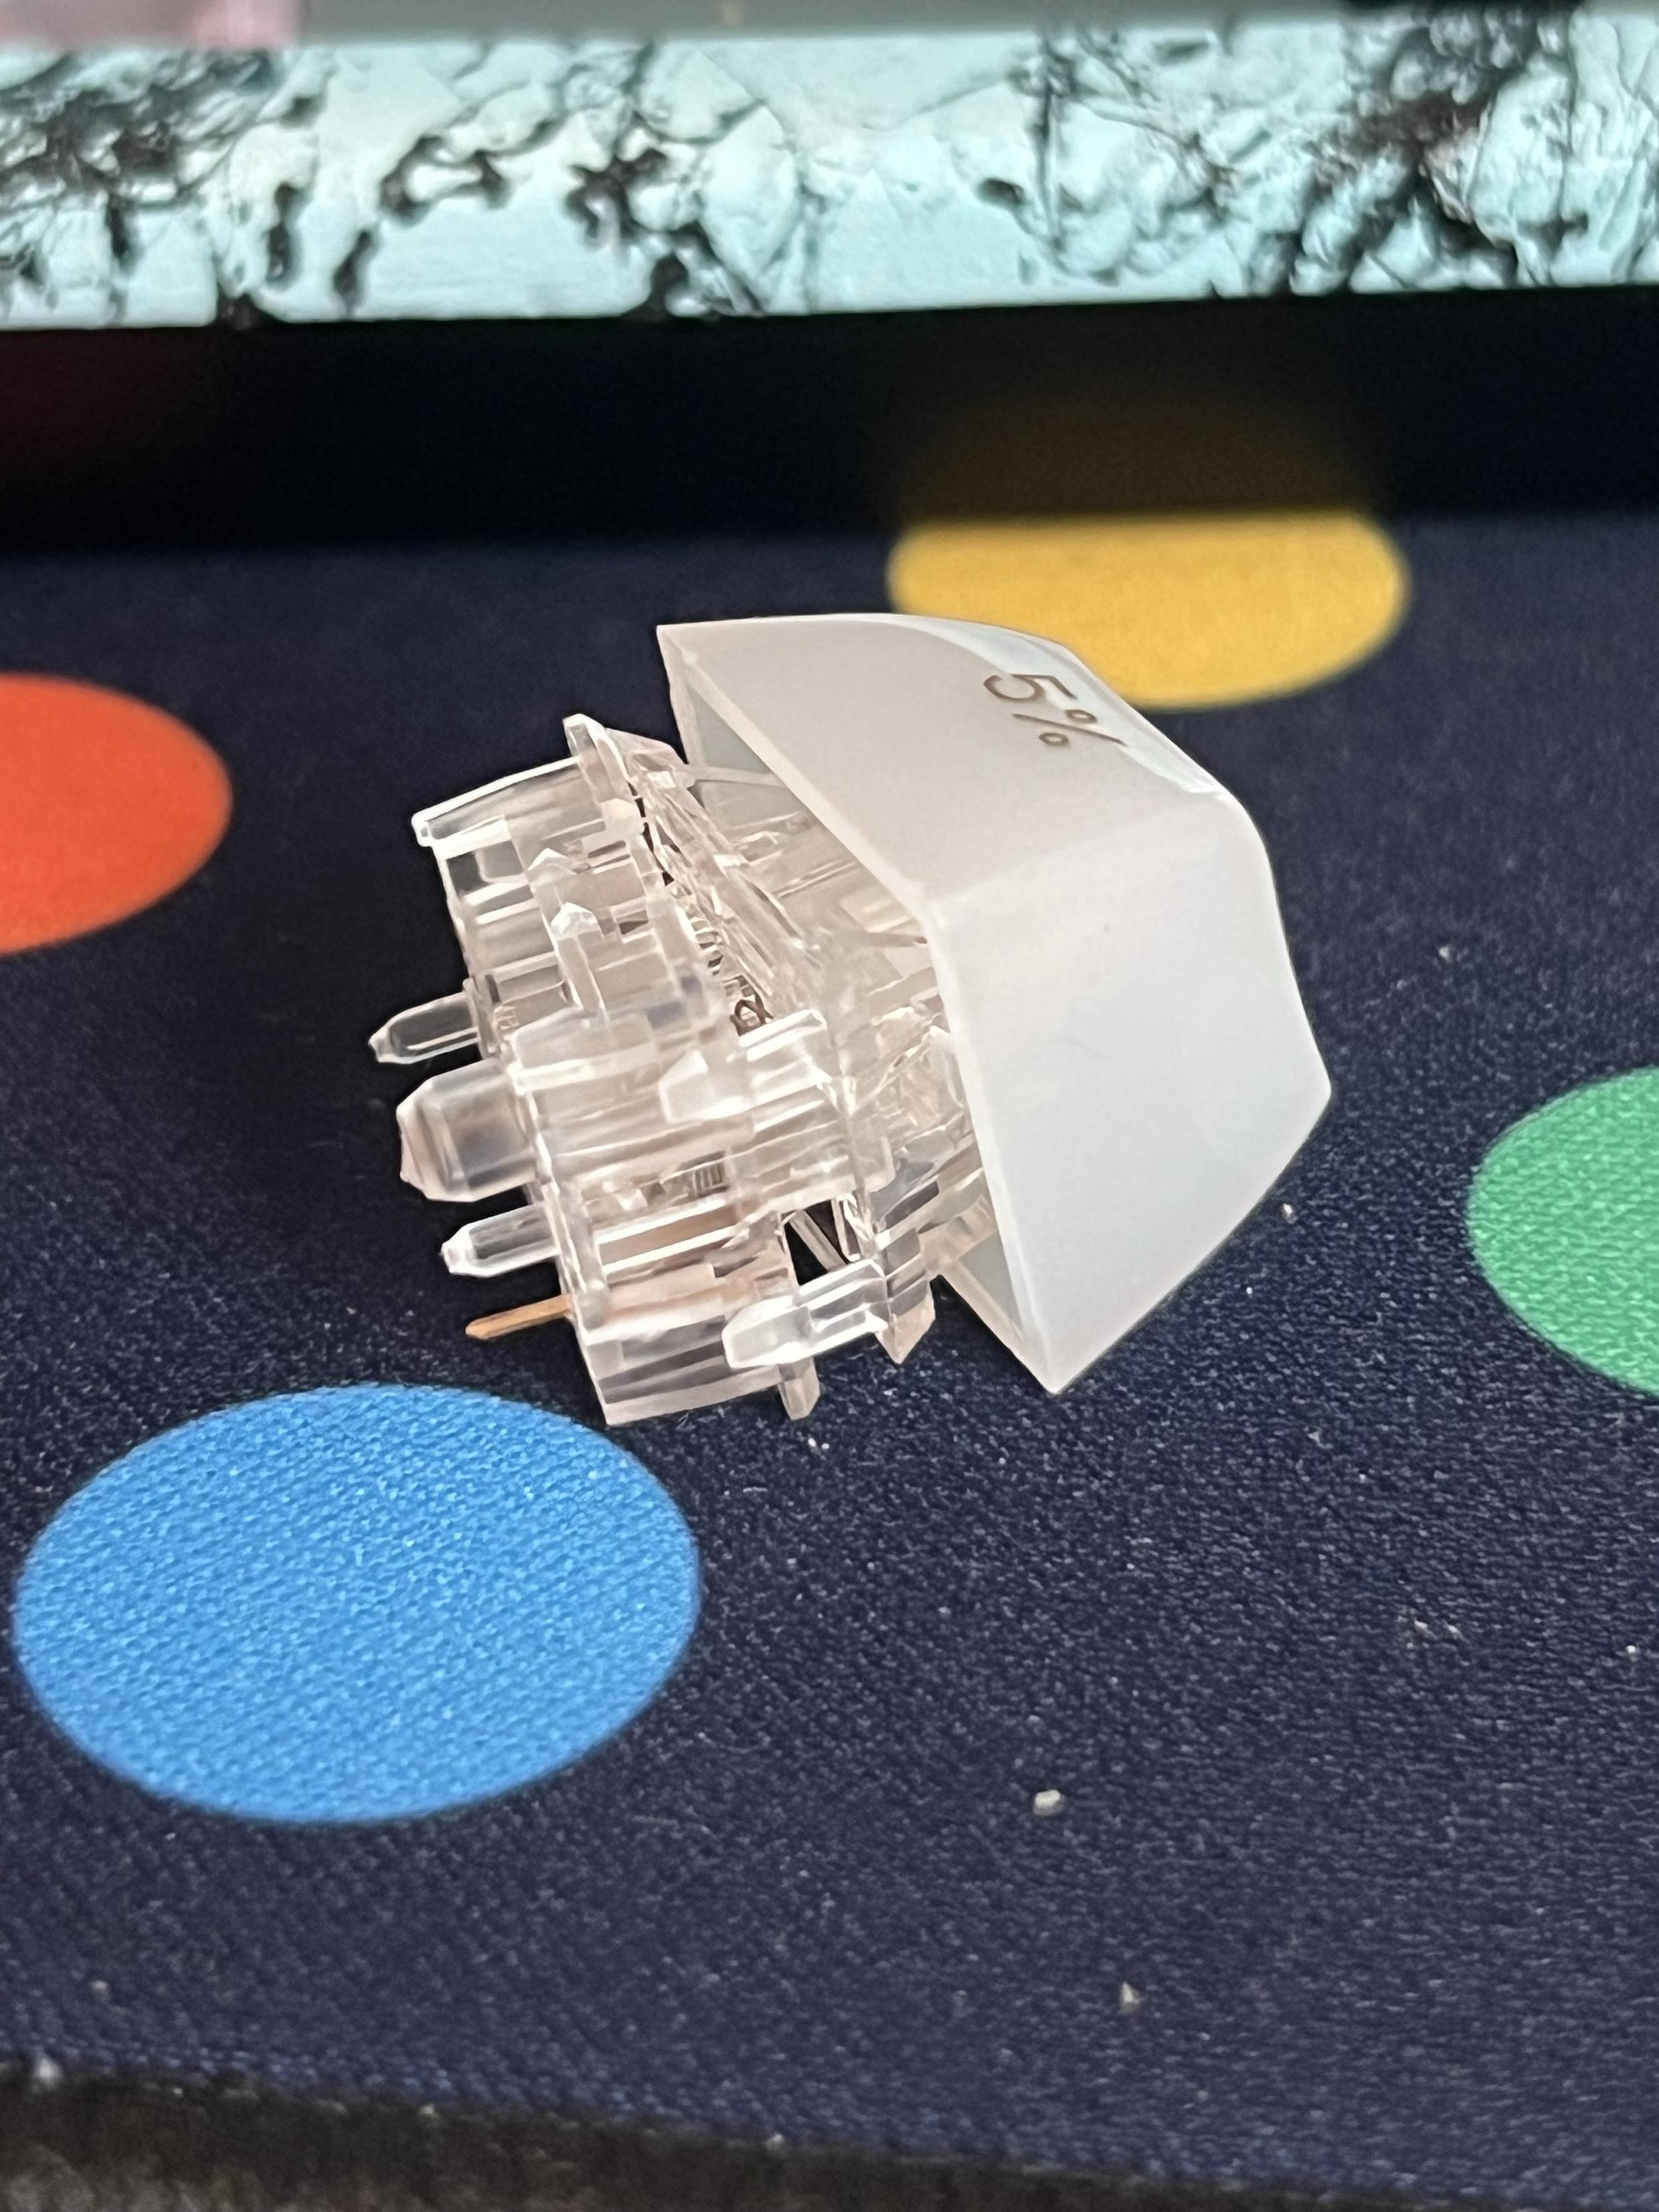
These keycaps were so firmly stuck on that the switch came apart while I was trying to remove them 😬 I eventually settled on prying apart with a screwdriver.
I later refined this to the rather less careful approach of levering the keycap off with a screwdriver. This sent switches pinging across the room but got the job done quick. If you’re looking at this board thinking “oh I’ve got a great set of caps for that” beware that you’re in for a journey getting the old ones off. You should, in all seriousness, plan to replace the switches at the same time. Why go to all this hassle? Well the Jade75 is an interesting board, but the supplied keycaps are … uninspiring. Rarely do I meet a board so deserving of a glow-up.
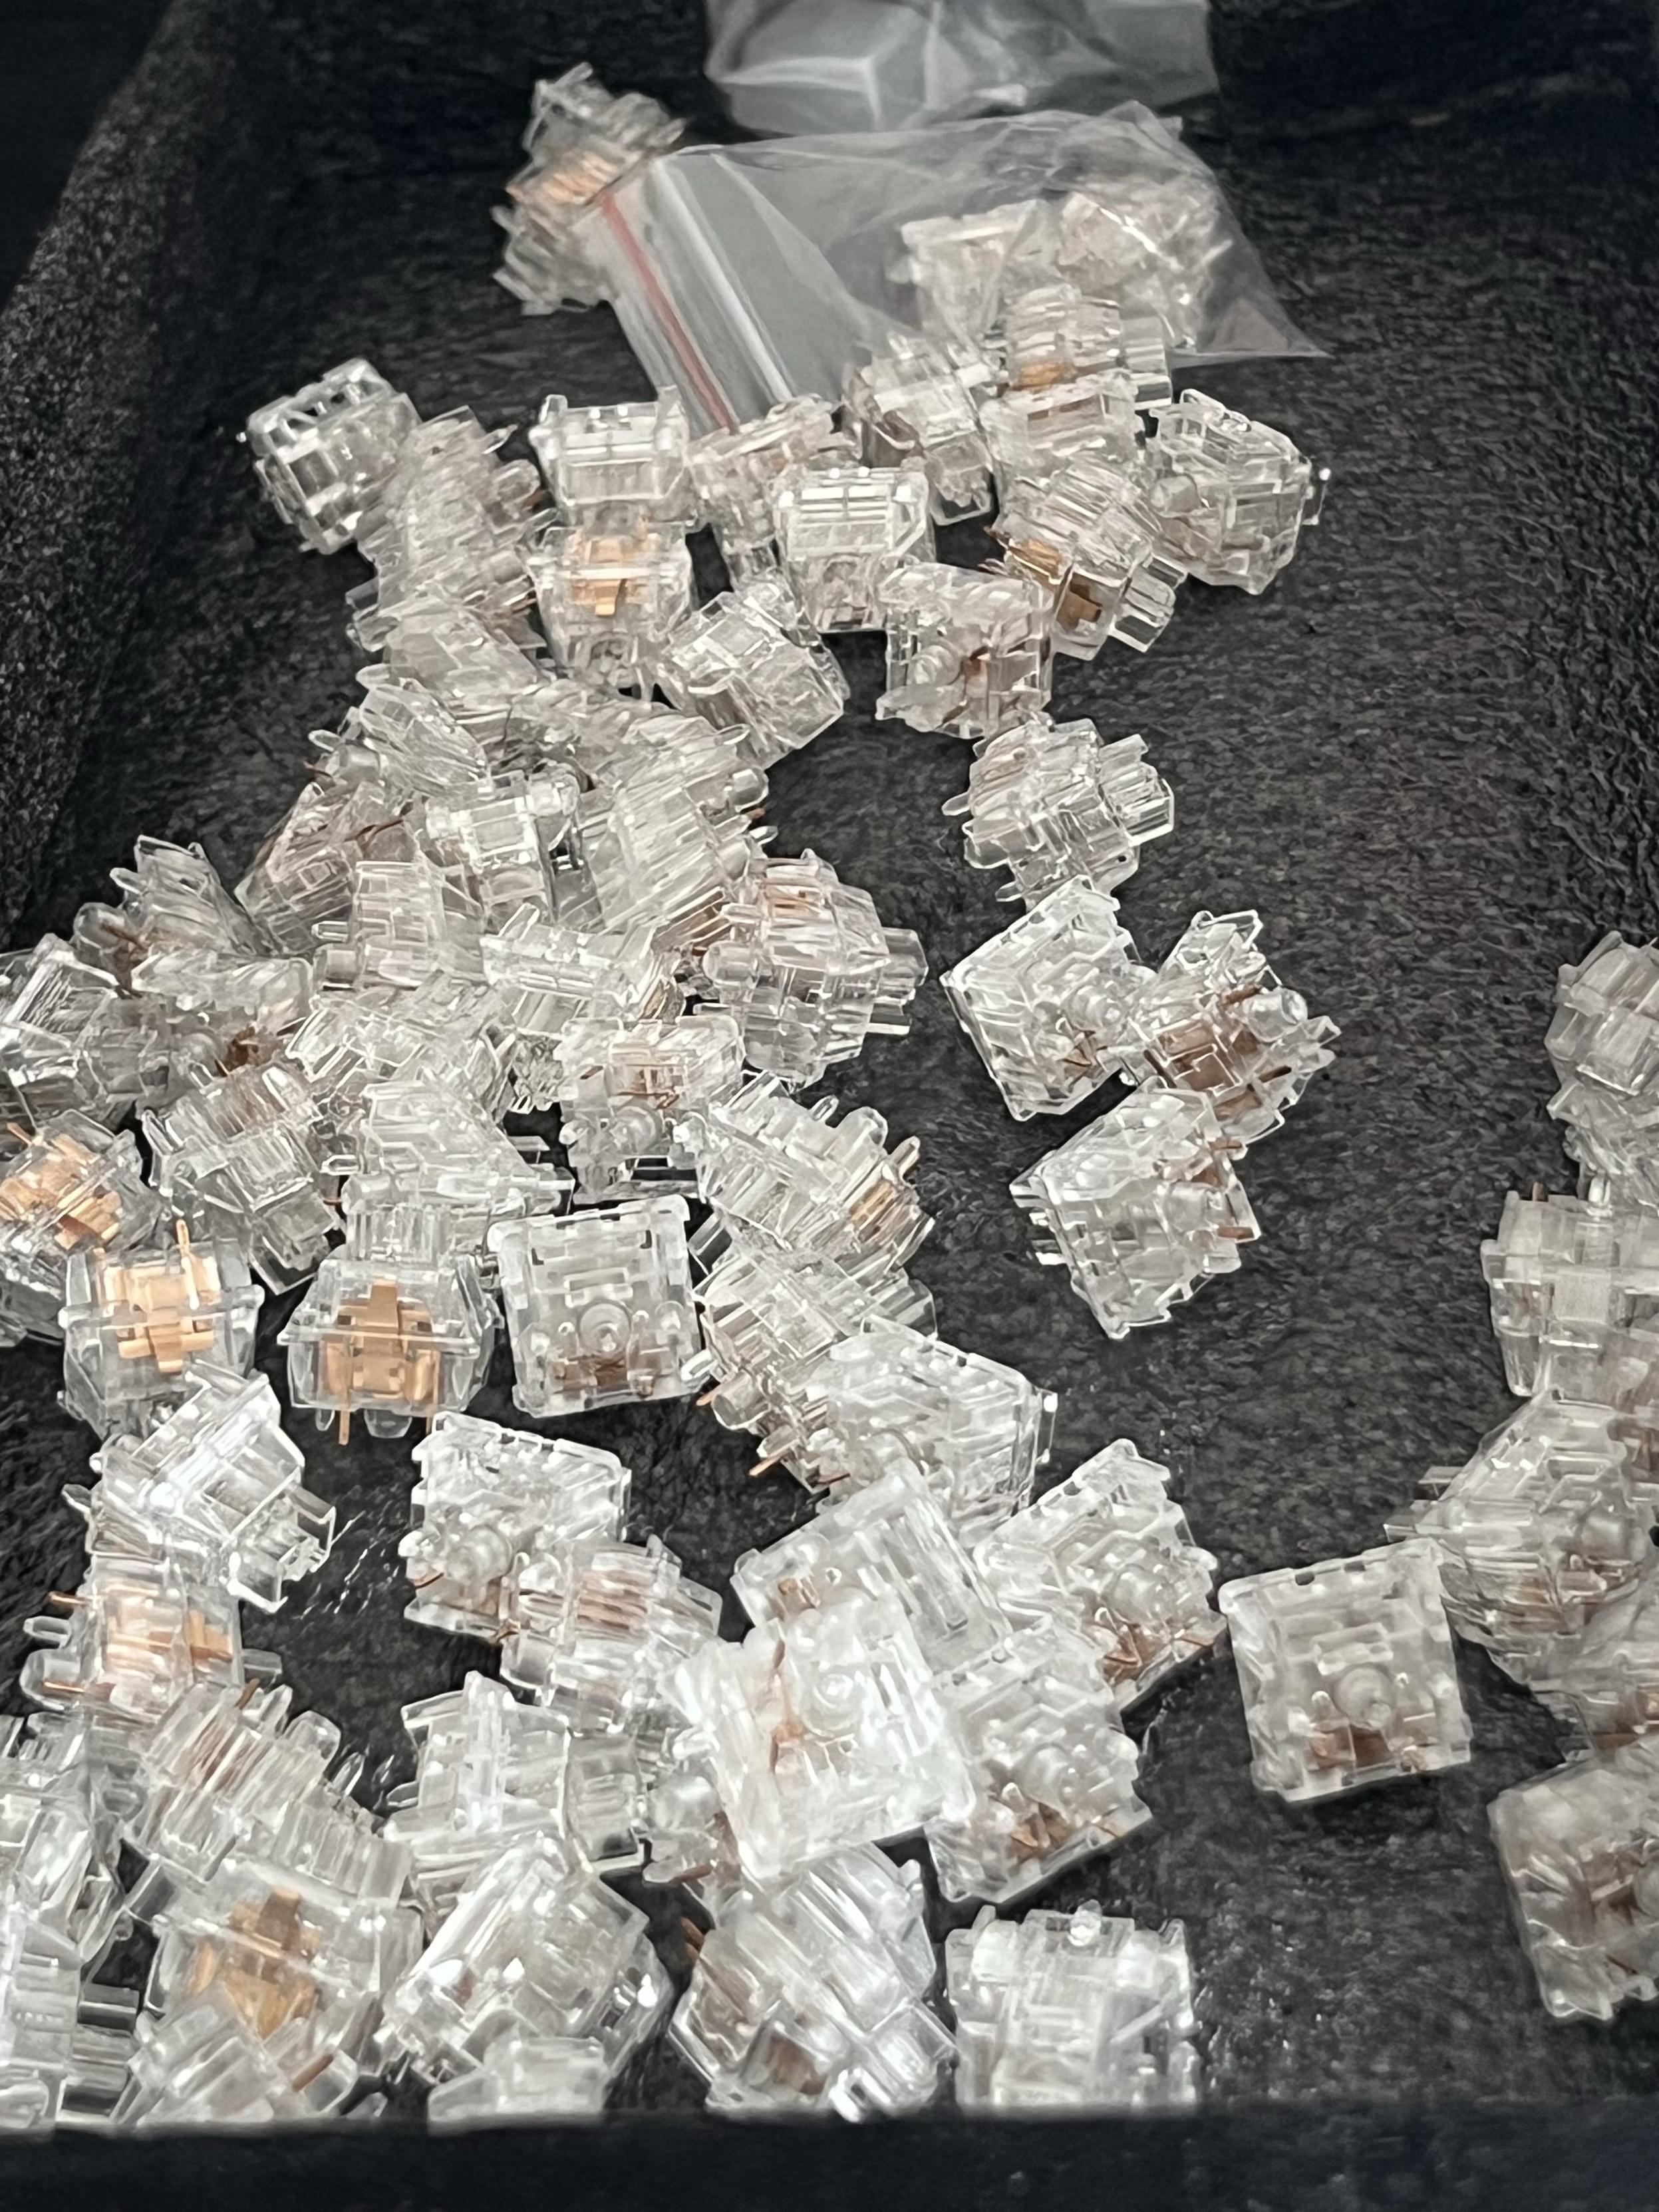
The pain of separating every switch from its stubborn keycap better be worth it!
The tray-mount and threaded riser setup means that all the internal padding foam is only really beneficial for acoustics, though it also serves to obscure the underside of the PCB from being seen through the bottom of the case. Unlike prior KiiBOOM boards there’s no fancy treatment given to the PCB and nothing pretty to look at. Fair play to KiiBOOM for making the lower padding, a thick layer of flexible PET, precision cut around the risers. Very often I see slightly wonky foam cuts but KiiBOOM are, as usual, good at nailing many of the finer points.
Solid mounts onto risers between plate and PCB and PCB and base add up to a rock solid board to type on. If you like a little flex and give to cushion your more enthusiastic typing sessions it might not be for you.
Software
Yes it’s QMK/VIA compatible. Yes you get another JSON file you have to side-load into usevia.app. Yes I am tired of pointing this out and complaining about it. On the upside at least QMK and VIA are a sort-of standard, even if they have been somewhat misappropriated and abused by vendors. On the downside, QMK – the firmware that actually runs on the keyboard – and VIA – the configuration protocol and software – are often contorted somewhat to fit a board’s features. In the case of the Jade75 that means you’ve got no software control over the side-lights from- instead having to rely on the limited options available via the Fn+Z hotkey. In my case I wanted blue backlighting with blue sidelighting so it’s fine, but if you’re trying to dial in a particular preference you’ll be going against the grain.
Side-loading JSON files is a weird thing to require of customers. I strongly suspect a large portion of Jade75 buyers will be buying on looks alone and never touching the key binding and macro features. This is fine, but I wish KiiBOOM would double-down on this market and pare back their keyboard to make it more functional for beginners. If I had a dollar for every time I’d helped even competent people through VIA/QMK side-loading issues, I’d have a dollar. But the situation isn’t getting better with time.
I suspect the reason KiiBOOM, and others, use QMK is because it largely works. There’s a base of knowledge around the firmware and both QMK and its underlying RTOS/HAL (ChibiOS – which is the part actually responsible for maintaining compatibility with various microcontrollers powering these keyboards… HAL standing for: Hardware Abstraction Layer) are actively maintained with tons of already integrated keyboards and drivers to crib from.
Jade75 is, of course, also a tri-mode board, something not officially supported by QMK but hacked in by manufacturers nonetheless. Despite this somewhat janky state of affairs I’ve never really had any trouble with tri-mode boards and the near de-facto standard of using Q, W and E for Bluetooth profiles makes them all familiar and easy to set up.
Where Jade75 differs slightly from many of its brethren is a missing switch for Win/Mac mode. Instead Fn + A and Fn + S select these modes respectively. As usual, though, the layers available for binding in VIA are split between Windows and macOS (this leads to much confusion when people try to remap their board using the wrong layer pair and nothing happens) with Layers 0 and 1 corresponding to Windows and 2 and 3 corresponding to macOS. There’s also a layer 4, but it beats me what it’s… for.
In macOS mode the F1 and F2 keys control brightness as expected, while F3 brings up Mission Control and F10, F11 and F12 are Mute, Volume Down and Volume Up respectively. F4, however, brings up Launchpad in lieu of Spotlight search and F5 and F6 are just regular Fn keys in all modes.
Overall
Jade75 is another wild and wacky board from KiiBOOM that’s sure to fall very firmly in the “Marmite” category of keyboards. That’s to say you’re either going to love it, or absolutely hate it. In typical fashion I seem to find myself, once again, on the fence. With the right keycaps and lighting Jade75 can look really good. Stock? Not so much.
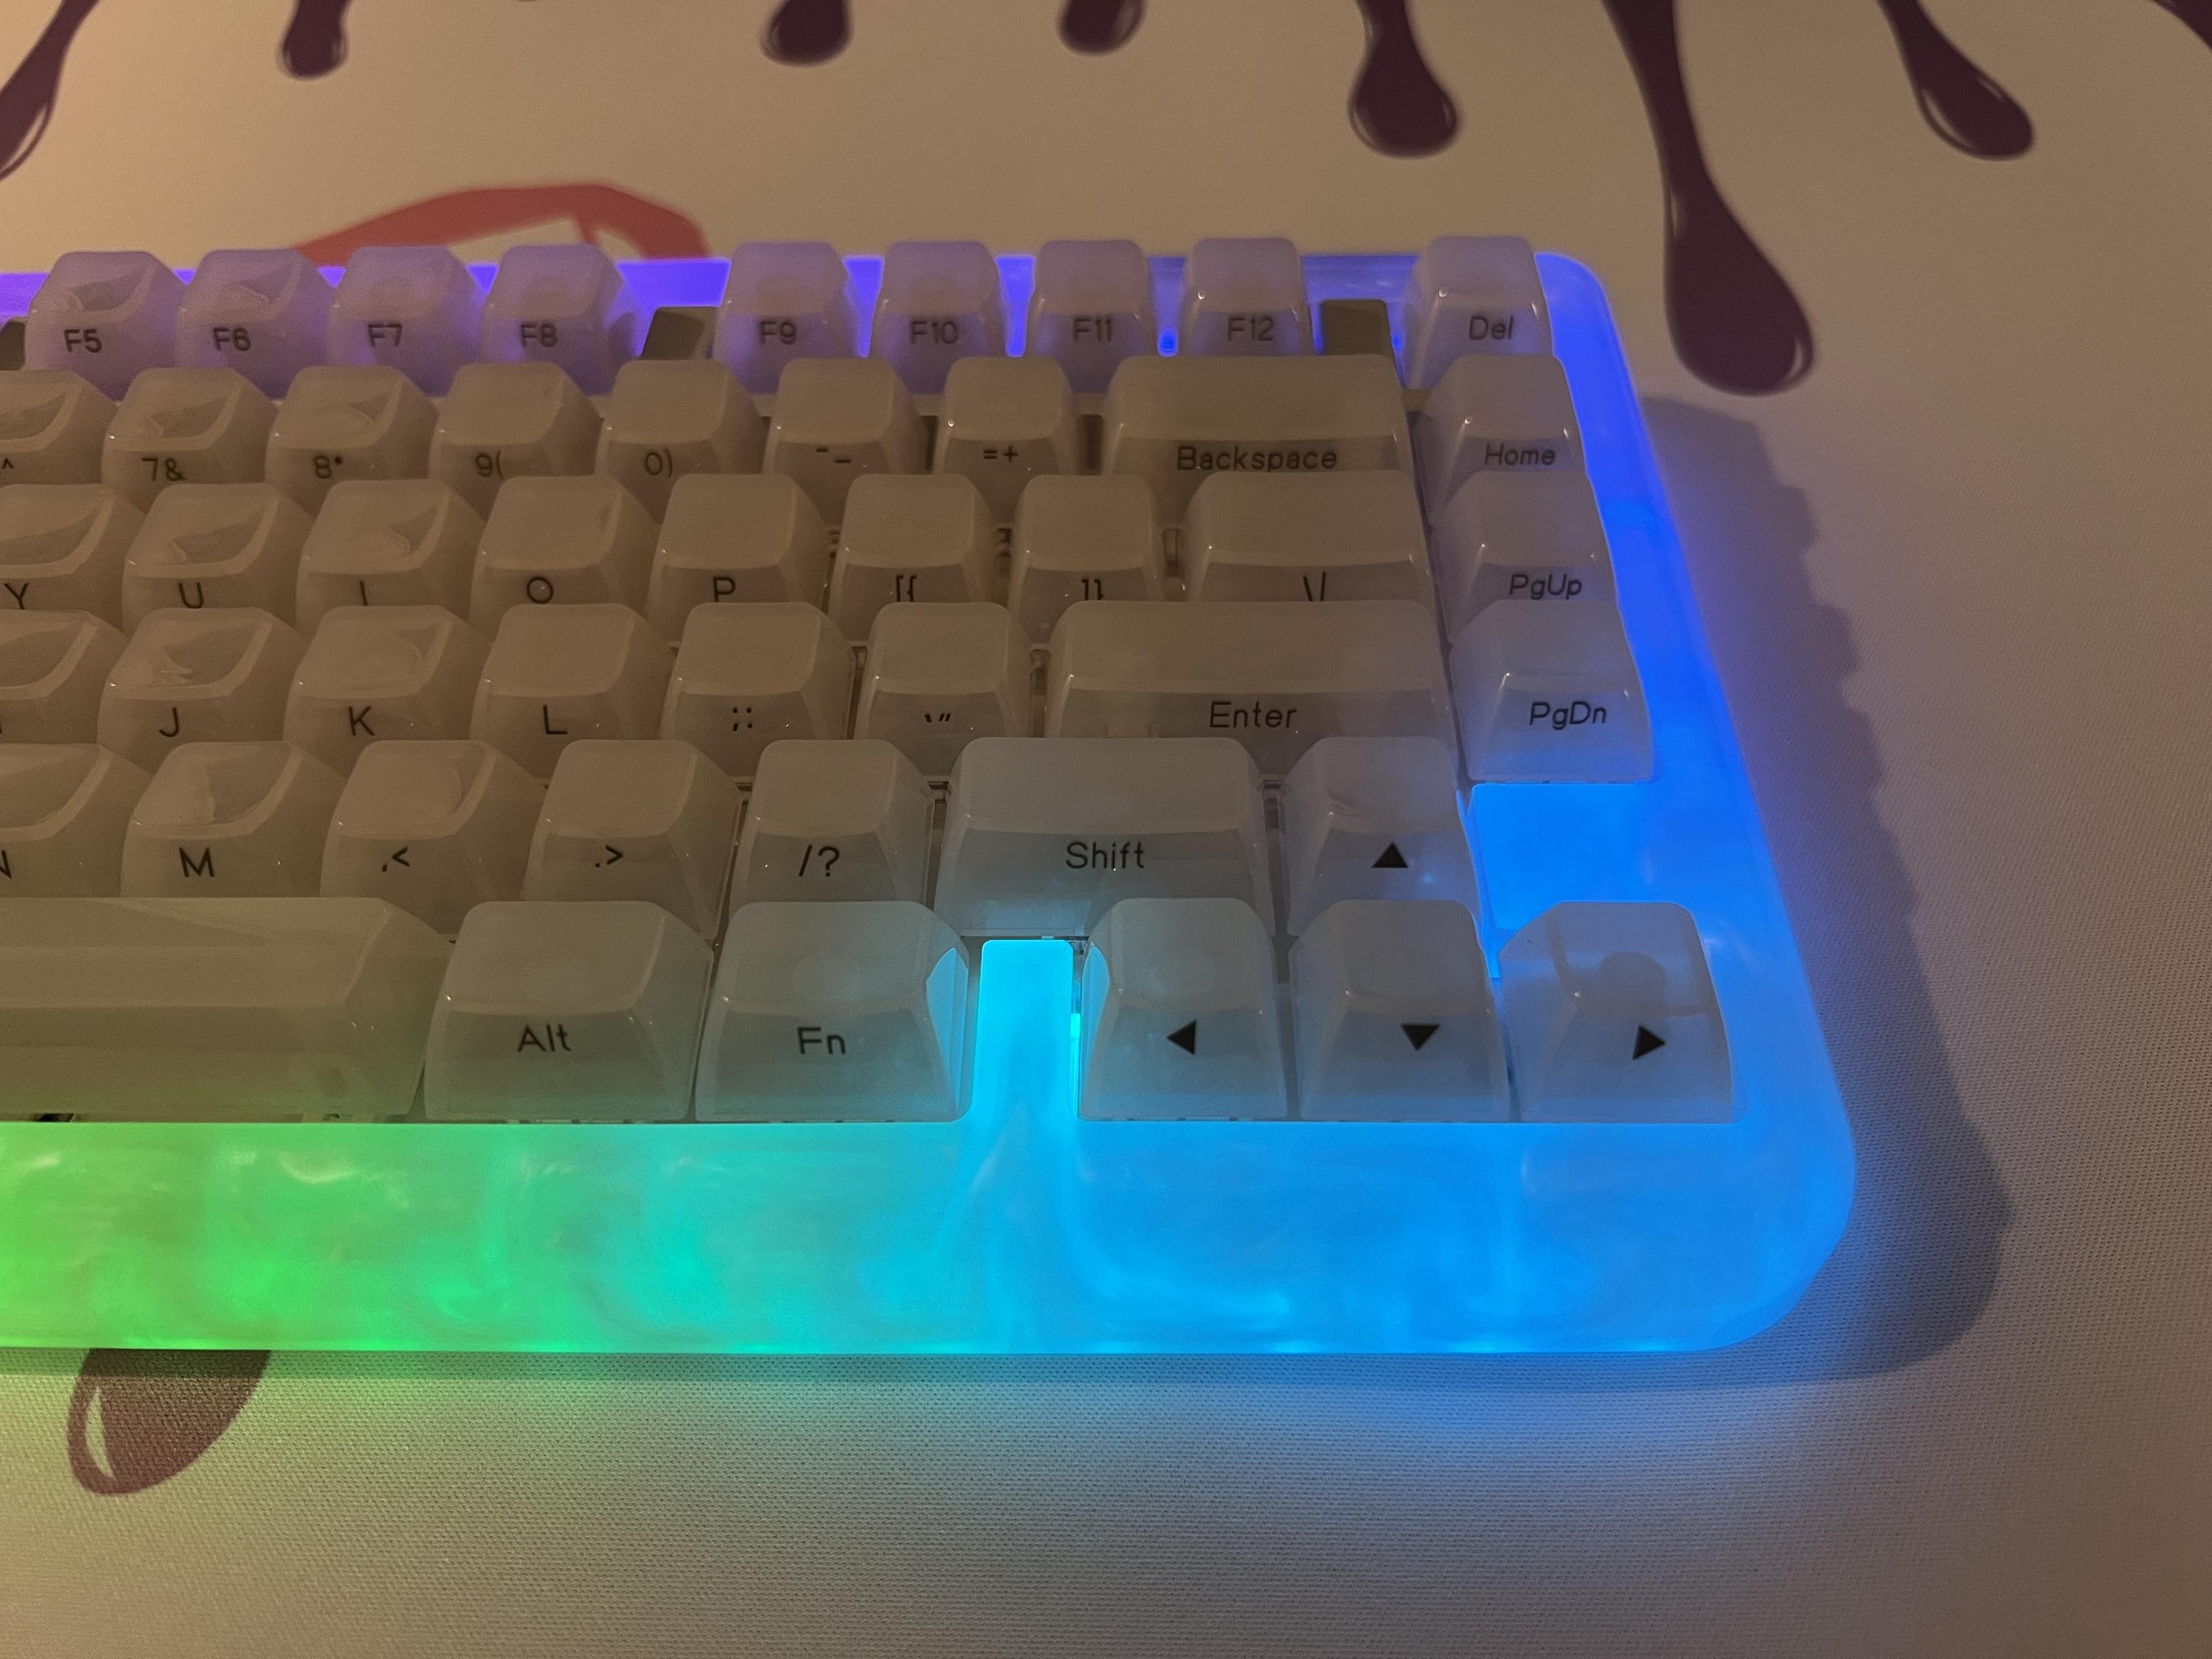
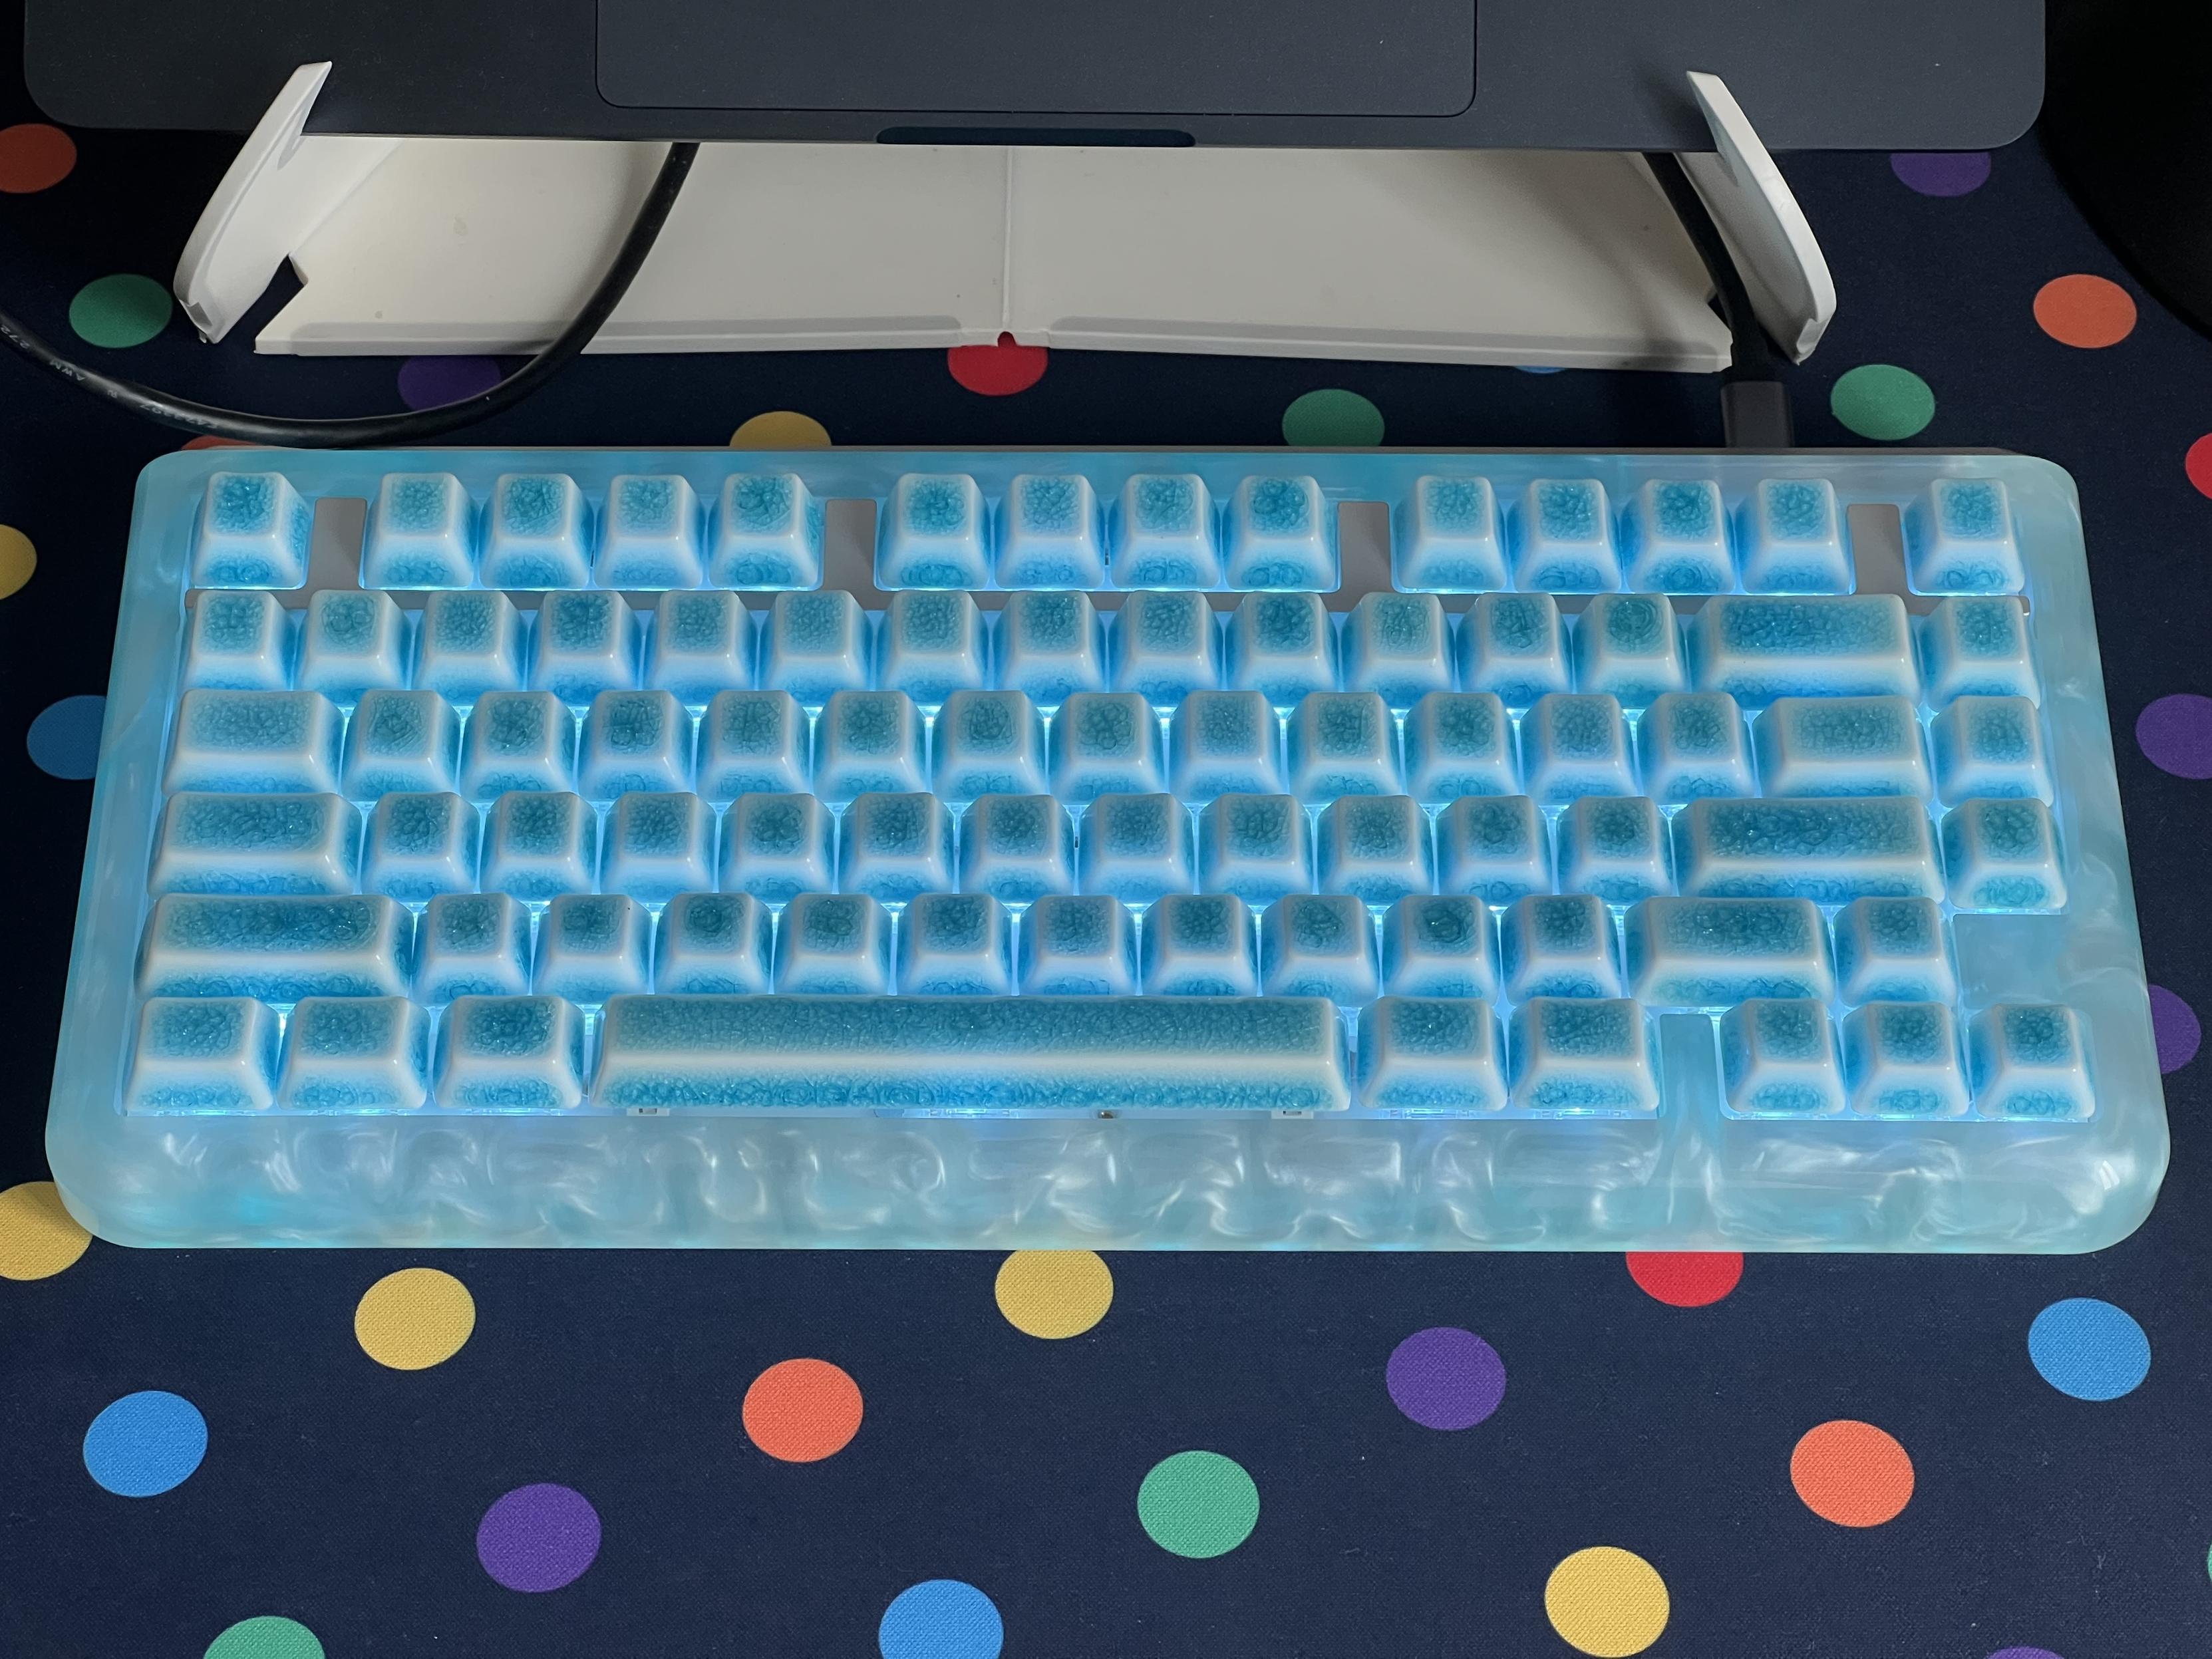
It is, at least decent to type on. Despite being a little firm, it’s quiet and comfortable giving a healthy dose of that mechanical feel without being egregious with clacky acoustics. Lit up blue, and with Cerakey’s Crazed Blue (blank) ceramic keycaps it’s an extremely bold board. The aluminium top shell trimming around the F keys looks wildly out of place, though, and I think I might remove or repaint it (uh oh, foreshadowing).
Underlighting doesn’t do much for this board. The bottom might as well have been solid aluminium so that the top could be solid resin for a cleaner less fussy look.
If KiiBOOM could flip the design so that the PCB drops in from the bottom and the trim around the F-keys becomes a part of the top shell then I think it would look a lot better. Sometimes – especially on a board this weird – less is more and I think getting a consistent resin look and feel across all of the normally visible areas of the board would make a huge difference. This would also allow the bottom to be a single piece of aluminium with an extrusion up into the top shell for the switch and USB port, eliminating the need to glue (slightly wonkily, I might add) an aluminium badge to the resin bottom. This would obscure the underlighting somewhat, but the Jade75 sits so low on a desk that most of that light makes it out of the sides instead. If we were getting really fancy I’d try to set magnets into the resin itself, making the top and bottom halves of the board easy to separate with just a firm push. I could sit here and redesign keyboards all day, though, but the fact remains the Jade75 is pretty decent as-is. Am I damning it with faint praise here? A little. But if you’re on the love-it side of this look, I think you’ll enjoy it.
Little touches, like holes in the PCB switch foam to access the plate screws, don’t go unnoticed, and the screw posts even make lining everything up again for reassembly relatively easy. And yes, the supplied tools will even let you remove the aluminium trim from the plate. Though I wish it were screwed through the PCB- that was quite an adventure too. Though I did manage to remove the plate with all switches installed and successfully reinstall it as one piece. While I expected an absolute carnage of bent pins, it went together surprisingly easily. Does the Jade75 look better without that aluminium trim? You’re damn right it does. Does the keyboard need to be lit up to sell the look? Yes, but how often does lighting get to make this much of a difference?
Superfluous aluminium trim, who needs it! Unfortunately this was screwed into the plate and a bit of a pain to remove.
You can pick up Jade75 in one of two colours – White, as reviewed, or Clear for a slightly less gravitating finish – direct from KiiBOOM for $199. Are there better all-round boards out there for the money? Yes. Is there anything quite this weird? If so, I haven’t found it!
The keycaps, by the way, are blue crazed blank ceramic caps from Cerakey and they absolutely rock this look.