Wemax Go Advanced – Portable business laser projector review
My previous experience with laser projectors is a tale of two extremes. At one end lies a 4k, short-throw behemoth with a price tag to match. At the other, a next to useless blurry pixelated gimmick which barely broke the £100 barrier and still managed to be a waste of money.
To say the Wemax Go Advanced strikes a middle ground between these extremes would be uncharitable. It’s an incredible projector for its size.
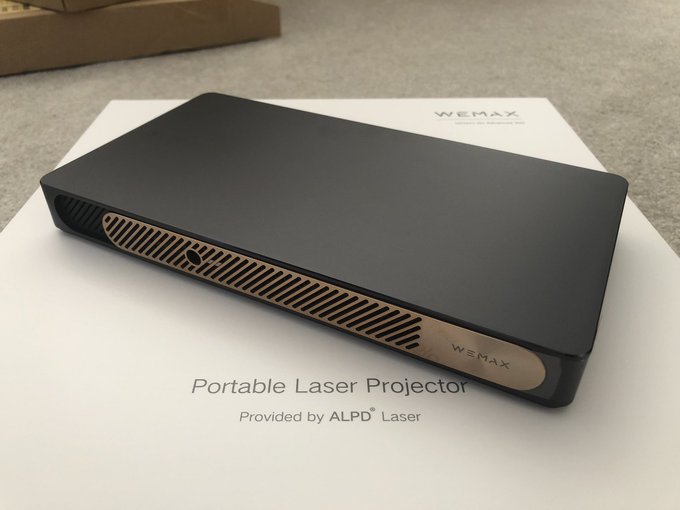
In fact the Go Advanced projector hits hard, fresh out of its outer postage box, oozing style and panache from the moment you set eyes on the packaging. A fitting first impression for a sleek, portable business projector that isn’t -let’s face it – exactly cheap.
This thing is ridiculously nice! pic.twitter.com/6N5AvezZMh
— Phil Howard (@Gadgetoid) August 12, 2022
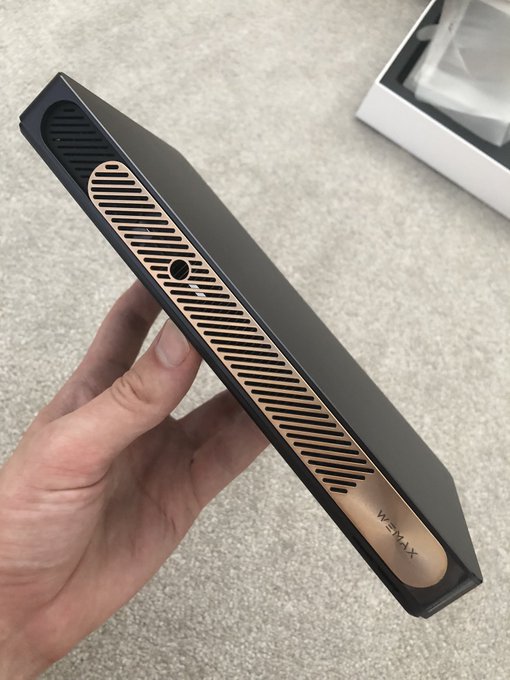
Go Advanced comes dressed to impress in a clean, minimalist black exterior. Picked out of the black is a copper/gold accented lens cover, which is both stylish and multi-functional. It serves as a cover for the lens and the autofocus/autokeystone camera, as an on-off switch and as that extra visual touch that lifts Go Advanced out of the mundane and gives it some “wow” factor. And – indeed – “wow” was my reaction as I lifted it out of the box.
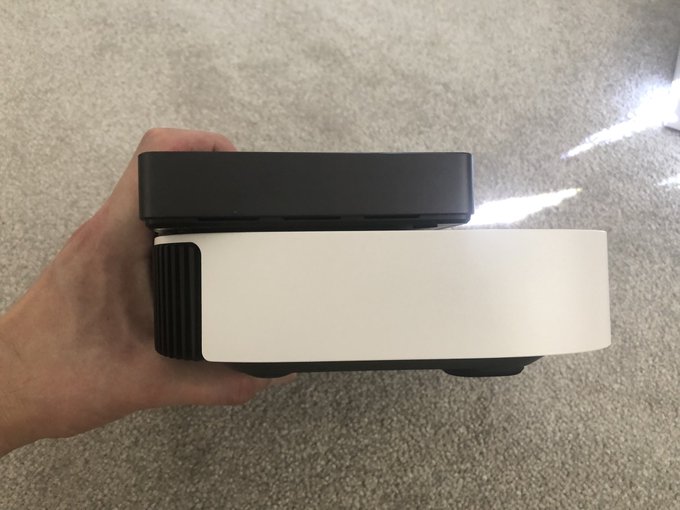
I need you all to understand how small this thing is… pic.twitter.com/MGr01KVW3y
— Phil Howard (@Gadgetoid) August 12, 2022
The projector itself is joined by a power supply – which I left in the box – and a remote with style to match. Thankfully they eschew the usual garbage tier pack-in AAA batteries and you’ll need to bring your own. I recommend grabbing some Amazon Basics Rechargeable or IKEA LADDA if you somehow don’t already have some. Albeit the former aren’t quite as good as the Eneloop they try to imitate.
Some accompanying documentation and a quick start guide round off the package, but I skipped these, grabbed the first USB Type-C power supply to hand and fired it up.
The Hardware
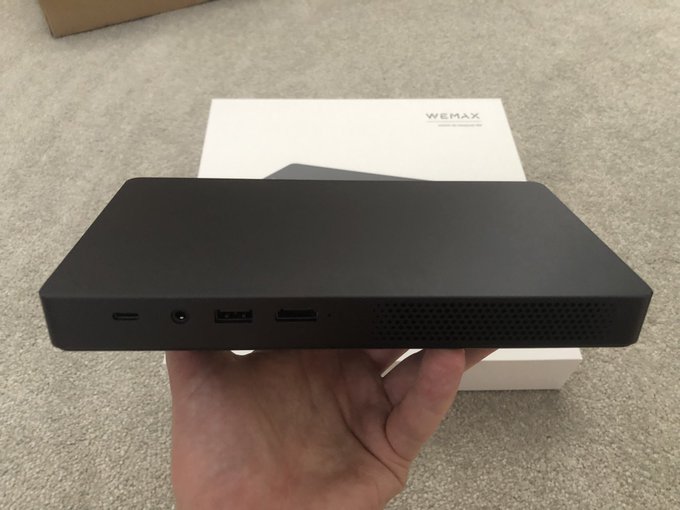
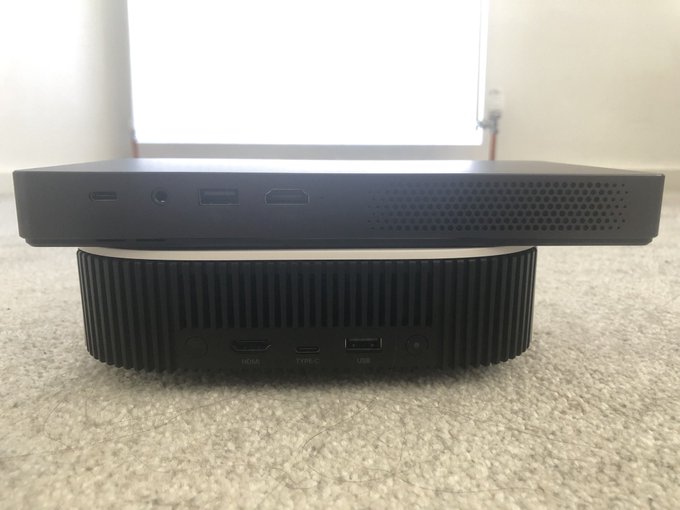
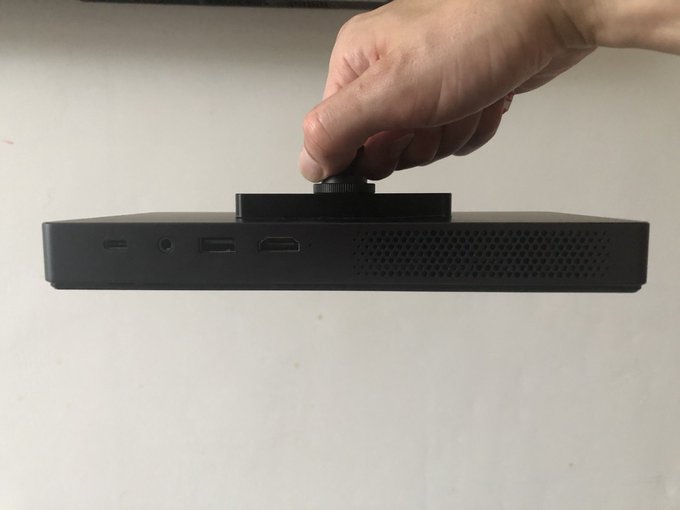
The USB Type-C port on Go Advanced is power only – I’m conflicted since the projector can run on battery long enough for an extra USB port to be useful – but it’s joined by a full-sized HDMI port, USB A port and a 3.5mm audio jack. If this seems a little thin on the ground, don’t worry, you’re not going to be connecting more than one device at a time and the Go Advanced has smarts so there’s Bluetooth and WiFi options for peripherals and streaming to boot.
Powering the projector is an Amlogic T972-H. This ARM Cortex A55 with 4 cores @ 1908MHz and a Mali G31 is paired with 2GB RAM and a pretty respectable 16GB of storage. Storing and playing media files for a presentation is very possible here, and it’s a welcome bump over the 8GB that seems to be prevalent in smart A/V devices. While the OS may not be the most finessed, it is – at least – consistently responsive. The GPU achieved a 3D Mark “Sling Shot” score of 451 which is in the same ballpark as the Anker Nebula Solar.
The front-facing auto-correction camera reports as supporting 1280×720 and 640×480 resolutions. It’s difficult to tell if the higher resolution (over the Anker Nebula Solar) is critical to the object avoidance, but whatever it does… it does it well. This is joined by a time-of-flight sensor next to the lens, which is responsible for detecting objects (typically your toddler’s face) and dimming the laser brightness/displaying a warning to avoid eye damage.
FengOS
Powering on the projector reveals the catch in an otherwise beautifully presented and delectably compact package- it’s powered by FengOS. FengOS is a deGoogled flavour of Android intended for projectors in- it’s fair to say- a predominately Chinese market. Android aficionados will have stronger opinions than me about whether this is a good or bad thing. In practice it means many apps depending upon Google Play Services or other such functionality will not run at all, or will crash at some point. Netflix – for example – will only run if you use the mouse version. This is normally fine if you’re using a remote control app or Bluetooth mouse, but it’s not exactly a smooth, couch-friendly entertainment experience.
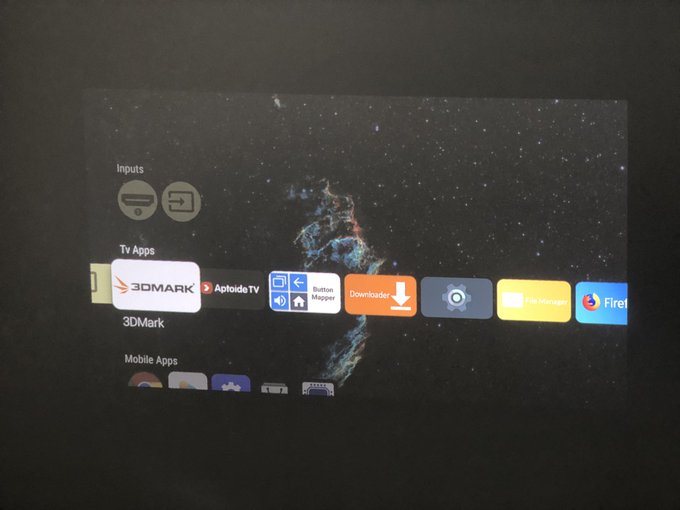
The included “Get Apps” tool and the Aptiode store leave very much to be desired. The former has a curated list of very useful apps such as VLC, the wrong/right version of Netflix, plus Plex and KODI (formerly XBox Media Center). The latter is about as full of random, questionable garbage as you might expect a mobile app store to be and it’s difficult to separate the proverbial wheat from the chaff. If you’re comfortable with jumping through hoops to sideload your favourite app (assuming it will work at all) then you’ll be right at home.
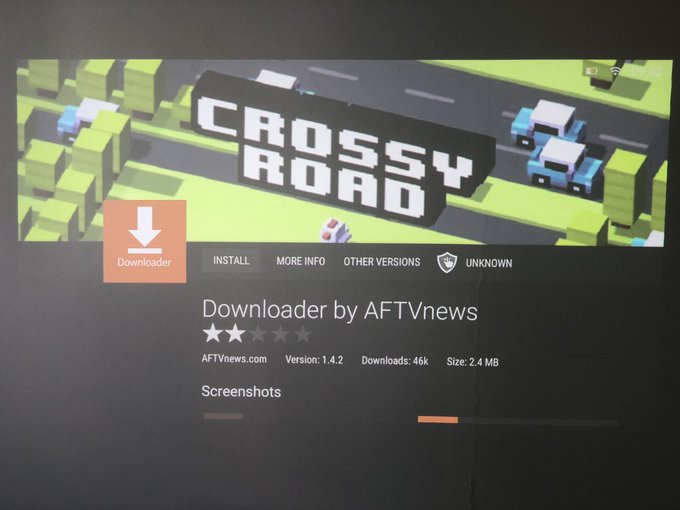
Note that AFTVNews Downloader is a version out of date and – for reasons I can’t fathom – has a “Crossy Road” splash image on Aptoide. If you download this version, and follow the instructions to install the browser plug-in you can then update and it’s pretty plain sailing from there to install things like SmartTube Next.
Why does Downloader by AFTVnews have a Crossy Road masthead on Aptiode?
Why is it two versions out of date with broken support for GitHub URLs?
WJDK! pic.twitter.com/IYlZ4qU5F1
— Phil Howard (@Gadgetoid) September 1, 2022
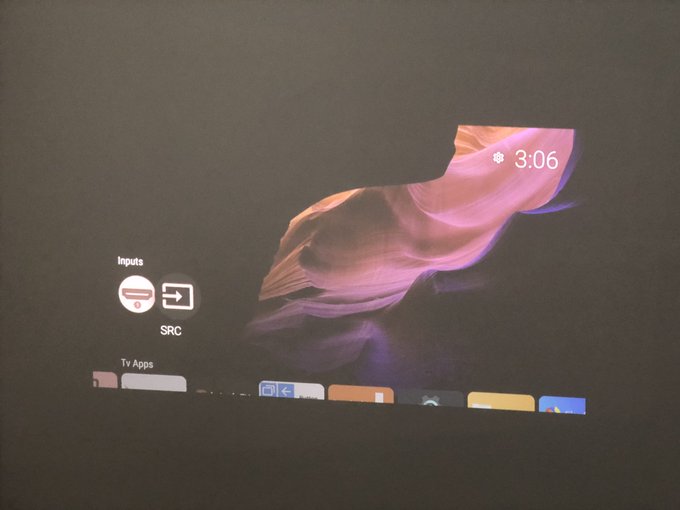
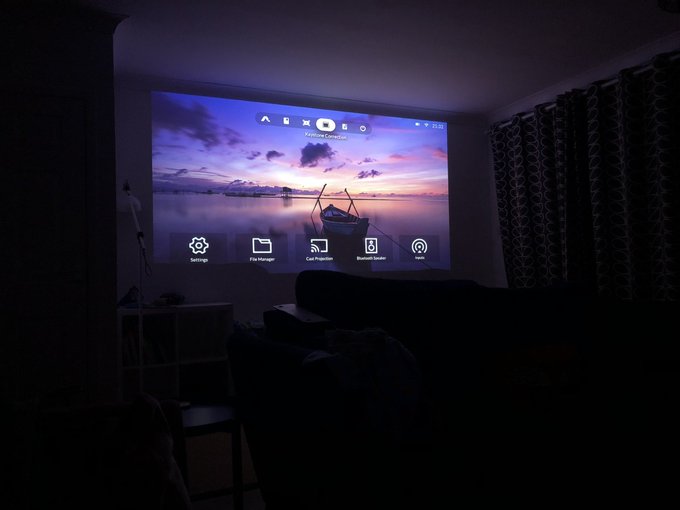
While lack of media apps is forgivable in a business projector FengOS the interface also lacks customisation options, presenting a very pared back UI that gives access to Settings, File Manager, Cast Projection, Bluetooth Speaker and Inputs. To be fair these are probably the features you’ll use most for this particular projector, but there’s no opportunity to change them if you prefer something else. Accessing Android apps is done via the “Launcher” which is a simple slide-out tray that slides in from the right, showing two columns of apps. This can get quite busy quite quickly, though you can long press to re-order “Sequence” the apps so your most used are at the top. Either way doing something you *might* do in a business setting – like accessing the browser- takes more clicks than it perhaps should.
You can totally fix the UI issue by… replacing the launcher. I tried ProjectTivy (which, again, has to be awkwardly side-loaded, but this is really easy once ADB is up and running) which is a very, very deep rabbit hole. In addition to giving a much more customisable UI, ProjectTivy grants access to Fengmi engineering Menu and FengOS engineering Menu, some good places to get yourself into real trouble. It provides shortcuts for the HDMI and USB interfaces, and lists apps in a way that Android TV users might be more comfortable and familiar with. It can also grab random wallpapers from Reddit and adjust the launcher colour scheme accordingly. cool.
You can just chuck ProjectTivy launcher on the Wemax Go Advanced and get a pretty nice UI with a familiar look and feel. pic.twitter.com/CIZRT1TQ42
— Phil Howard (@Gadgetoid) September 1, 2022
Back to vanilla FengOS – You can’t access Android settings without using Button Mapper to map a button (long press). These are distinct from the settings that FengOS does provide. Without access to Android settings it’s difficult to manage apps and perform debugging steps such as clearing the cache, or even uninstalling them altogether. Apps can still be uninstalled by launching Aptiode (or via ADB if you’re hardcore) but this is an extra step for those used to sailing through Android system menus. Some poking around the settings reveals an option or to (linked to Google services) that crashes back out to Home. Presumably these are the reason settings are hidden, since the de-Googled OS doesn’t quite support every menu item listed.
The software keyboard is clearly intended for Chinese audiences and has a tendency to blind type into a Chinese-language input box which can make it extremely frustrating to type even simple phrases. With a little work it can be swapped out for Gboard, but I’d prefer a better out of the box experience. Whether you swap out your launcher or not, you’ll probably want to swap the keyboard.
There’s a cute, if somewhat redundant, screensaver including a photo of Shirakawa-go village in the snow, with a window frame and animated snowfall composited in front. The resulting virtual window effect is quite endearing (and this is a running theme for their screensaver animations) but I suspect most users would prefer the projector dimmed and turned off to conserve “lamp” life.
Though the normal Android settings UI is unavailable (without aforementioned workarounds) the settings UI provided is reasonably comprehensive. You can adjust network settings, system settings, energy saving, security (including enabling ADB support), Image settings (keystone and picture quality), Sound (Key tones and some named equaliser presets), and Bluetooth connectivity. ADB works fine, and you can use – for example – Universal Android Debloater to uninstall packages if you’re so inclined.
Audio / Video Quality & Playback
While it’s *only* a 1080p projector the image quality is fine for a medium sized virtual screen – throwing a roughly 40” to 50” diagonal at roughly 50” to 60” from the wall is a nice sweet spot balancing brightness with screen size and avoiding any “screen door” effect (being able to visually see the individual pixels). Much larger throw sizes are possible and watchable, I push around 65” in my office, but there are diminishing returns with brightness and picture quality.
Not bad for something that (awkwardly) fits in my pocket… pic.twitter.com/BxLbC46b2G
— Phil Howard (@Gadgetoid) August 12, 2022
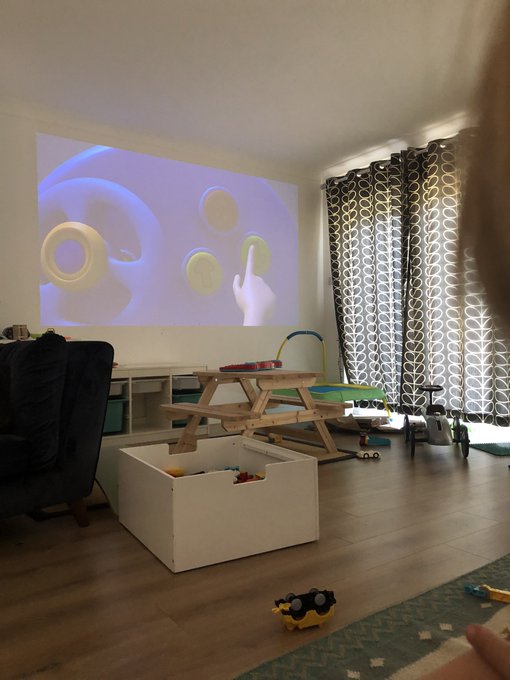
Even with daylight leaking in through the windows the projector is usable for video watching. Sure it’s far from perfect, but it’s amazing how black your eyes will trick you into thinking a white wall is.
The photo doesn’t do it justice, but it’s surprising watchable even with the full brunt of our summer heatwave blasting through the almost ineffective curtains. pic.twitter.com/ixW4Pz9SCS
— Phil Howard (@Gadgetoid) August 12, 2022
It probably won’t come as a surprise, in a device this small, that the sound isn’t great. Small projector. Small speakers. Small sound. It’s a fact of life and not a big deal in a business projector. If you’re determined to use it for movies and TV then a Bluetooth soundbar works wonders and places the sound relative to the picture much more effectively.
SmartTube Next will happily chew through 4K, 60FPS HDR videos with only the occasional stutter (showing roughly 2% dropped frames), even if that extra resolution isn’t making a difference it’s good to know there’s headroom.
Casting video to the projector from a standard Android device is tricky- since it’s degoogled you’ll find the built-in Chromecast functionality of your phone simply wont “see” the projector no matter how hard you try. On my POCO X4 I needed to restore Xaomi’s “Cast” app, go into Settings -> Connection & Sharing -> Cast and toggle it on. On the projector side I needed to go to Cast Projection -> Miracast. Once the projector is found and connected it gives me full screen mirroring, which is roughly as unpleasant as you’d expect. I could not get application casting – eg playing a video from VLC on my phone directly to the projector – to work. Installing “com.google.android.apps.mediashell” (Chromecast built-in on the Aptiode store) did not help. I suspect a lot more re-Googling would be required to get it working.
The Remote
The remote is fairly decent. It has a reassuring weight, lending it a feel of quality. In lieu of a fragile battery door, the entire back slides off revealing the AAA battery compartment and various product information stickers. The usual array of buttons adorn the top- with navigation, volume, power, menu, home, back and a dedicated microphone button (which currently just pops up a “microphone will be supported soon” prompt). Two things fall short, in my humble opinion, there’s no dedicated autofocus button (I move the projector around a lot and would find this quite useful) and the Back/Home buttons feel swapped so that I instinctively press the wrong one.
There’s a very conspicuous lack of buttons on the projector itself, save for the sliding lens cover which doubles as a power switch. I don’t have a huge problem with this, since it begets a very clean, professional look, but a little button to trigger autofocus/auto-keystone manually would have been nice. While the Anker Nebula Solar – for instance – includes buttons on the projector itself, they can sometimes be more trouble than they’re worth.
Auto keystone / Auto focus
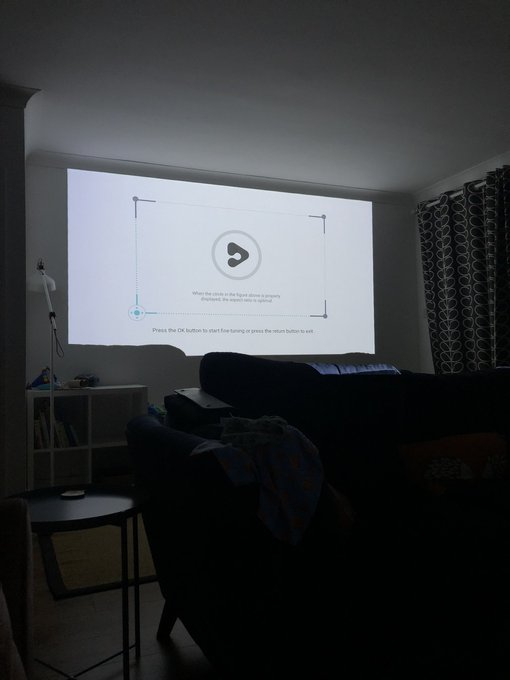
The auto keystone/focus on Go Advanced are impressive. The projector will do its best to compensate for being off-axis both horizontally and vertically, and can correct a small amount of tilt. It can also use the built-in camera to recognise some objects obstructing the projection area and compensate for them. I tried positioning a lamp in front of my wall and, sure enough, the image was corrected to fill the remaining, unobstructed space. This is a cool, though not always desirable feature, that can make plonking down the projector and getting set up in an office environment much easier and quicker than it might otherwise be. If you’re planning to mount the Wemax Go Advanced for a more permanent setup, you’ll still have to make manual keystone adjustments since- despite putting in an incredible effort- it’s never quite perfect.
In most cases extreme keystone correction means you’re also not getting the best possible image quality. This is far more visible in business style settings that might involve projecting sharp edges and crisp graphics in presentations. Extreme off-angle keystone will produce jagged, aliased lines that would not normally be noticeable in movie or video content but are – for example – very clear when browsing the web. This is pretty typical of projectors and not unique to Go Advanced, but something to remember if you’re new to them. Keystone is accomplished not by adjusting the optics to change the projected area, but by squashing, skewing and stretching the image into the available projection zone in such a way that it appears square and level. In addition to loss of visual quality, this post processing will also introduce latency. The ideal situation is no keystone whatsoever, but having such flexible correction for so great a variety of less-than-ideal setups truly makes the Wemax Go Advanced exceptionally good for its intended purpose: portability.
The auto-keystone camera is joined by a time of flight sensor that detects obstructions in front of the lens. This is intended to avoid eye damage, but does tend to be quite sensitive to people walking past the projector. I suppose it has to be. It likes to offer you the option to turn it off, but I’ve so far resisted. It’s a minor annoyance that wouldn’t hurt – I suspect – quite so much as having the full brunt of the projector shone into your eyes.
Tripod / Ceiling Mounting
In lieu of a 1/4” thread mount, Wemax appear to sell a spring clamp tripod. This is fine, but between D and I we have a half dozen or more tripods – including my favourite, the Manfrotto Pixi – that I would rather use than adding another to my collection.
Yeeesh it hasn’t even had time to cure and it’s going nowhere! pic.twitter.com/FMGM0lvViV
— Phil Howard (@Gadgetoid) August 16, 2022
To this end I decided to modify the Go Advanced with a tripod mount. After some brief deliberation I figured 3M tape and a small ¼” and ?” cheese plate would do the trick. Yep, I taped a mounting plate right onto the top of the projector, screwed in a ?” to ¼” adapter and stood it – upside-down- on our Pixi tripod. This is stolid as a rock and works beautifully, leaving the bottom of the projector- including its fold-out foot- available for table top use.
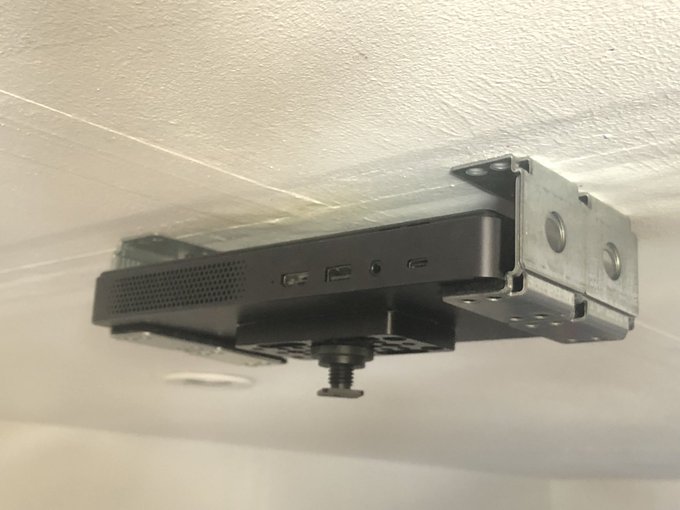
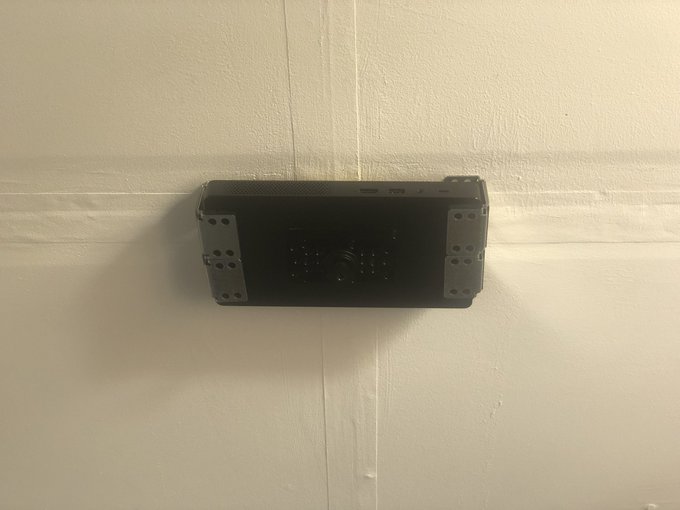
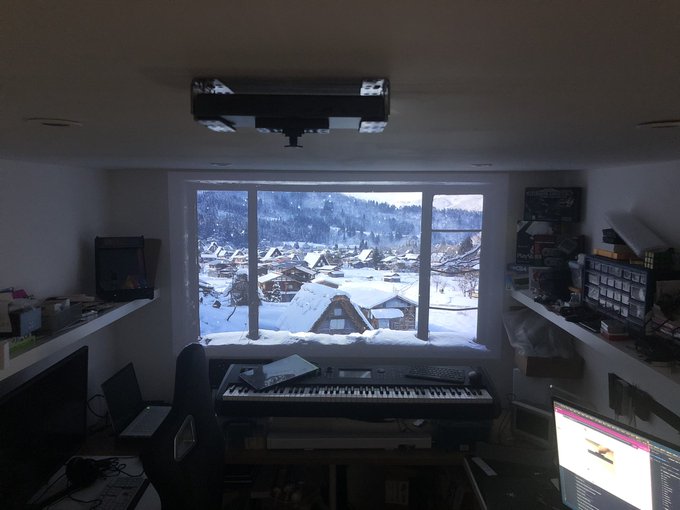
Since I knew – roughly – where the ceiling studs were in our office I also used yet more 3M tape to stick together some assorted metal brackets (I had kept these from a bunch of IKEA Kallax shelves I never secured to the wall) and screwed these to the ceiling to create a mounting cage. The Go Advanced can now slip easily into the cage on my ceiling, filling the whole end wall (minus a gap on the left and right for shelves) of our office and streaming audio via Bluetooth to the Majority Audio K2 soundbar I use with my piano.
Look ma, no wires! pic.twitter.com/rLRaiiPDYp
— Phil Howard (@Gadgetoid) August 19, 2022
This quick and easy, slot-in-and-go projector setup is phenomenal, with the light weight (despite the battery) and wireless nature (thanks to the battery) of the Go Advanced making it an extremely unobtrusive and inexpensive projector to ceiling mount. Since the projected image is offset to above the projector, mounting it flush to the ceiling works surprisingly well where a low-hanging, ball-head or posable mount might otherwise be needed. Wemax, if you’re listening… a form-fitting, purpose built ceiling mount for the Go Advanced would be really cool! I’d love to stick one in each bedroom so the projector can just be set up, out of the way, anywhere I happen to want to use it.
Finally have a window in my office! pic.twitter.com/WaoRhzHfDx
— Phil Howard (@Gadgetoid) August 19, 2022
Overall
The Wemax Go Advanced projector is first and foremost a business projector. I would consider the Android functionality an added bonus rather than a core feature, and it seems to exist more to facilitate playing video files and streaming video than as an effort to bring the full smart TV experience to the device. A little patience and some tinkering make FengOS pretty tolerable, though, and while it’s difficult to customise it balances this with a pretty responsive and stable interface. The keystone functionality is brilliant, making the best of all kinds of awkward setups and making the Go Advanced a surprisingly good projector for sticking on a tripod at the end of the bed, on the kitchen table or elsewhere.
Android TV 10 was slated to arrive on the Go Advanced by August 2022, but the month has come and gone and it’s now delayed to the end of the year. It may or may not require new hardware, so if you’re particularly concerned with the software experience you might want to forego the (currently very discounted) current generation and hold out for what – if the Go Advanced is anything to go by – might be a thoroughly excellent successor.
I could probably write so much more but as it stands the Wemax Go Advanced pairs great looks with great features and- with a little tweaking – tolerable software but there’s very much room for improvement and I’m excited to see where Wemax go from here. You can grab the Wemax Go Advanced directly from their website for $699 at time of writing.
