Meletrix Zoom65 V2 Mechanical Keyboard Kit Reviewed
After building the Chilkey ND75, and trying the Slice75 and Slice68 I figured it was time to graduate to something a little more middle of the road- a complete, bag o parts custom board that tickles that electronics hobbyist itch just a little.
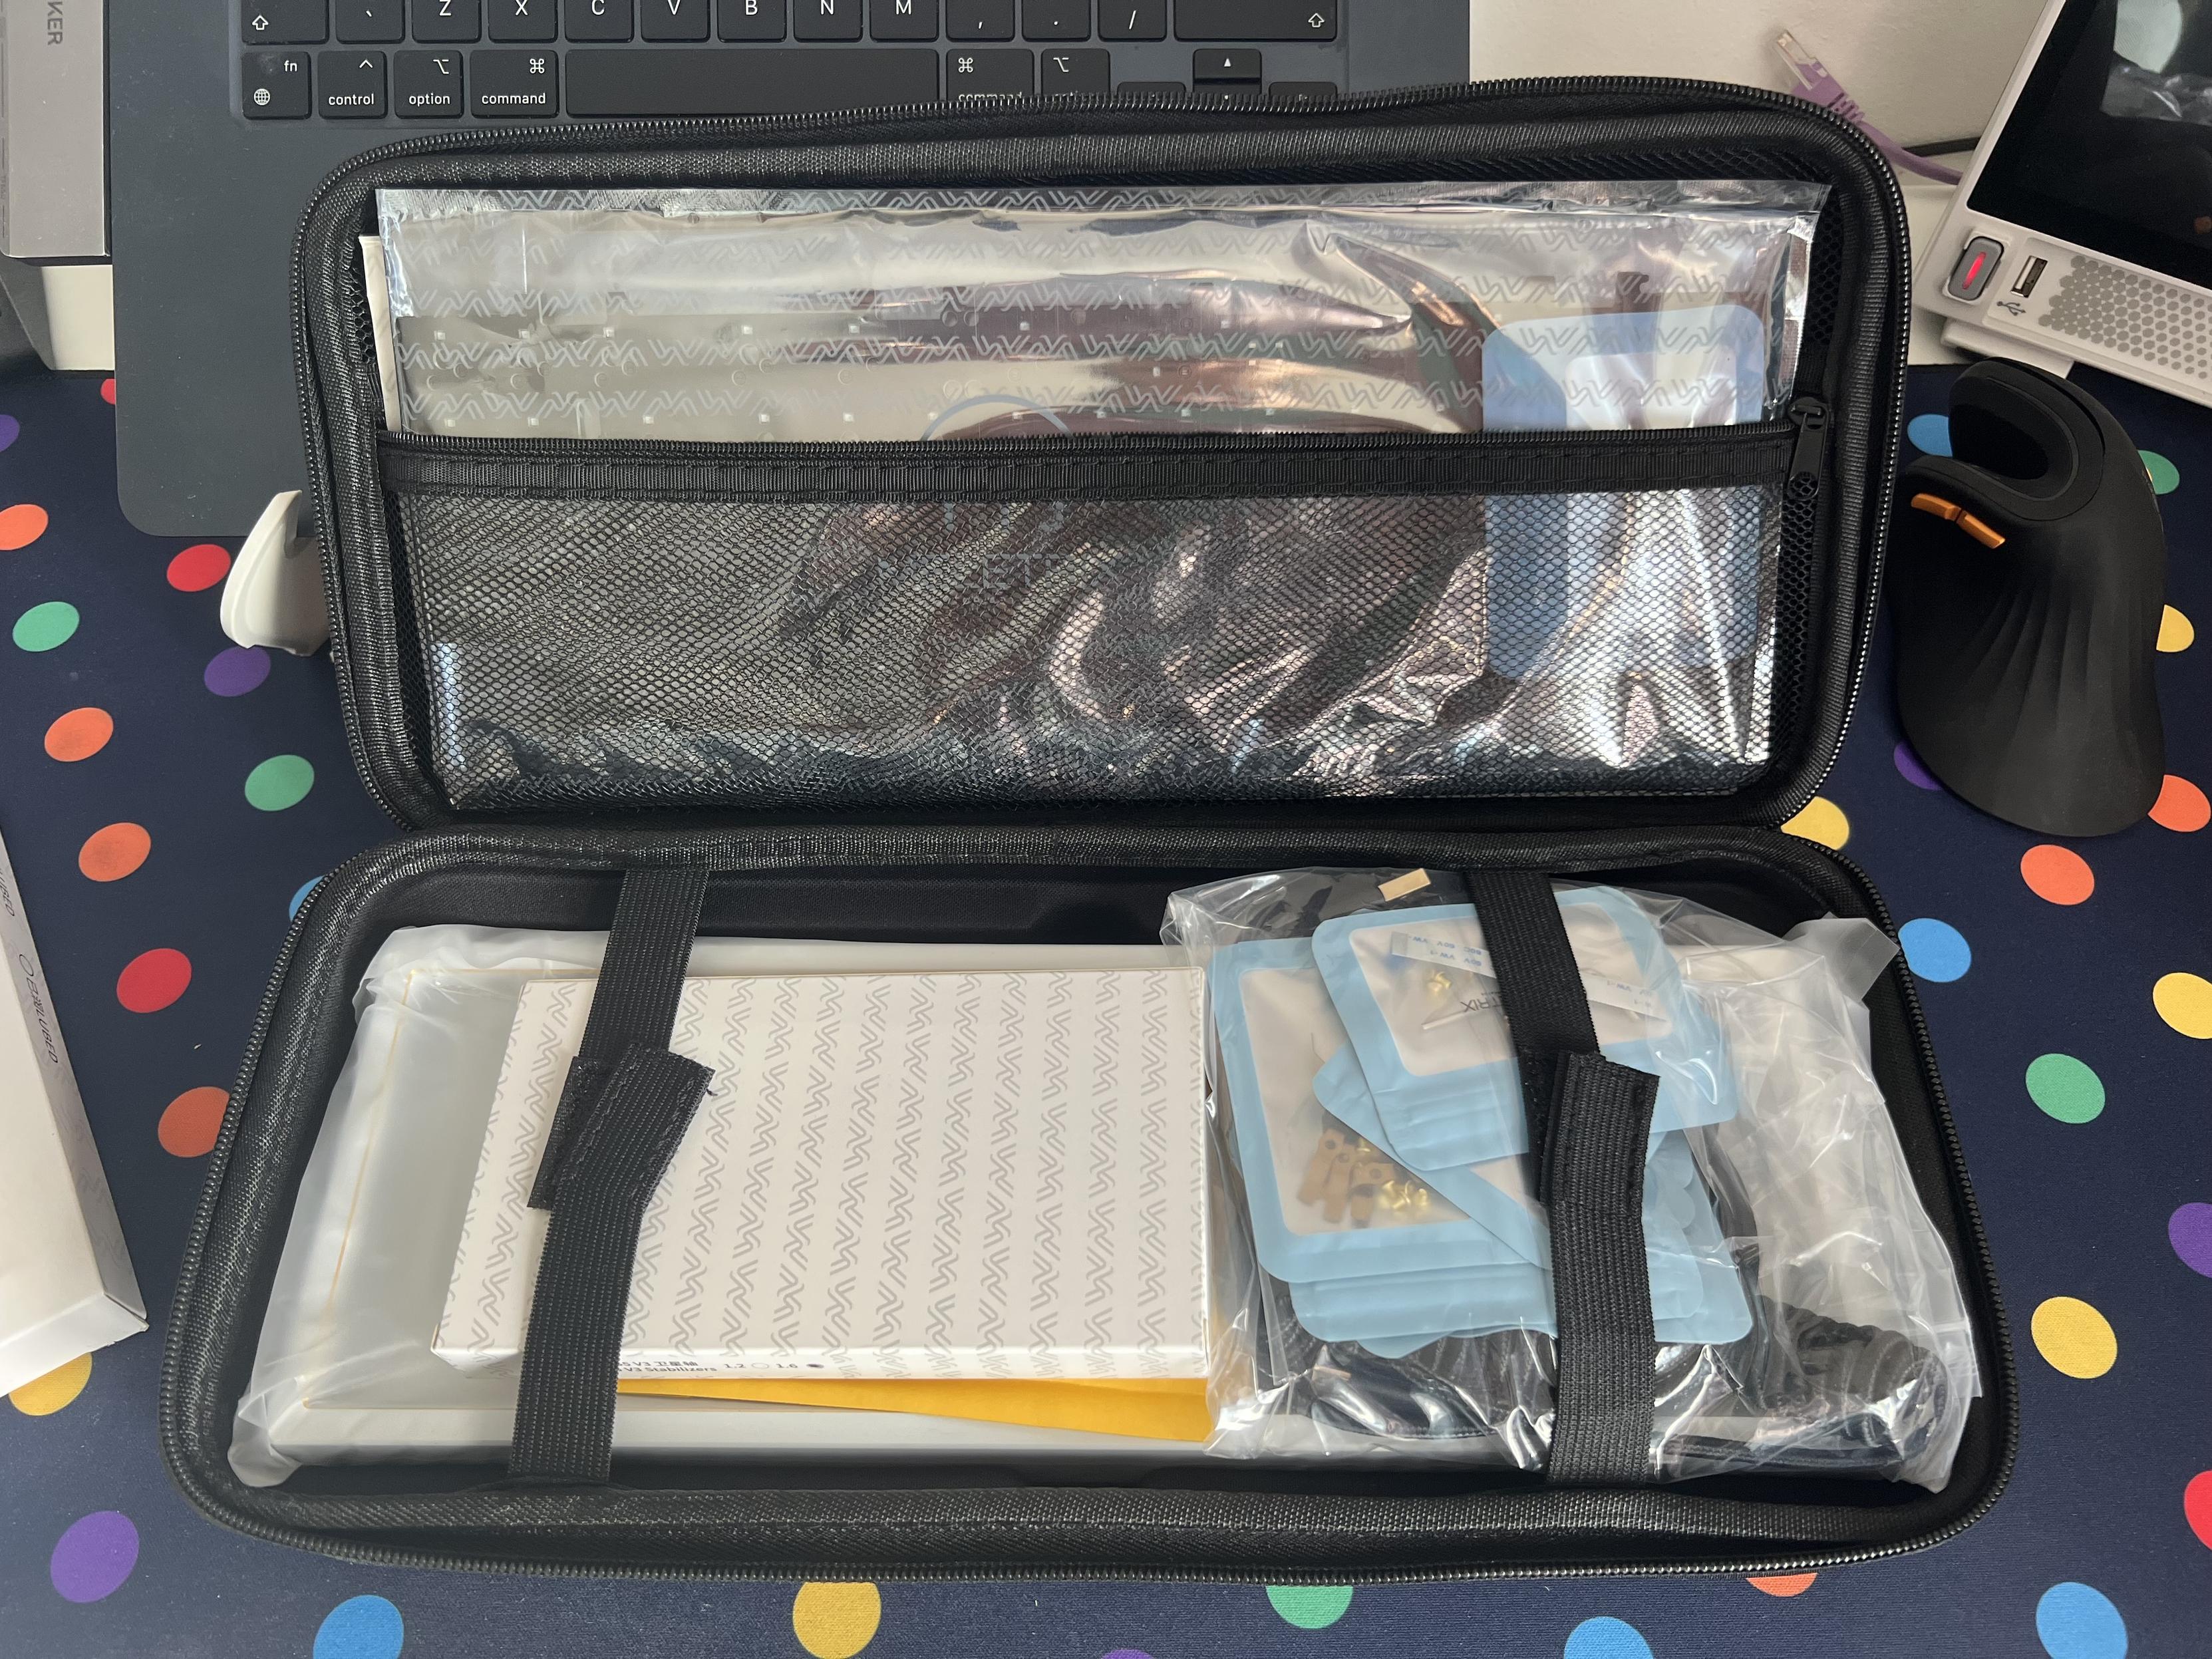
It’s a kit in every sense of the word. Some assembly required and a delicious array of parts to get confused by.
I need people to understand that custom mechanical keyboard kits are exactly that- kits. The typical custom will come without switches or keycaps, but you can expect to find your PCB, plate, weight and enclosure of choice along with sundry parts like LCD modules, USB daughter boards and batteries. You might even get some basic stabalisers; those fiddly little metal bar thingies that keep longer keycaps from rocking side to side.
Custom boards can even involve soldering switches, and sometimes even diodes if you want to get fancy (which I did with my ISOXLIIS board because I didn’t want to place SMD diodes). The Zoom65 V3 involves neither of these, but does come with a dizzying variety of mounting options, an LCD modular, a sprinkling of tools and a really nice carry case to keep it all together.
Options, options, options
Before you get the kit in hand, though, you’ve got to make some hard decisions. Every Zoom 65v3 – if you’re not buying an off the shelf combo – requires the selection of a case, back plate, magnetic badge – dubbed “External Weight”, plate – available in no fewer than six materials – and PCB. You’ll also need to pick some switches and keycaps.
As with the ND75, however, Computer Orbit (once again, completely unaffiliated but they really do make this quite easy) offer a configurator.
This guides you through the choice of eight case colours, seven back plates and seven external weight options, with prices ranging from £189 up to £245 depending on your choices. Unlike the ND75 configurator, though, it does not offer choices of switches or keycaps and you’ll have to strike out and find these for yourself. You will need up to 69 switches for a full UK ISO layout with a split left shift and (actually quite handy) split spacebar. The split spacebar turns one key into three- two shorter spacebars flanking a 1.25u key – and is a very convenient way to make the most out of the 65% layout since you get an extra Fn key in effect.
Thankfully switches come in convenient packs of 70, running you anywhere from about £14 upwards. Unthankfully, switches are a very personal preference that are difficult to pick if you haven’t already tried a bunch. I’d recommend picking up a couple of cheaper sets of 70 in a couple of different styles to see which you like best. With linear, tactile and clicky just being the very tip of the iceberg for options you might find yourself in deep- just grab the cheapest linear switches you can find and leave it as an exercise for later. You’re not going to escape the hobby if you’re diving in this deep! Might as well set yourself up for some exploration.
That said, Meletrix will take out some of the guesswork by selling you Zoom65 switches and Zoom65 keycaps which are both decent entry-level options, if a little lacking in character.
This board with PBS blanks remains one of my favourites!
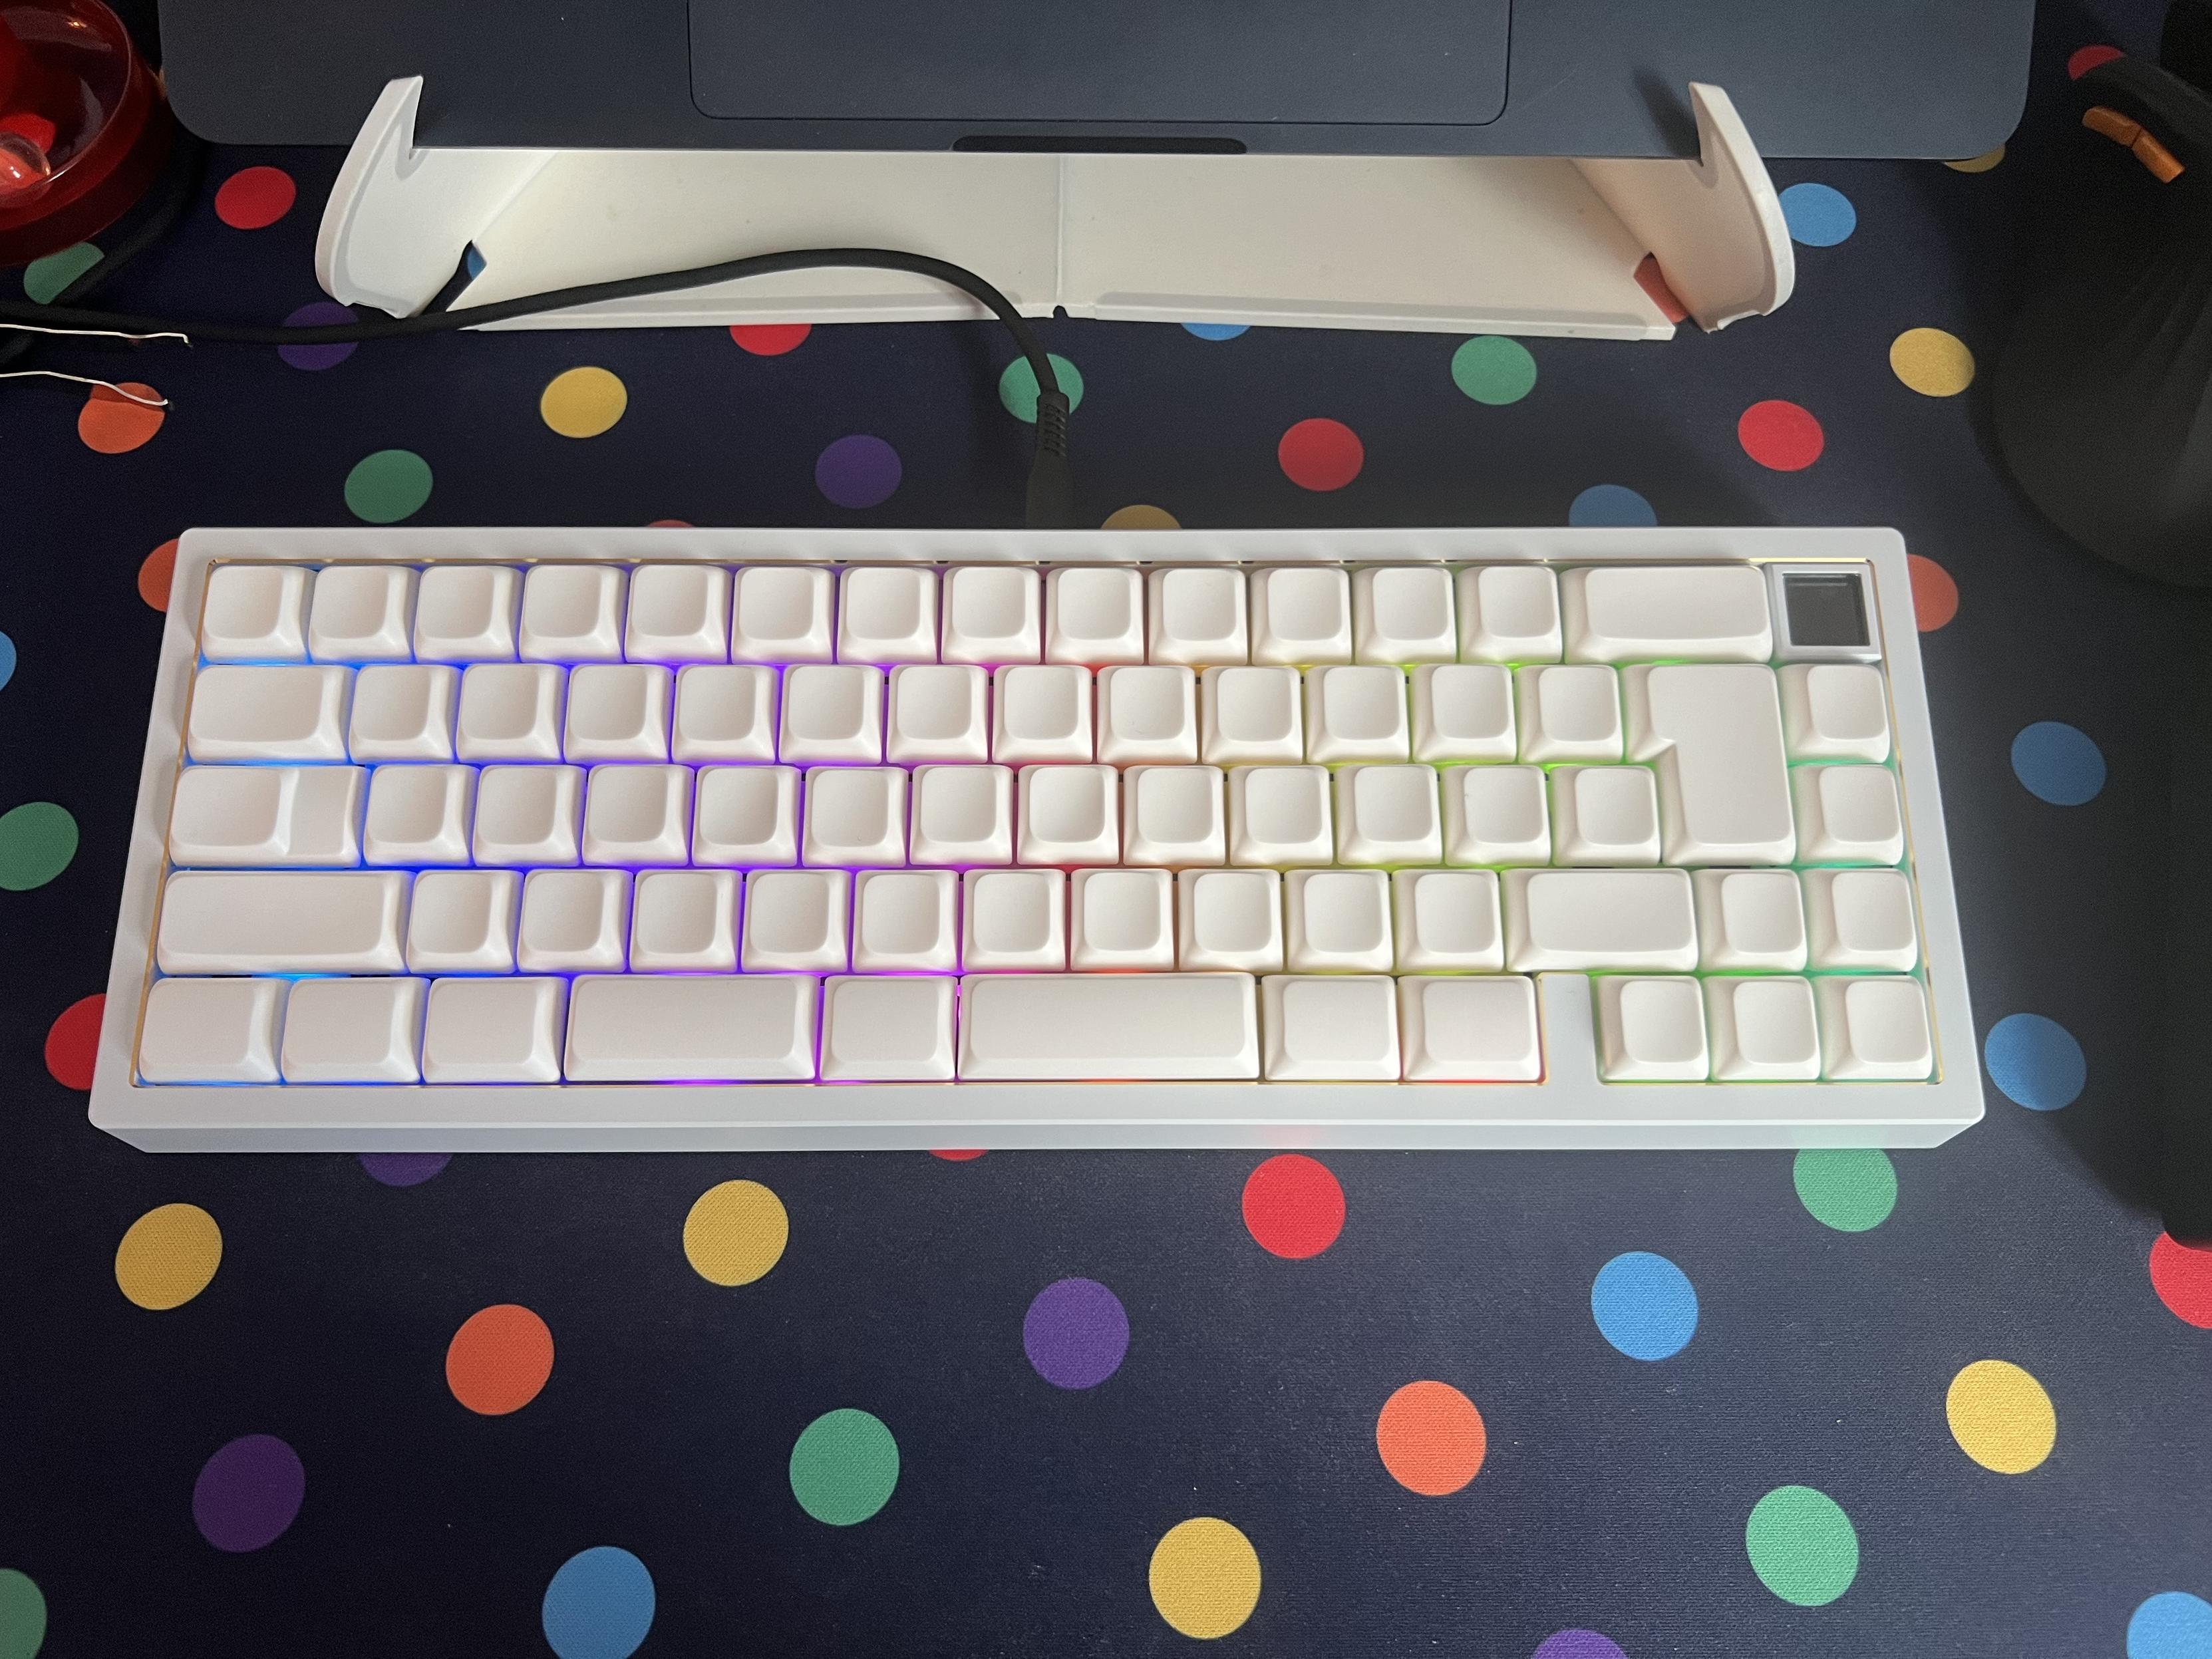
I decided to go for a white Zoom 65 with a gold chamfer, gold back plate and white weight which turned out to be very close to one of Meletrix’s “KLE” edition prebuilds. I ended up with Wuque Studio (a sister brand to Meletrix) Morandi Switches which are a very middle of the road linear switch with a high-ish actuation force (albeit not as high as Zoom65 switches) and a not outlandish price. All told the board – without keycaps – came in at £256 (a very pleasingly power of two price) and I paired it with white PBS Blanks for a very understated look.
If you’ve run the numbers you’ll probably be baulking right now and I don’t blame you. I was lucky enough for Meletrix to supply me the Zoom 65v3 for this review, and some assorted shenanigans which we’ll get to later. I would neither have paid this kind of money for one, nor been particularly happy if I had. Though I do enjoy using it. The Zoom 65v3 is a beautiful board but it’s a little flawed and involves more than a little TLC to get it to an acceptable standard. The mirror gold baseplate is glorious, though.
Assembly
Perhaps the most fun you’ll have with the Zoom65 v3 (at least, if you’re not me and joining in efforts to reverse engineer the LCD modular) is the assembly. There’s something quite satisfying about opening the cardboard outer box (and even outer outer box if you’re buying from ComputerOrbit) and being greeted with a pretty decent, zip-up carry case in which all the components sit. It’s exciting. There will, no doubt, be a strong temptation to start immediately but I should probably note a couple of pitfalls I charged right into before we move on-
First and foremost, don’t forget that ISO keyboards have a split left shift. I had installed a stabiliser for a full-width ANSI shift and made a fool out of myself. I blame swapping between ISO and ANSI and other weird layouts for addling my brain.
Next, decide if you want to use split space. If you’ve got keycaps that support it (Zoomcaps, or PBS blanks for example) – note: many premium sets require you to buy split spacebars separately – then I absolutely think you should. The split spacebar setup is a configuration option in VIA under the Layouts option (small icon with four keys in a sort of staggered grid) under the Configure tab. Here you’ll also find “Split Left Shift” which you’ll definitely want to enable if you’re ISO gang, and “ISO Enter” which will – confusingly – switch the ISO Enter to ANSI if you’ve downloaded the UK ISO VIA JSON file (via-json-ISO on the firmware page: https://meletrix.com/pages/firmwares). If this terminology is scary and meaningless to you… don’t worry, you’ll be dragged kicking and screaming into the wild world of side-loading keyboard configs into VIA – the web application for customising layouts – almost no matter where you turn.
The Zoom65 V3 instructions could very much use a little box-out or two explaining these idiosyncrasies and reminding you (or me, in this case) what an ISO keyboard layout is supposed to look like. I believe the instructions were written by, or heavily contributed to by a community member or members and they are, on the whole, very decent but not quite hand-holdy enough for a fool like me.
The next problem I had was stabilisers. There’s a lot of assumed knowledge in the instructions that left me a little in the dark as to how much force they needed to click into place (it turned out to be quite a lot) and what on earth to do with the little plastic wedges intended to hold them in place (I chose to simply ignore them.)
Since the stabalisers are mounted into the PCB and sandwiched by the plate, there’s quite a cost to making a mistake. By the time I had realised I missed the split left shift, I had inserted a full complement of switches and had started populating the board with keycaps. It was not trivial to take everything back apart, but at least I learned something from the experience. Take your time, make sure you know what layout you’re going for, and keep a reference handy.
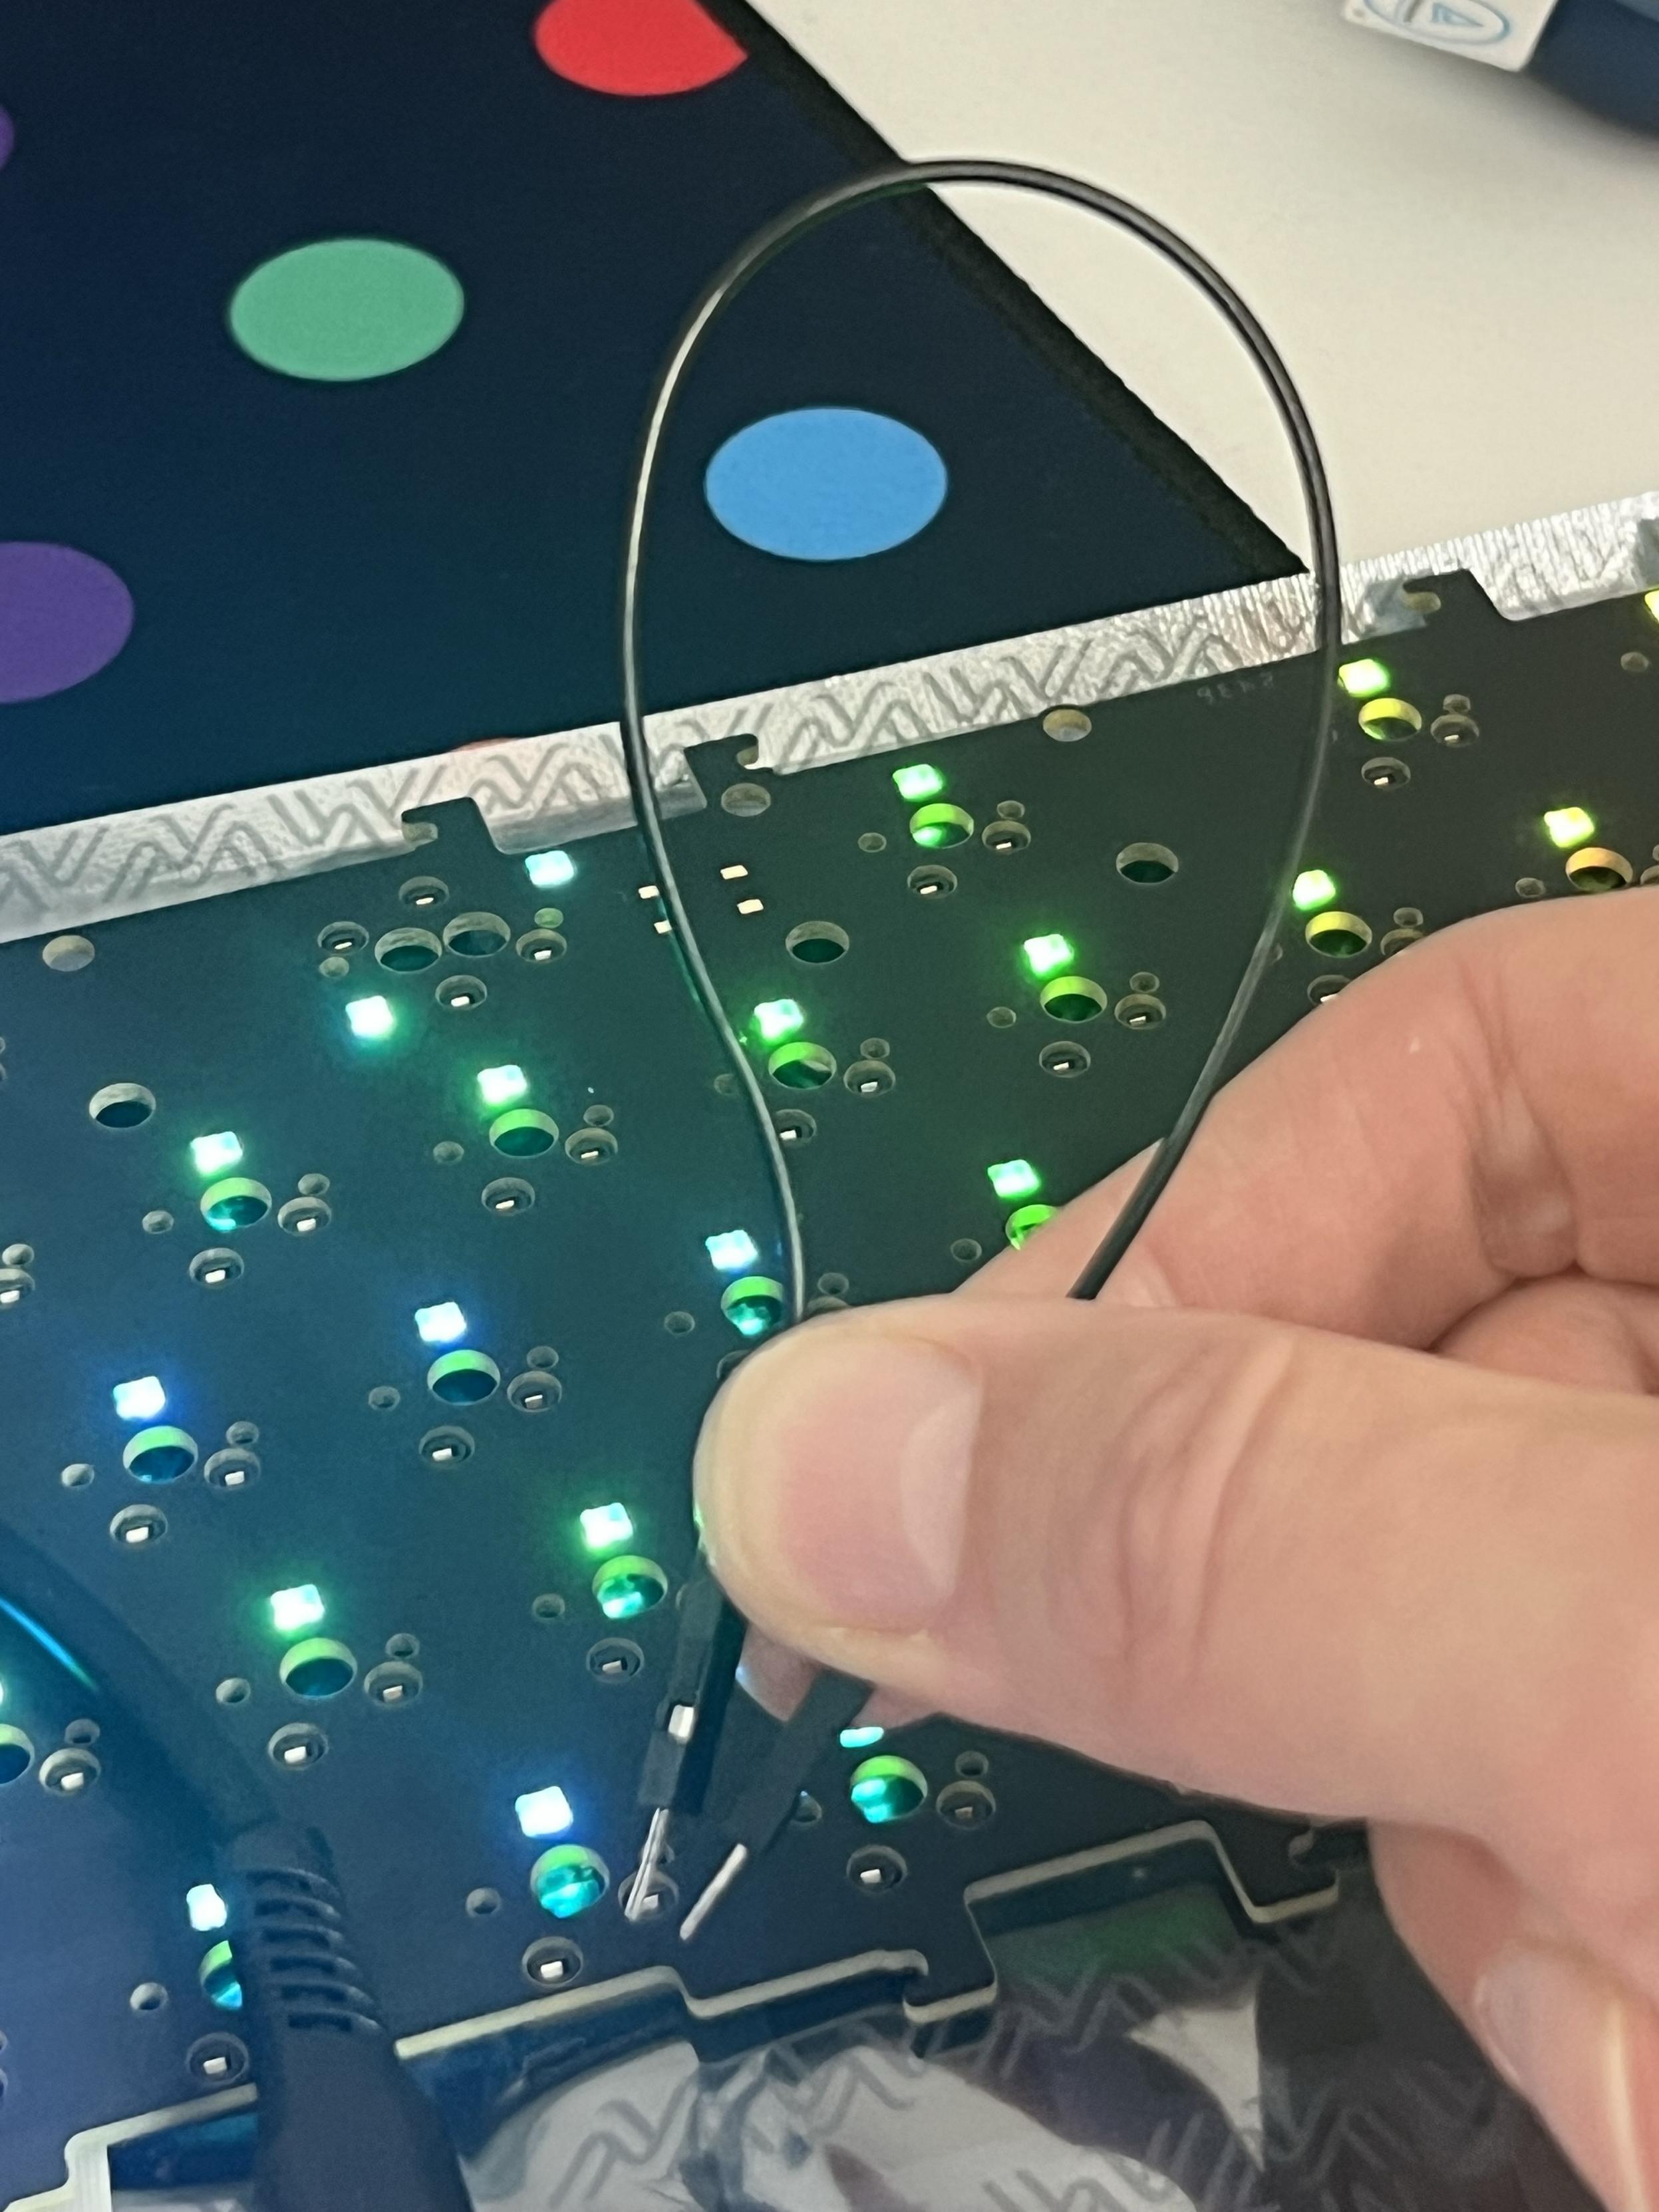
Testing all the switch sockets before assembly!
Back to the normal flow of instructions. The first step is a sensible one – remove the keyboard PCB from its bag (actually a little awkward because the bag was fractionally too small and it snagged on the ziplock rim), connect it to USB, and proceed to test every hotswap socket to confirm it’s functional. If you’re prone to bending pins while installing switches (I always seem to manage exactly one) then knowing that all of your hotswap sockets are functional is a good first step. The instructions suggest using tweezers for this step, but I opted for a short length of pointy-to-pointy dupont jumper jerky (basically hobby electronics breadboard wire) since tweezers felt like an accident waiting to happen. Not to mention – there were none in the box. A little hotswap switch testing fork might have been a cool addition, like those tiny sim tray removal tools you used to get with iPhones.
As for assembling the PCB and plate, I was pleasantly surprised to find threaded inserts in the POM plate, and simple PCB stand-offs which could screw into it. These are then screwed into the PCB and keep the PCB and plate separated by a constant distance. This makes installing adjacent switches easier, since they aren’t prone to just pushing the plate down (the plate flexing instead of switches popping into it is a common problem, often solved with a “plate fork”, a little fork-shaped spacer that goes between PCB and plate to keep it from squashing down.). Since switches aren’t supplied with the kit, the build guide does not cover installing them. This is a shame since it’s possible to get the process catastrophically wrong and break a hotswap socket off the PCB. You should ideally remove the PCB from the keyboard enclosure and keep it on a flat surface while installing switches (since having something behind your hotswap sockets could save them from being broken off the PCB by a slightly bent pin and too much insertion force.) I have a habit of not doing this, but I also have access to a soldering iron and smart people who are really good at electronics rework and have even better tools than me.
The main thrust of the instructions seems to cover the myriad mounting options for the PCB assembly into the enclosure itself. Mounting is a very personal choice, and does affect the feel and sound of a keyboard in ways that even the most jaded, keyboard naysayer might be convinced to notice. In my case I like bounce. Lots of bounce. So I plumbed for the “Maglev” option.
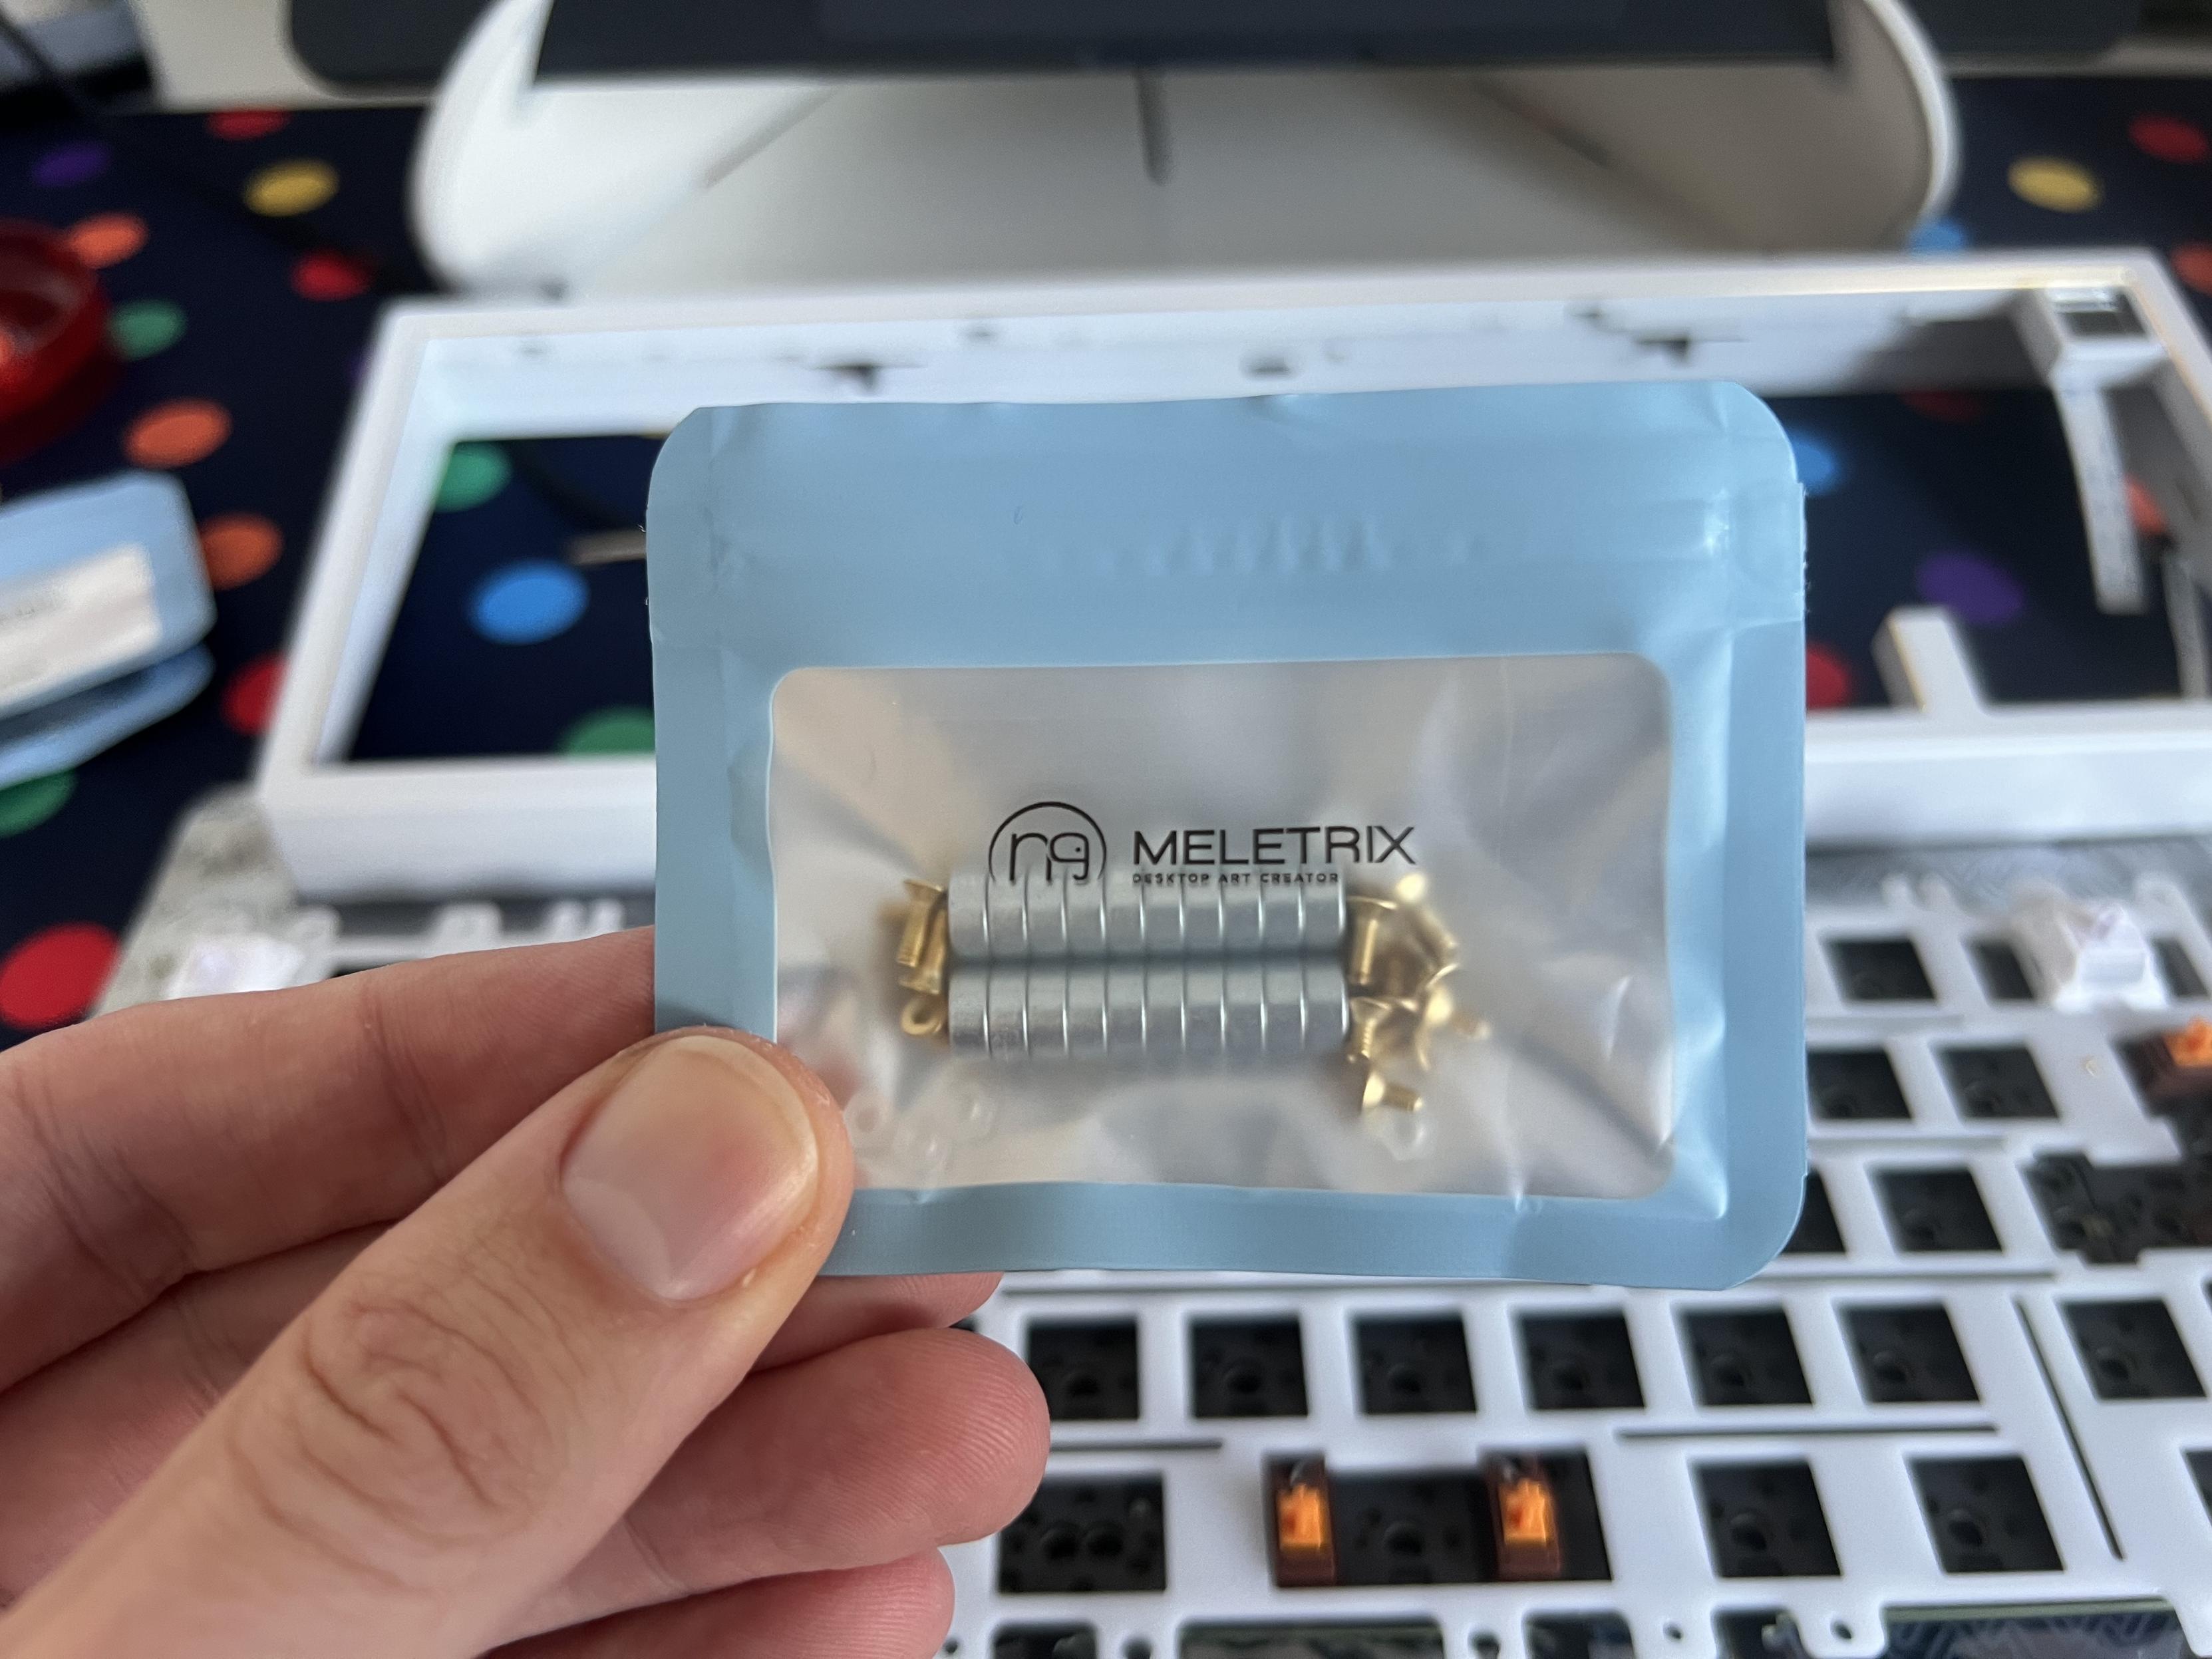
Magnets, how do they work?
Maglev is exactly what it sounds like, and involves screwing magnets to the plate, and even more magnets into recesses in the bottom enclosure. While it feels at first like this should be an awesome, maximum bounce setup there’s unfortunately very little room inside the Zoom65 v3 for the PCB to flex and bounce. Not one to be easily defeated, I decided to simply pop the top right off the Zoom65, leaving it resting on top of the ball catches that keep the top and bottom shells together. This gave oodles of extra room for the maglev to bounce, and makes for a quite silly sproingy board with lots and lots of give. To put a quantity on it, there seems to be a good 2mm of travel with the magnets pushing the middle of the board up ever so slightly more than the edges. Two locating pegs on the diagonal opposite corners of the lower enclosure also keep the plate from sliding off, so outright removing the top shell and exposing all the silly keyboard innards is also an option. Albeit quite a chaotic one if you’ve paid good money for a board that looks good.
I’m keen to design a “Lift Kit” for the Zoom 65 v3, just a simple set of shims and longer screws to space the top-shell ball catches a little further away and give just a little extra internal room without the top shell sitting too high. As it stands, it’s easy to get a little lift with some folded frog tape (if you know, you know) jammed under the catches, but the supplied screws don’t give much wiggle room. I think something that does this could be easily 3D printed, but it’s another one of those projects I just haven’t had the time for!. The same frog tape trick works under the USB daughter board, too, raising it up to align with the now misaligned hole in the top enclosure.
Gnarly frog tape shims for some extra maglev bounce? It’s not silly if it works.
Besides maglev the Zoom 65 comes with more traditional mounting options – such as “silica gel particle” (what I would call grommets), springs, pogo pins (which are just small springs in a metal canister and usually used for making electrical connections) and split o-rings – where an o-ring acts like a sort of suspension spring. If you prefer a firmer board or want to keep assembly simple, then just using the little silica grommets is an easy, tool-free way to go. These just push-fit into the plate and stand it off slightly from the bottom housing.
Maglev, on the other hand, is probably the most difficult, and I’ve heard reports of magnets (which can be brittle) breaking during installation. No such issues here, but they were a little tricky to install – ie: they kept sticking to my screwdriver.
Software
The software experience across most all the keyboards I’ve tested – with the possible exception of Nuphy’s in-house IO software – has been broadly quite mediocre. Not always terrible, but even at the best of times – QMK software with VIA configuration support – the experience is complicated and confusing. Zoom65 is no exception, relying upon a closed-source possible fork of QMK (which is a popular, open-source, cross-keyboard firmware) and the old side-loading JSON config files (whereupon you download a magic text file to tell VIA’s web configurator how to configure your keyboard.)
Thankfully a QMK derivative means I could rebind and configure the Zoom 65 on macOS, and QMK Toolbox even worked to update the Zoom 65’s firmware. This was handy because out of the box the Zoom 65 would crash periodically (yes, a keyboard… crashing) and the firmware fixed that right up.
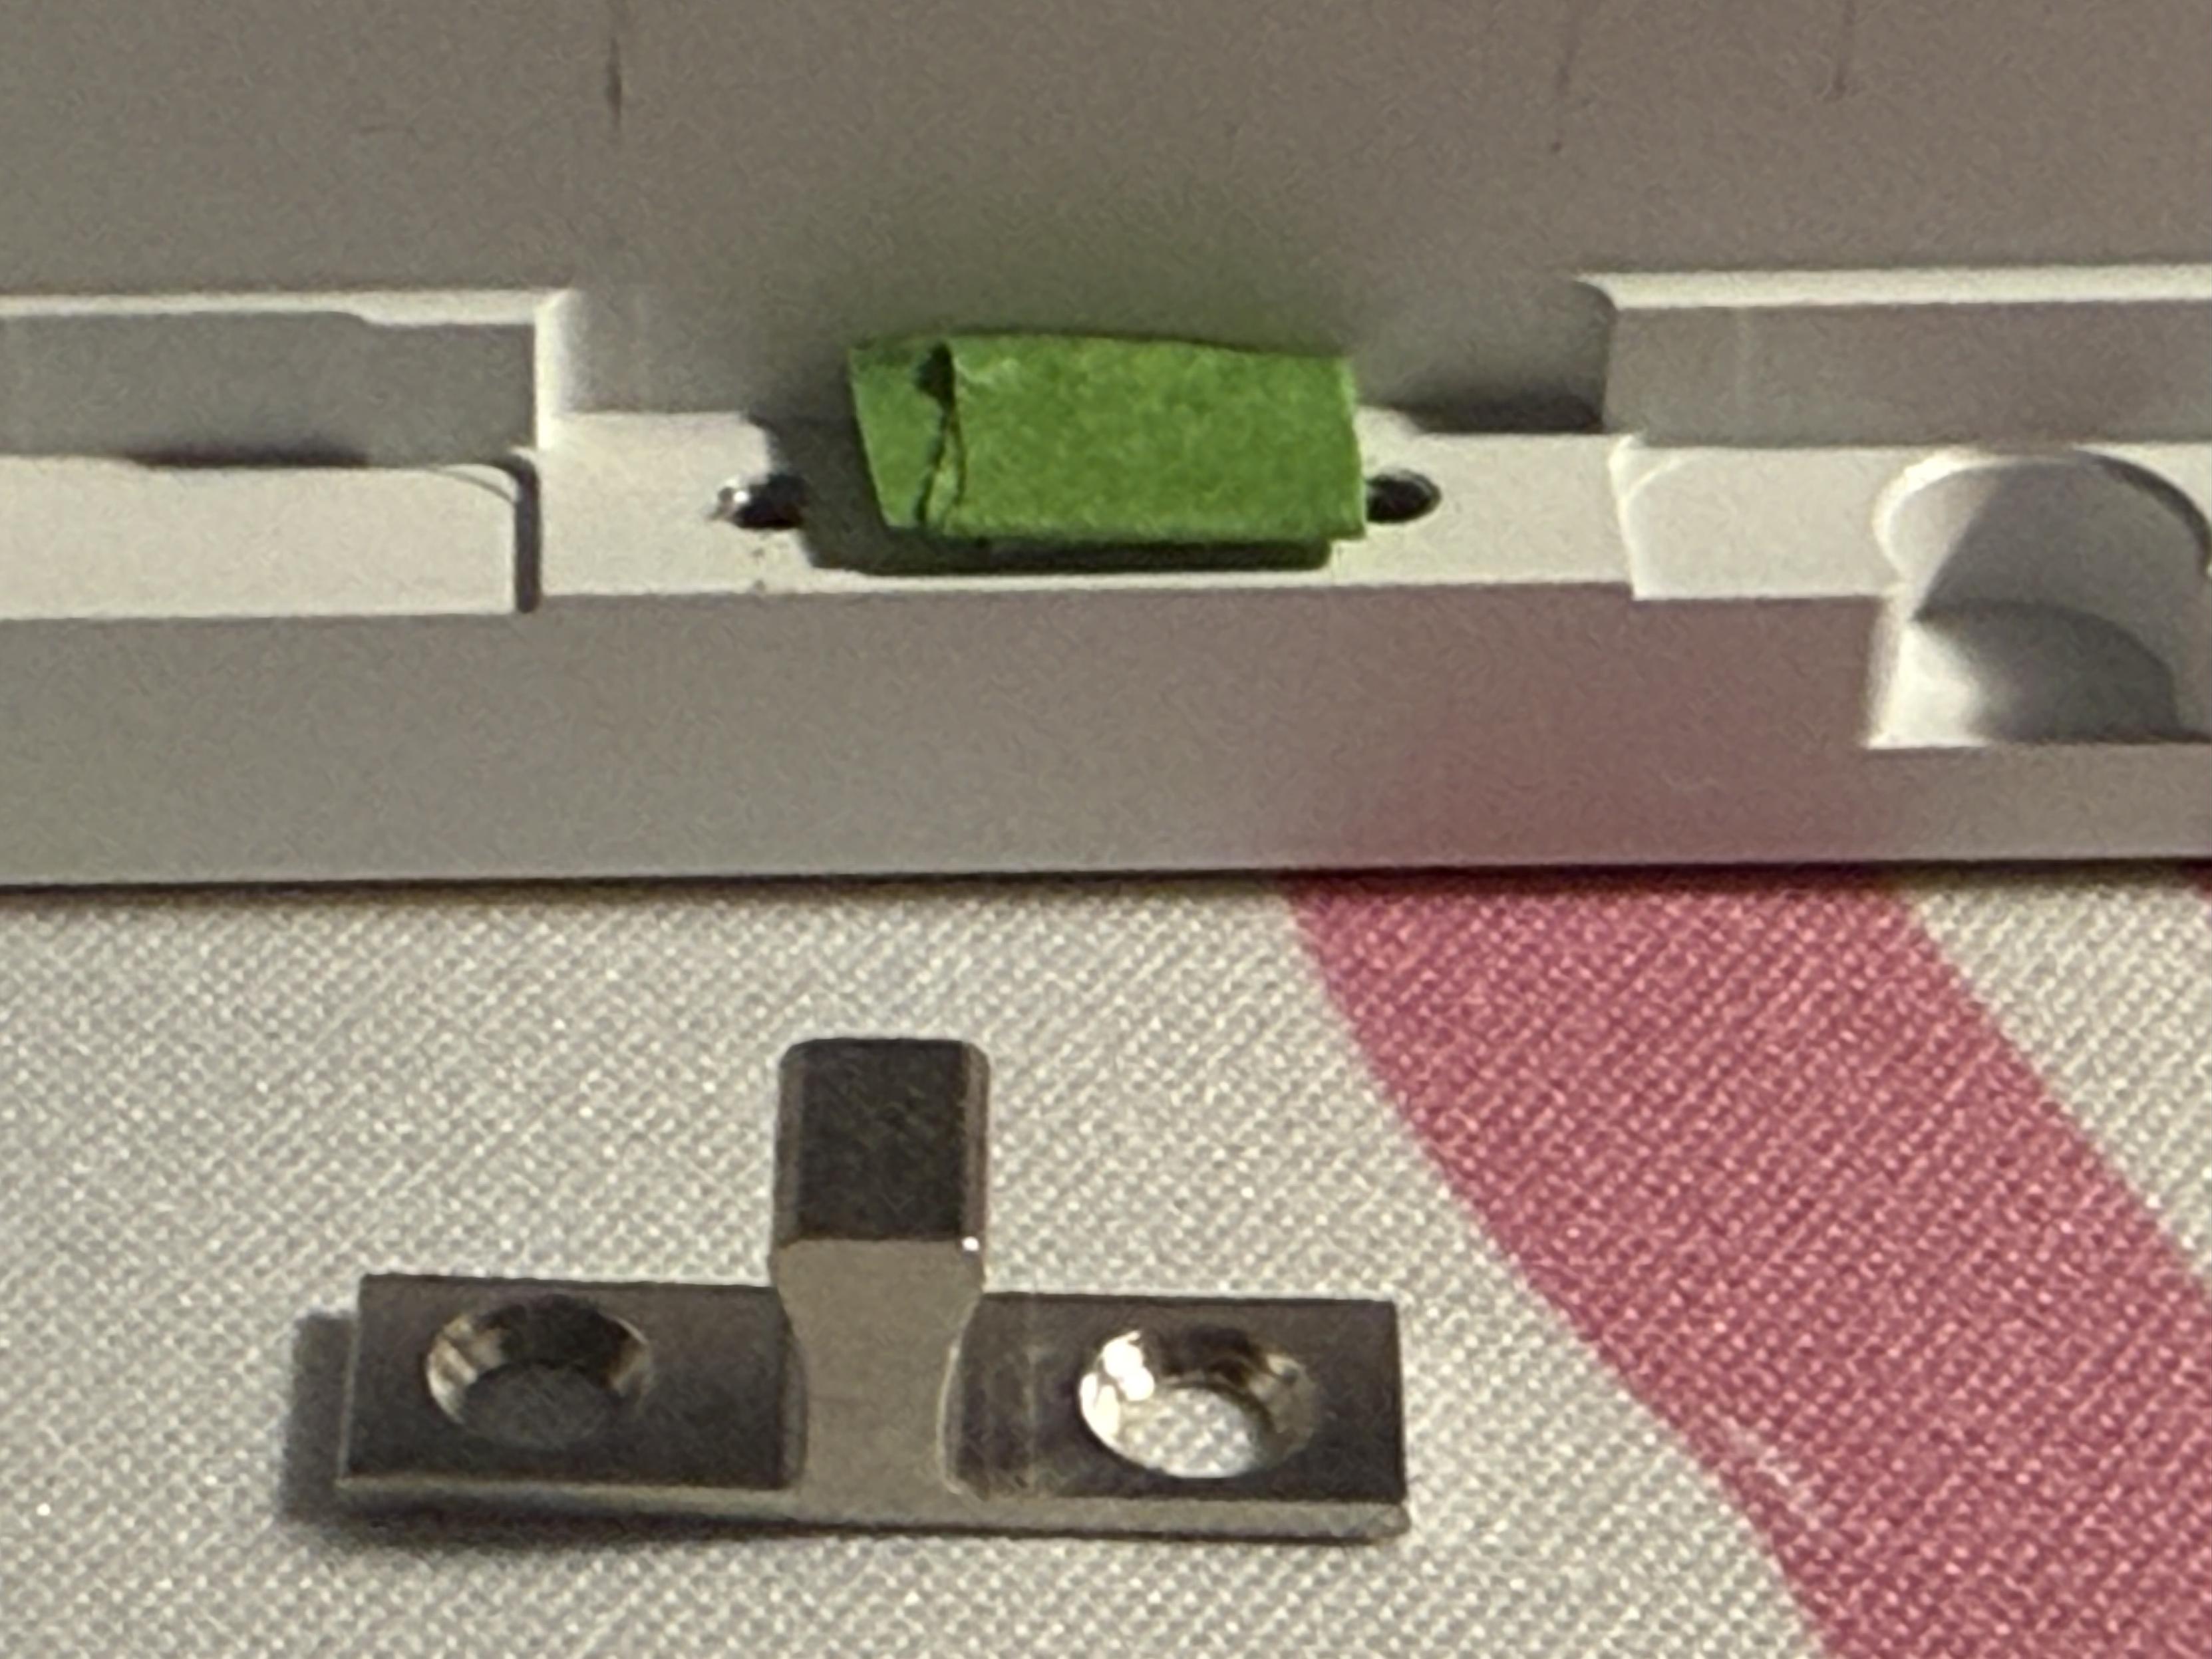
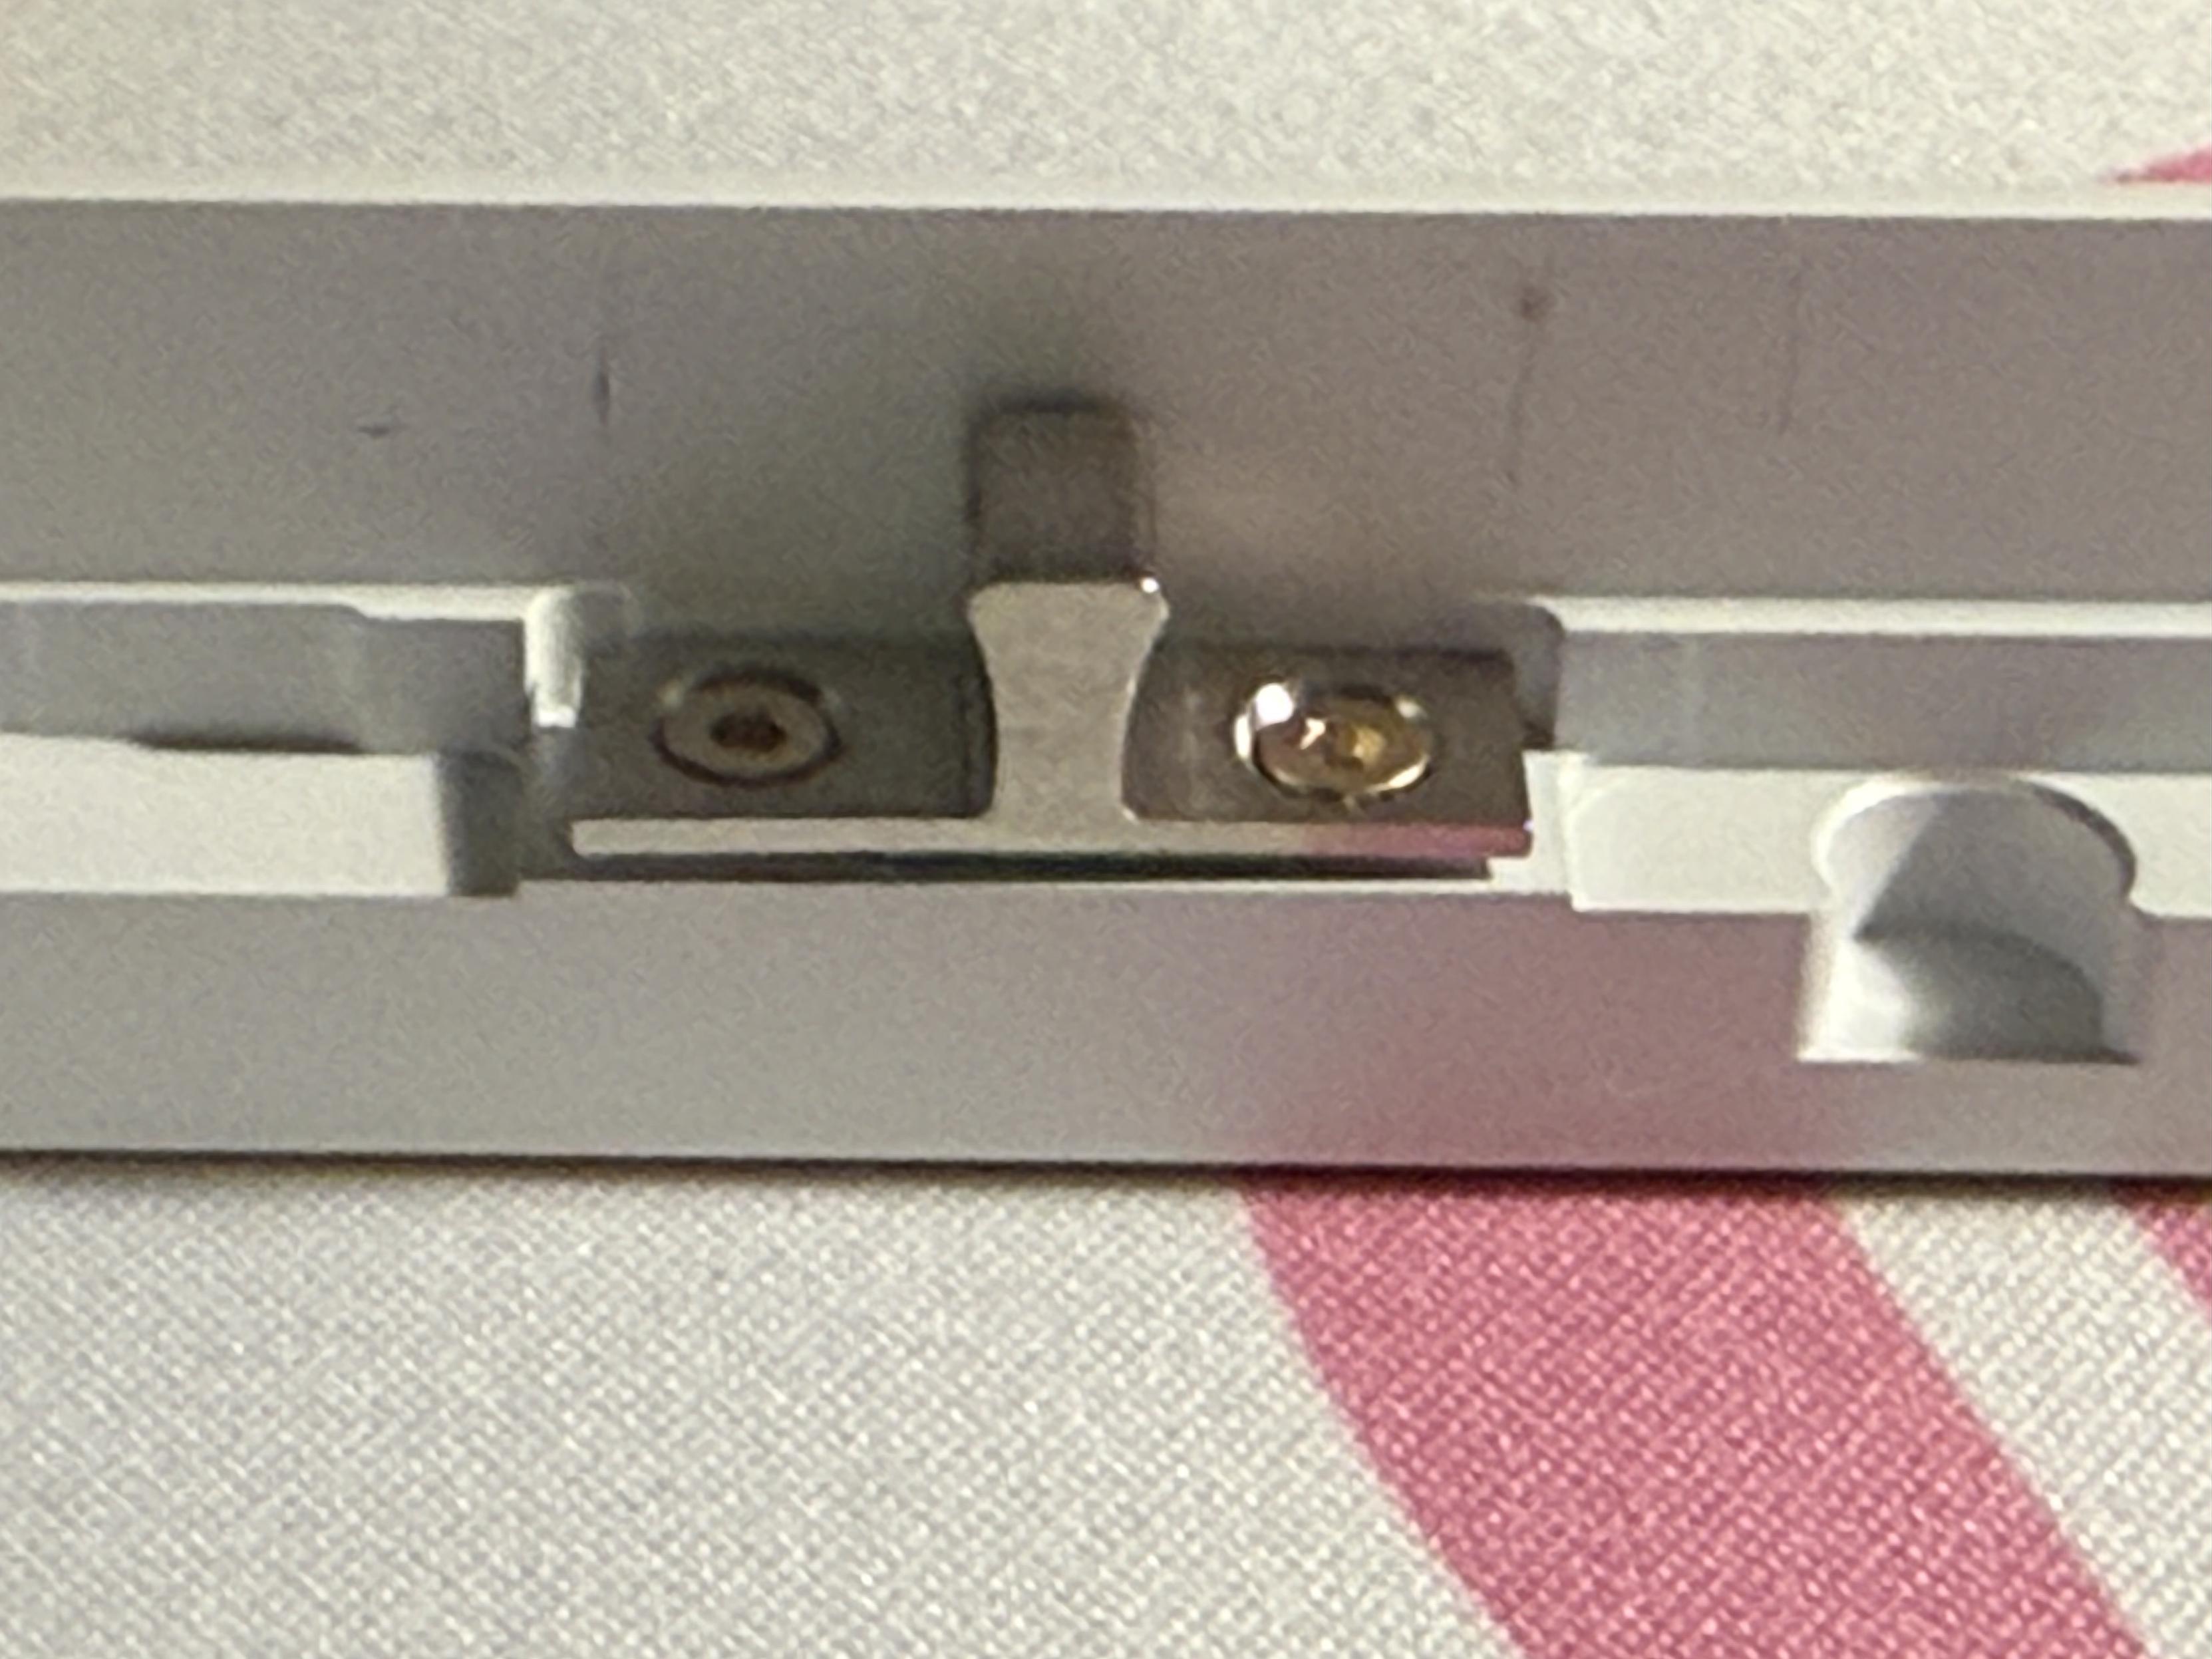
What the firmware didn’t fix was battery life, and I fell down rather a large rabbit hole trying to figure out why. In the Meletrix Discord a user had casually implicated the LCD modular as the culprit, and I figured that I am (if not uniquely) at least somewhat qualified to test that. I grabbed myself a couple of INA current sensing breakouts, a bunch of FFC debug breakouts, cables and other sundry bits and bobs and set about reverse engineering the LCD so I could find where to connect power and how to turn it on.
The result was catastrophic, since my over eager efforts to trace every pin from the FFC connector to its corresponding place on the LCDs tiny Artery AT32F MCU resulted in a very, very dead LCD modular. Thankfully Meletrix are nothing if not supportive of community efforts to improve their products, and they sent me not one, but two replacement modulars to experiment with. One went straight into my drawer for safe keeping, and the other was attached to a bizarre mess of Raspberry Pi Pico powered debugging equipment.
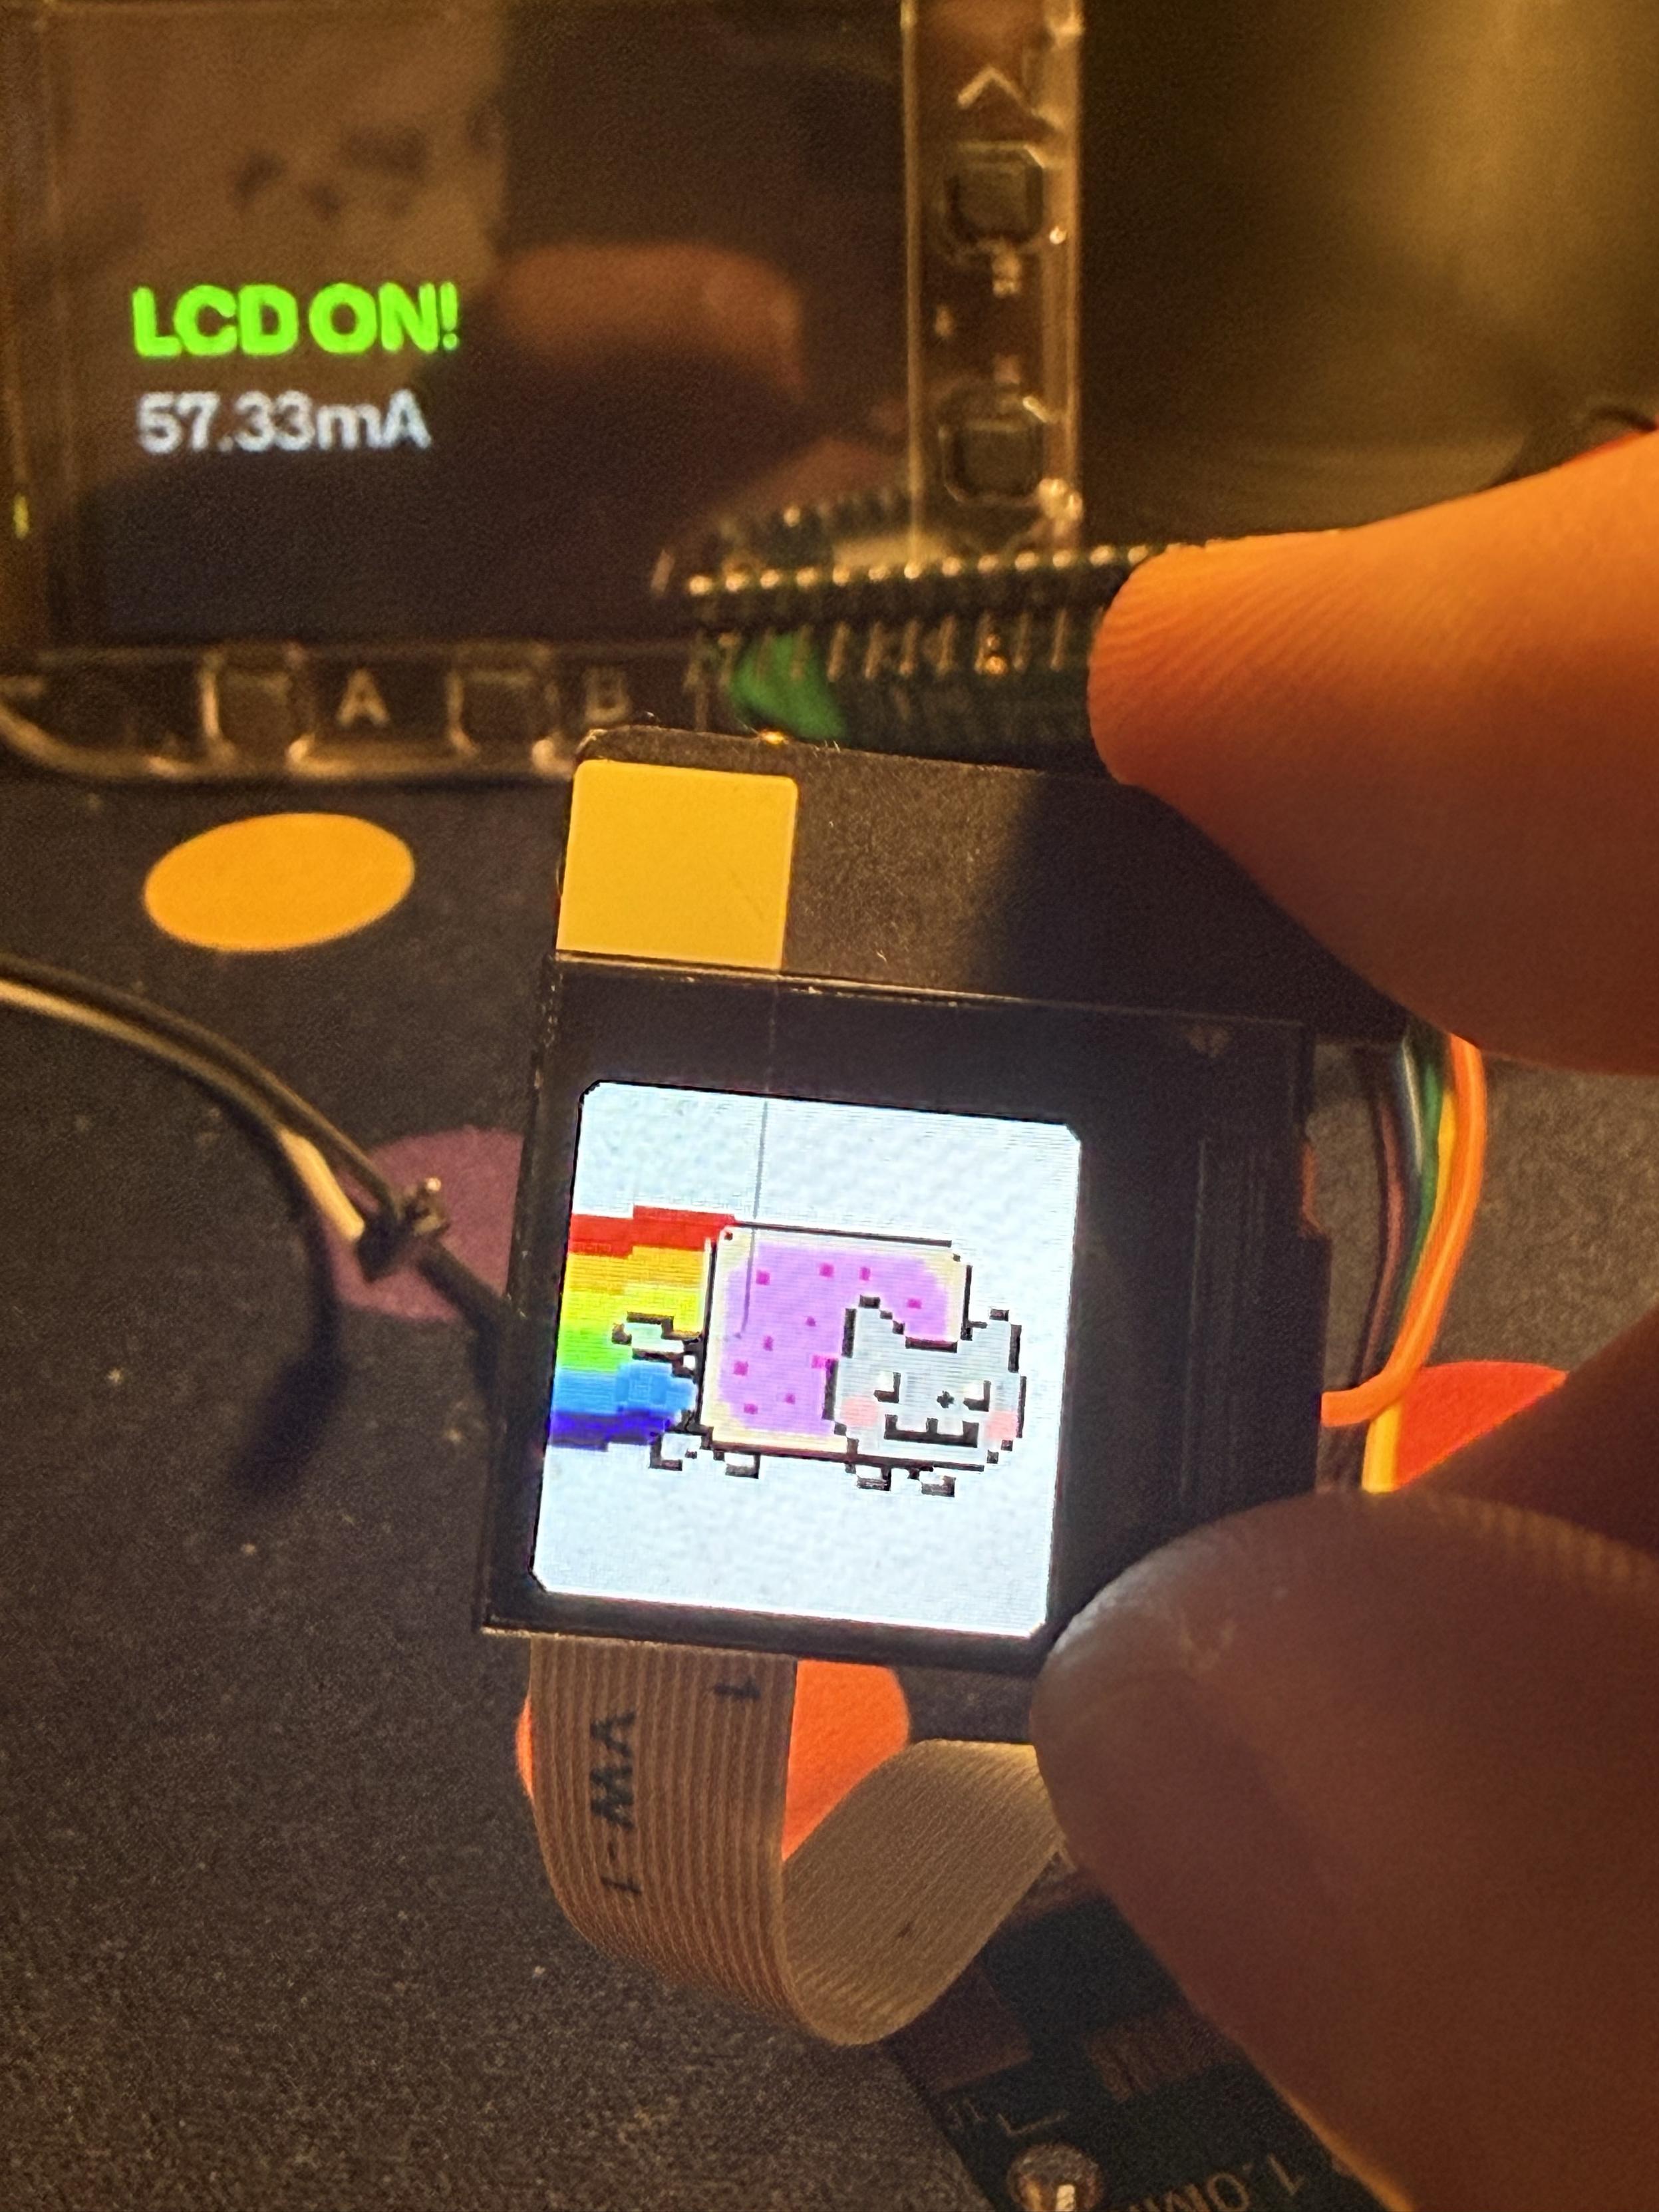
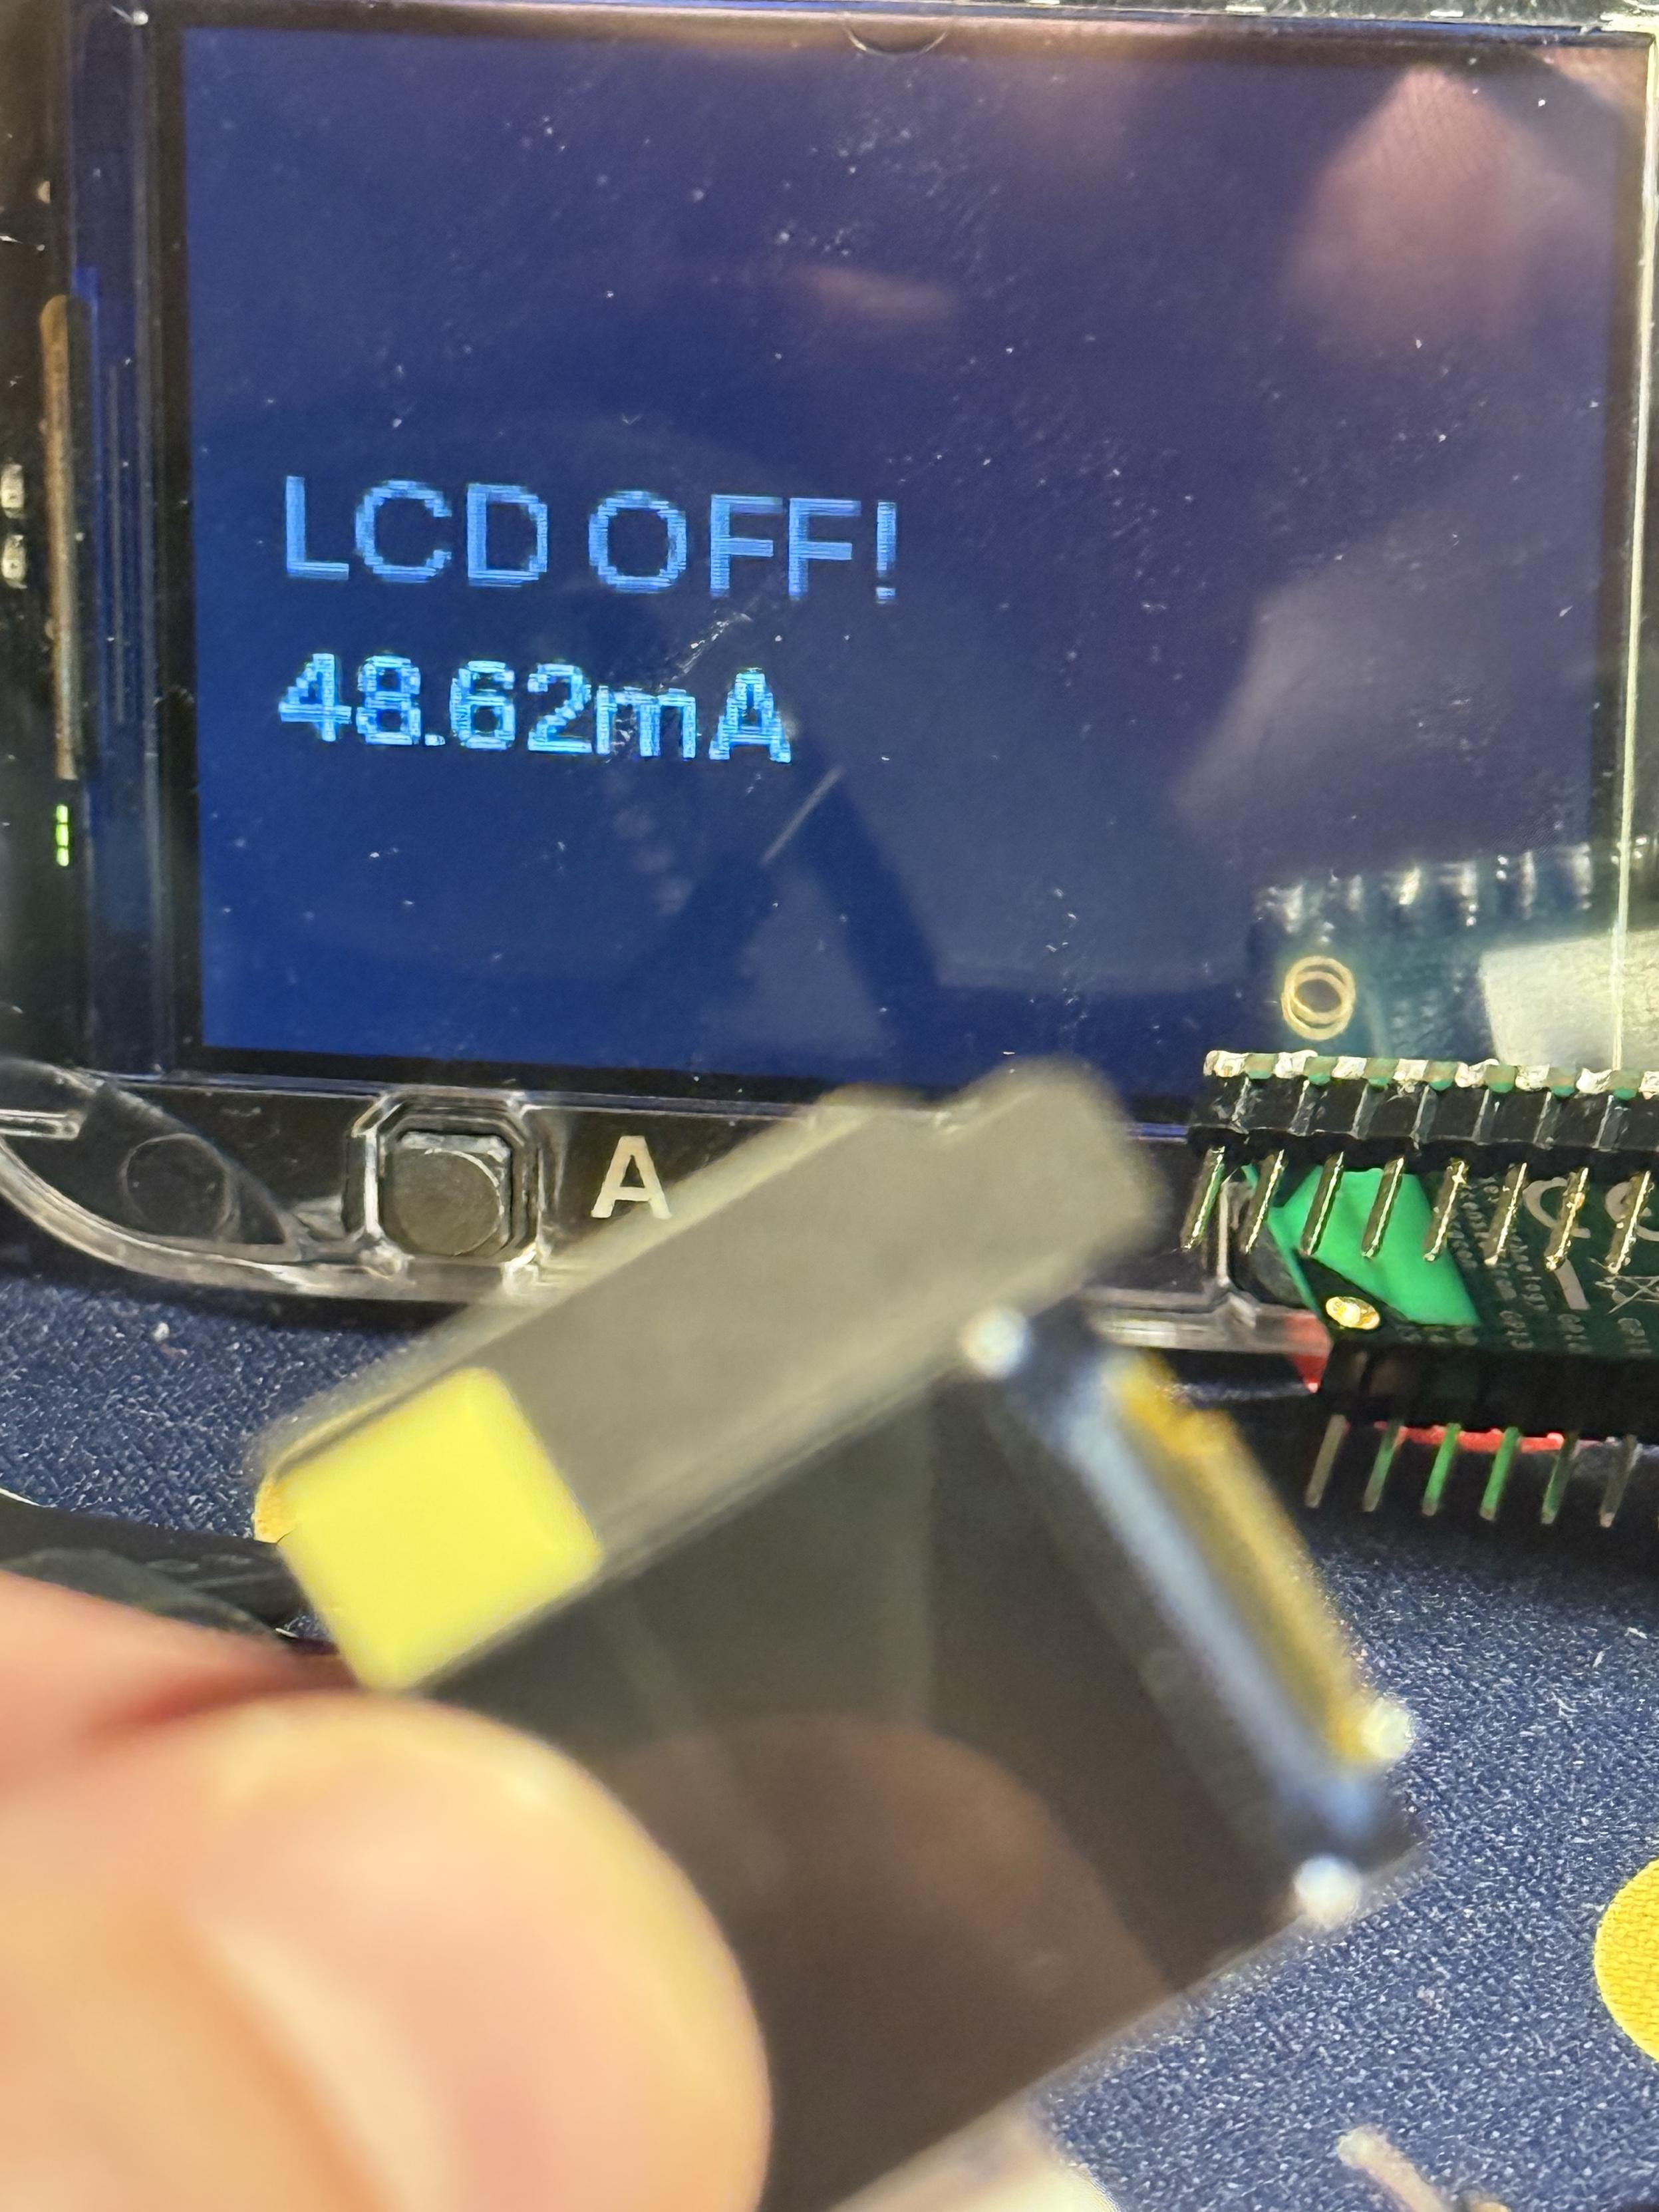
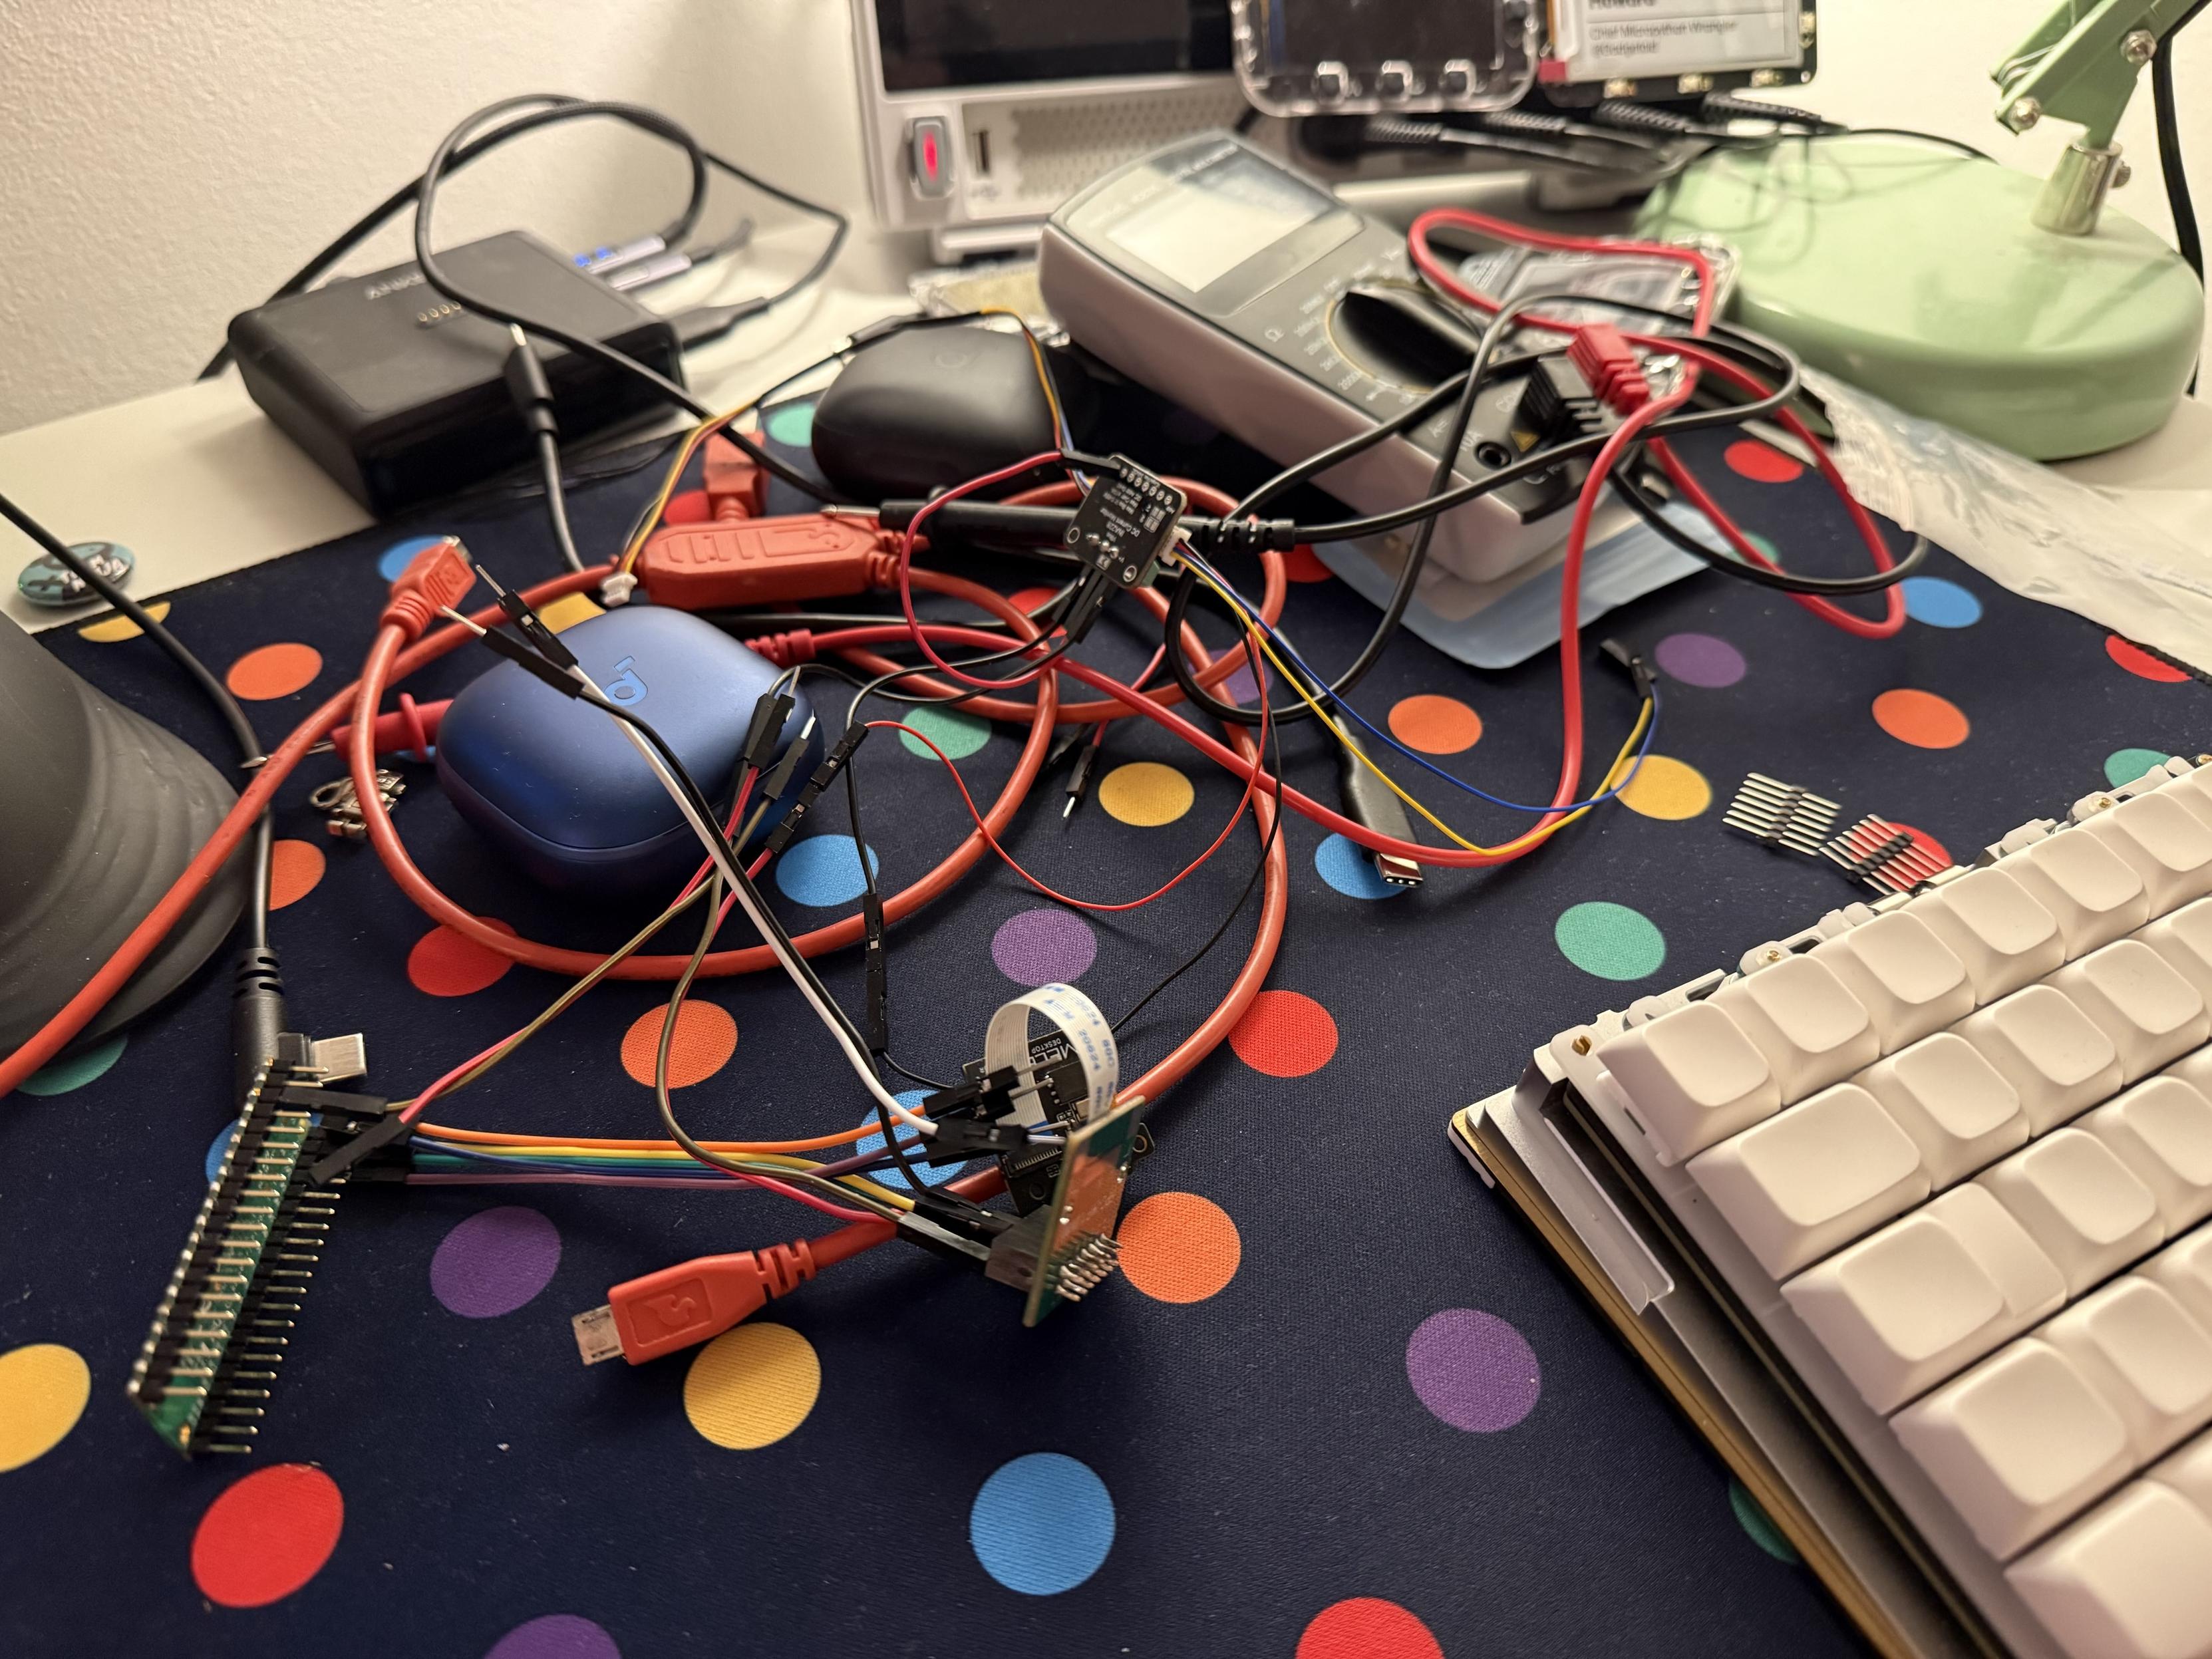
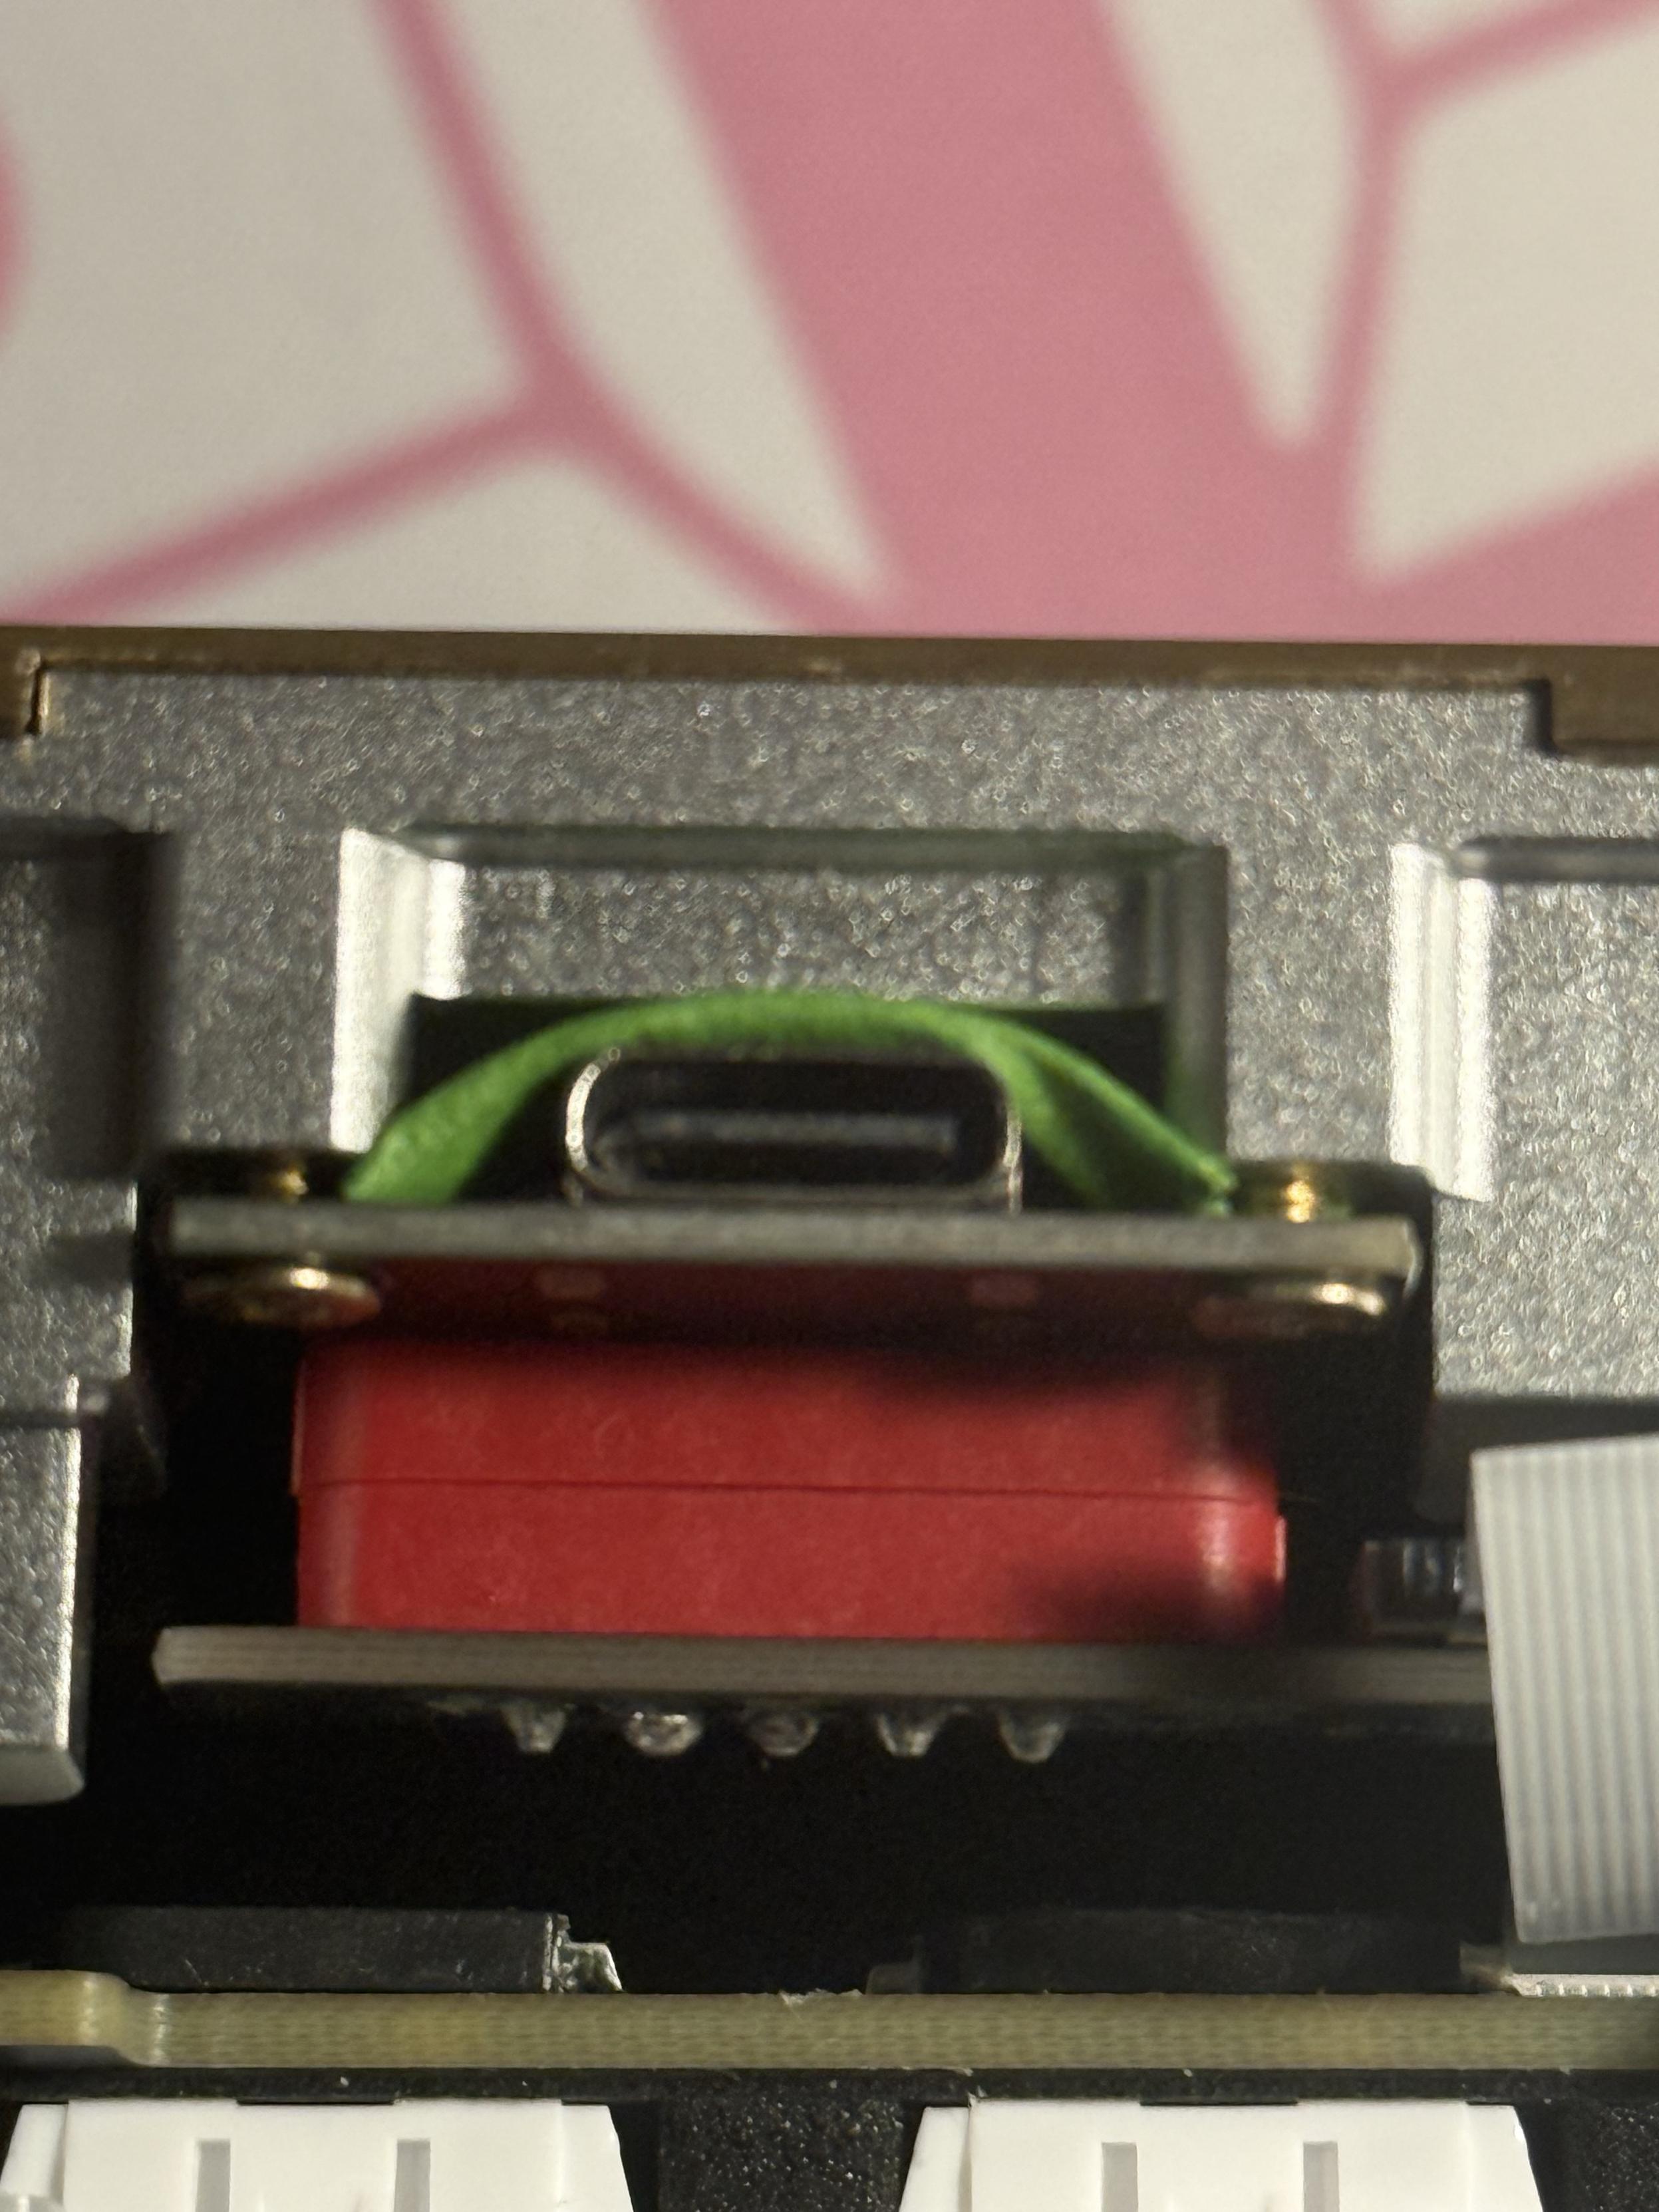
I might have gone to extreme lengths to diagnose the LCD power consumption!
I had leaned on the reverse-engineering efforts of others and managed to attach the UART of a Pico to the UART pins on the LCD modular FFC connector, and capture the commands that the keyboard sends to turn the LCD modular on and off. By replaying these commands from a Pico I was able to measure the power consumption of the module while it was on – where it sat around 53mA – and while it was off – where it still chewed through 47mA. These sound like small numbers, but when you consider the target off (or quiescent, if you will) power consumptions I’m used to are measured in micro-amps (not milliamps) then you might start to see what’s wrong. If I tell you, plainly, that the best possible battery life with the LCD modular attached and nothing else drawing power is 4 days then you might understand why I had battery issues with the Zoom 65.
In theory it might be possible for the keyboard PCB to hold the LCD modular in “reset” which drops power consumption down to 17mA (at this point I assume that the LCD is still “on” and the flash too, probably) which would extend the maximum theoretical battery life to 11 days. Still not great, but better. While this may be possible, I wouldn’t hold out hope of Meletrix issuing a firmware update, and holding the LCD in reset when it’s off would also have drawbacks – the LCD forgetting its position, for example – that might be tricky to work around. Right now, if you have a Zoom 65 v3 or are interested in getting one then the best possible improvement you can make to battery life, next to turning off the power hungry backlights, is to open up the case and disconnect the LCD ribbon cable. There are better LCDs out there you can sit on your desk and I’ll gladly sell you one.
Overall
With my fine-tuning, and the LCD modular removed the Zoom 65 V3 ended up a mainstay on my desk for quite some time, until I had to push it aside for some other boards. It’s a board I still love going back to, and I keep it handy when I want a compact board with a lot of bounce.
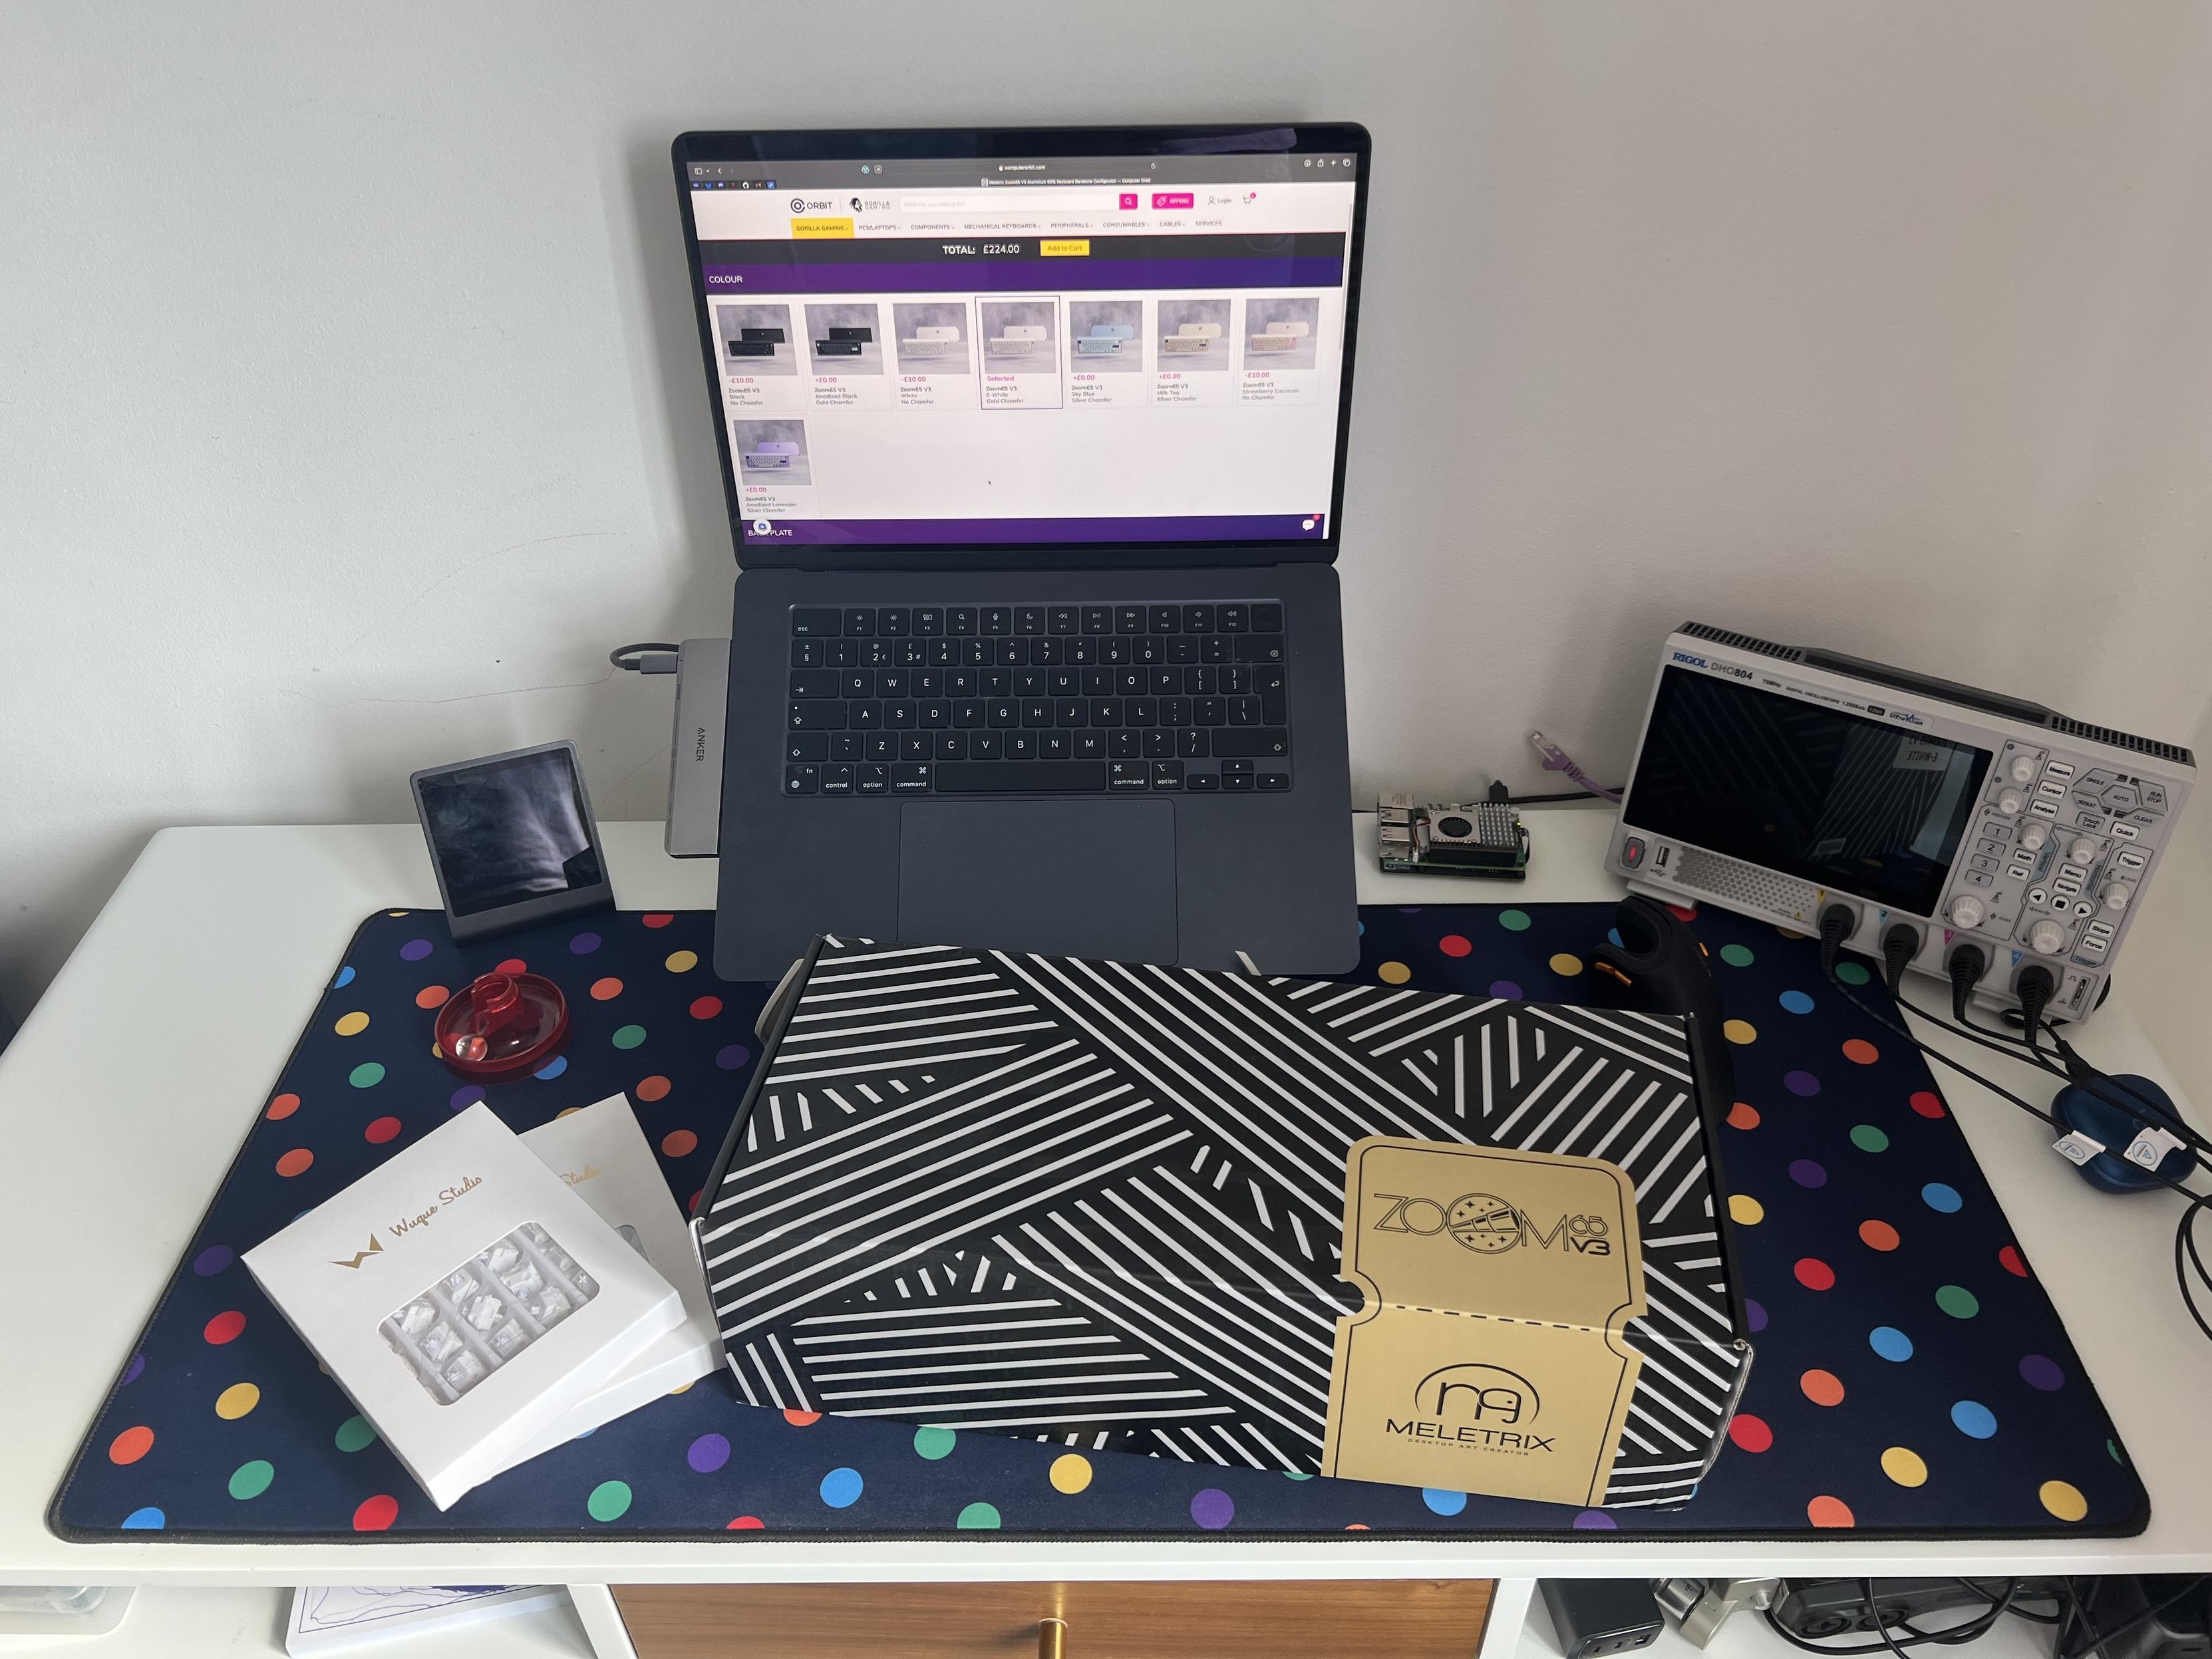
It’s always a good day when a new keyboard kit shows up!
Since it’s my first kit I can’t really place the complexity or quality in the wider market, but I enjoyed assembling it- though I rushed a little- and more so enjoyed making my little customisations and futzing with the LCD modular. The “hobby” of keyboards is very much broader and deeper than “slap it together and you’re done.” If you’re a beginner and you want somewhere interesting to start then you can’t go too far wrong with a Zoom65 V3, but you might also want to consider some flavour of Neo65 or Meletrix’s new Zoom 64.
If you’re interested in hall-effect switches there’s also a HE module for the Zoom65 V2 – https://meletrix.com/products/zoom65-v3-he-module which should pair nicely with Wuque Studio’s own Flux switches, which I reviewed back in September (2025).