KiiBOOM Phantom 81 Lite
KiiBOOM’s Phantom 81 Lite is an interesting beast. At a glance it looks like a wild detraction from the unique and considered designs that KiiBOOM typically put out. But its unassuming, clean plastic exterior hides an awful lot more than you might first think.
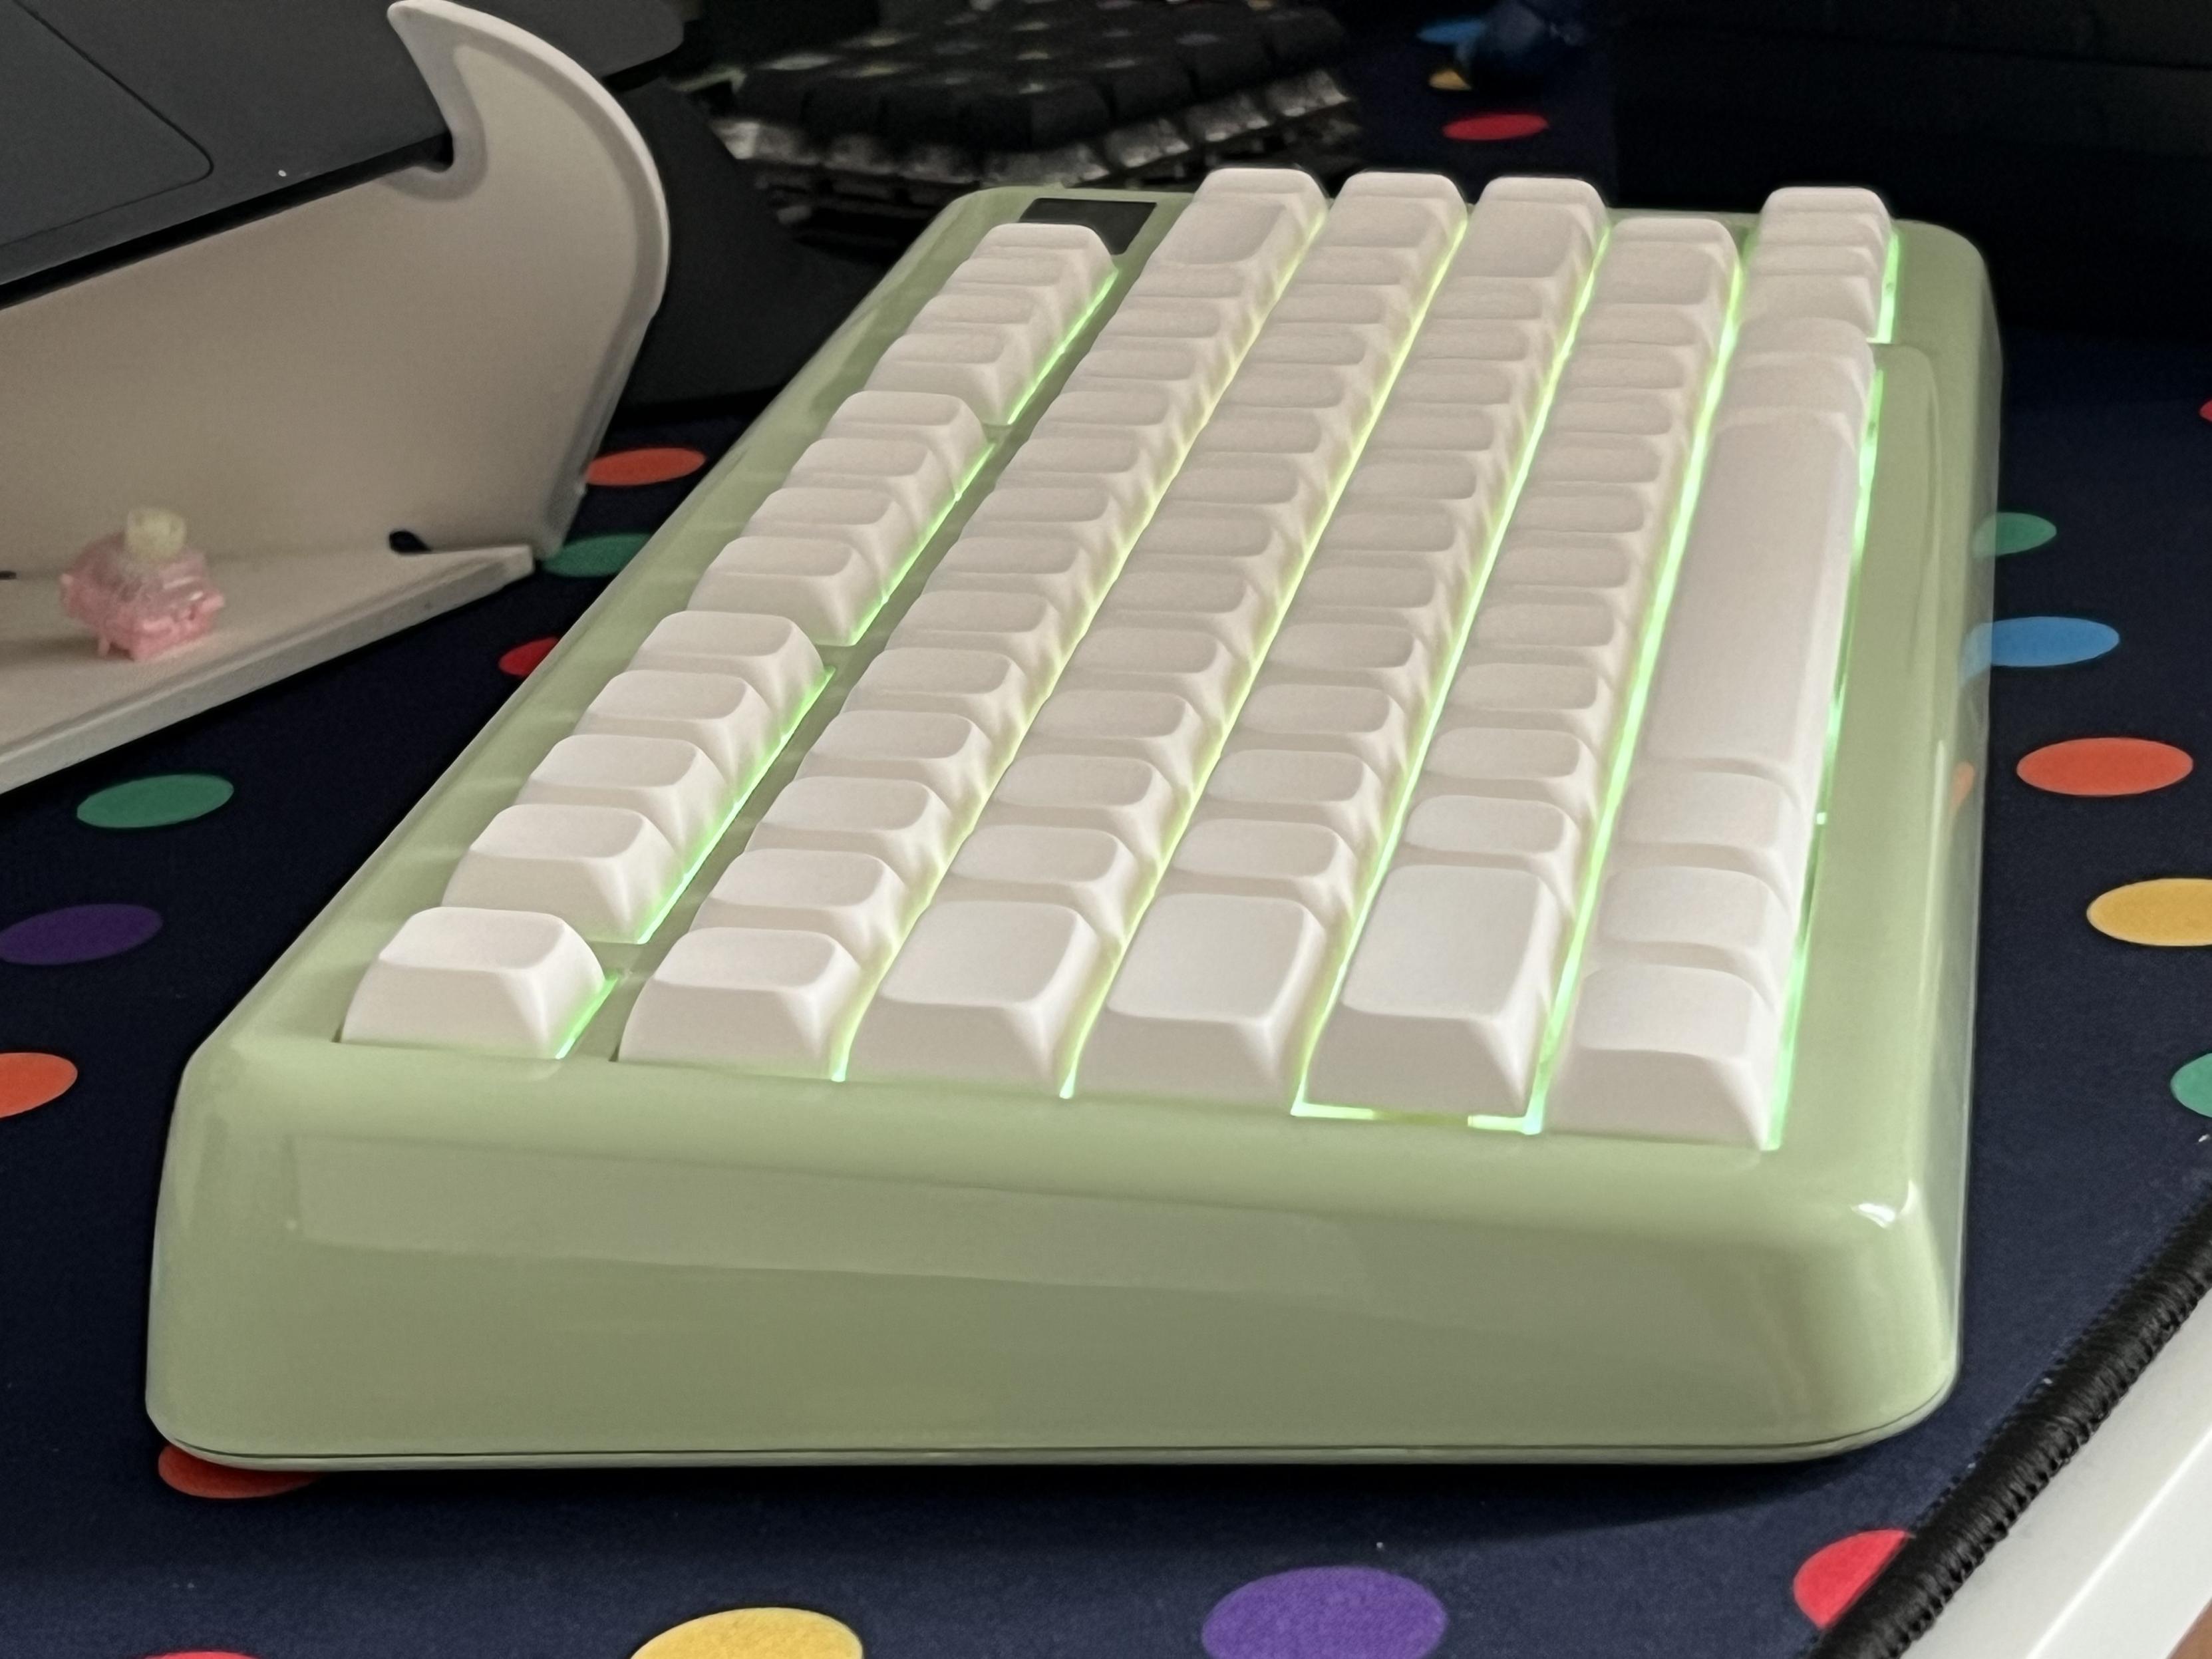
Before I get ahead of myself, however, let’s take a look at the Phantom 81 Lite at face value. KiiBOOM supplied me with the “green” variant for this review, which is a delightful shade of pastel green with silly frog-themed Moa keycaps to match. Their lineup consists of a White and a Black variant, each with Cherry keycaps (the kind you’re probably familiar with) and a Blue variant with Moa (uniform, with a much softer shape) keycaps which joins the green one I’m writing about here.
In all cases you get a very clean, understated opaque, gloss plastic enclosure which feels wildly off-brand for KiiBOOM. The cute Moa keycaps and the translucent caps on the black variant in particular add a touch of classic KiiBOOM flair.
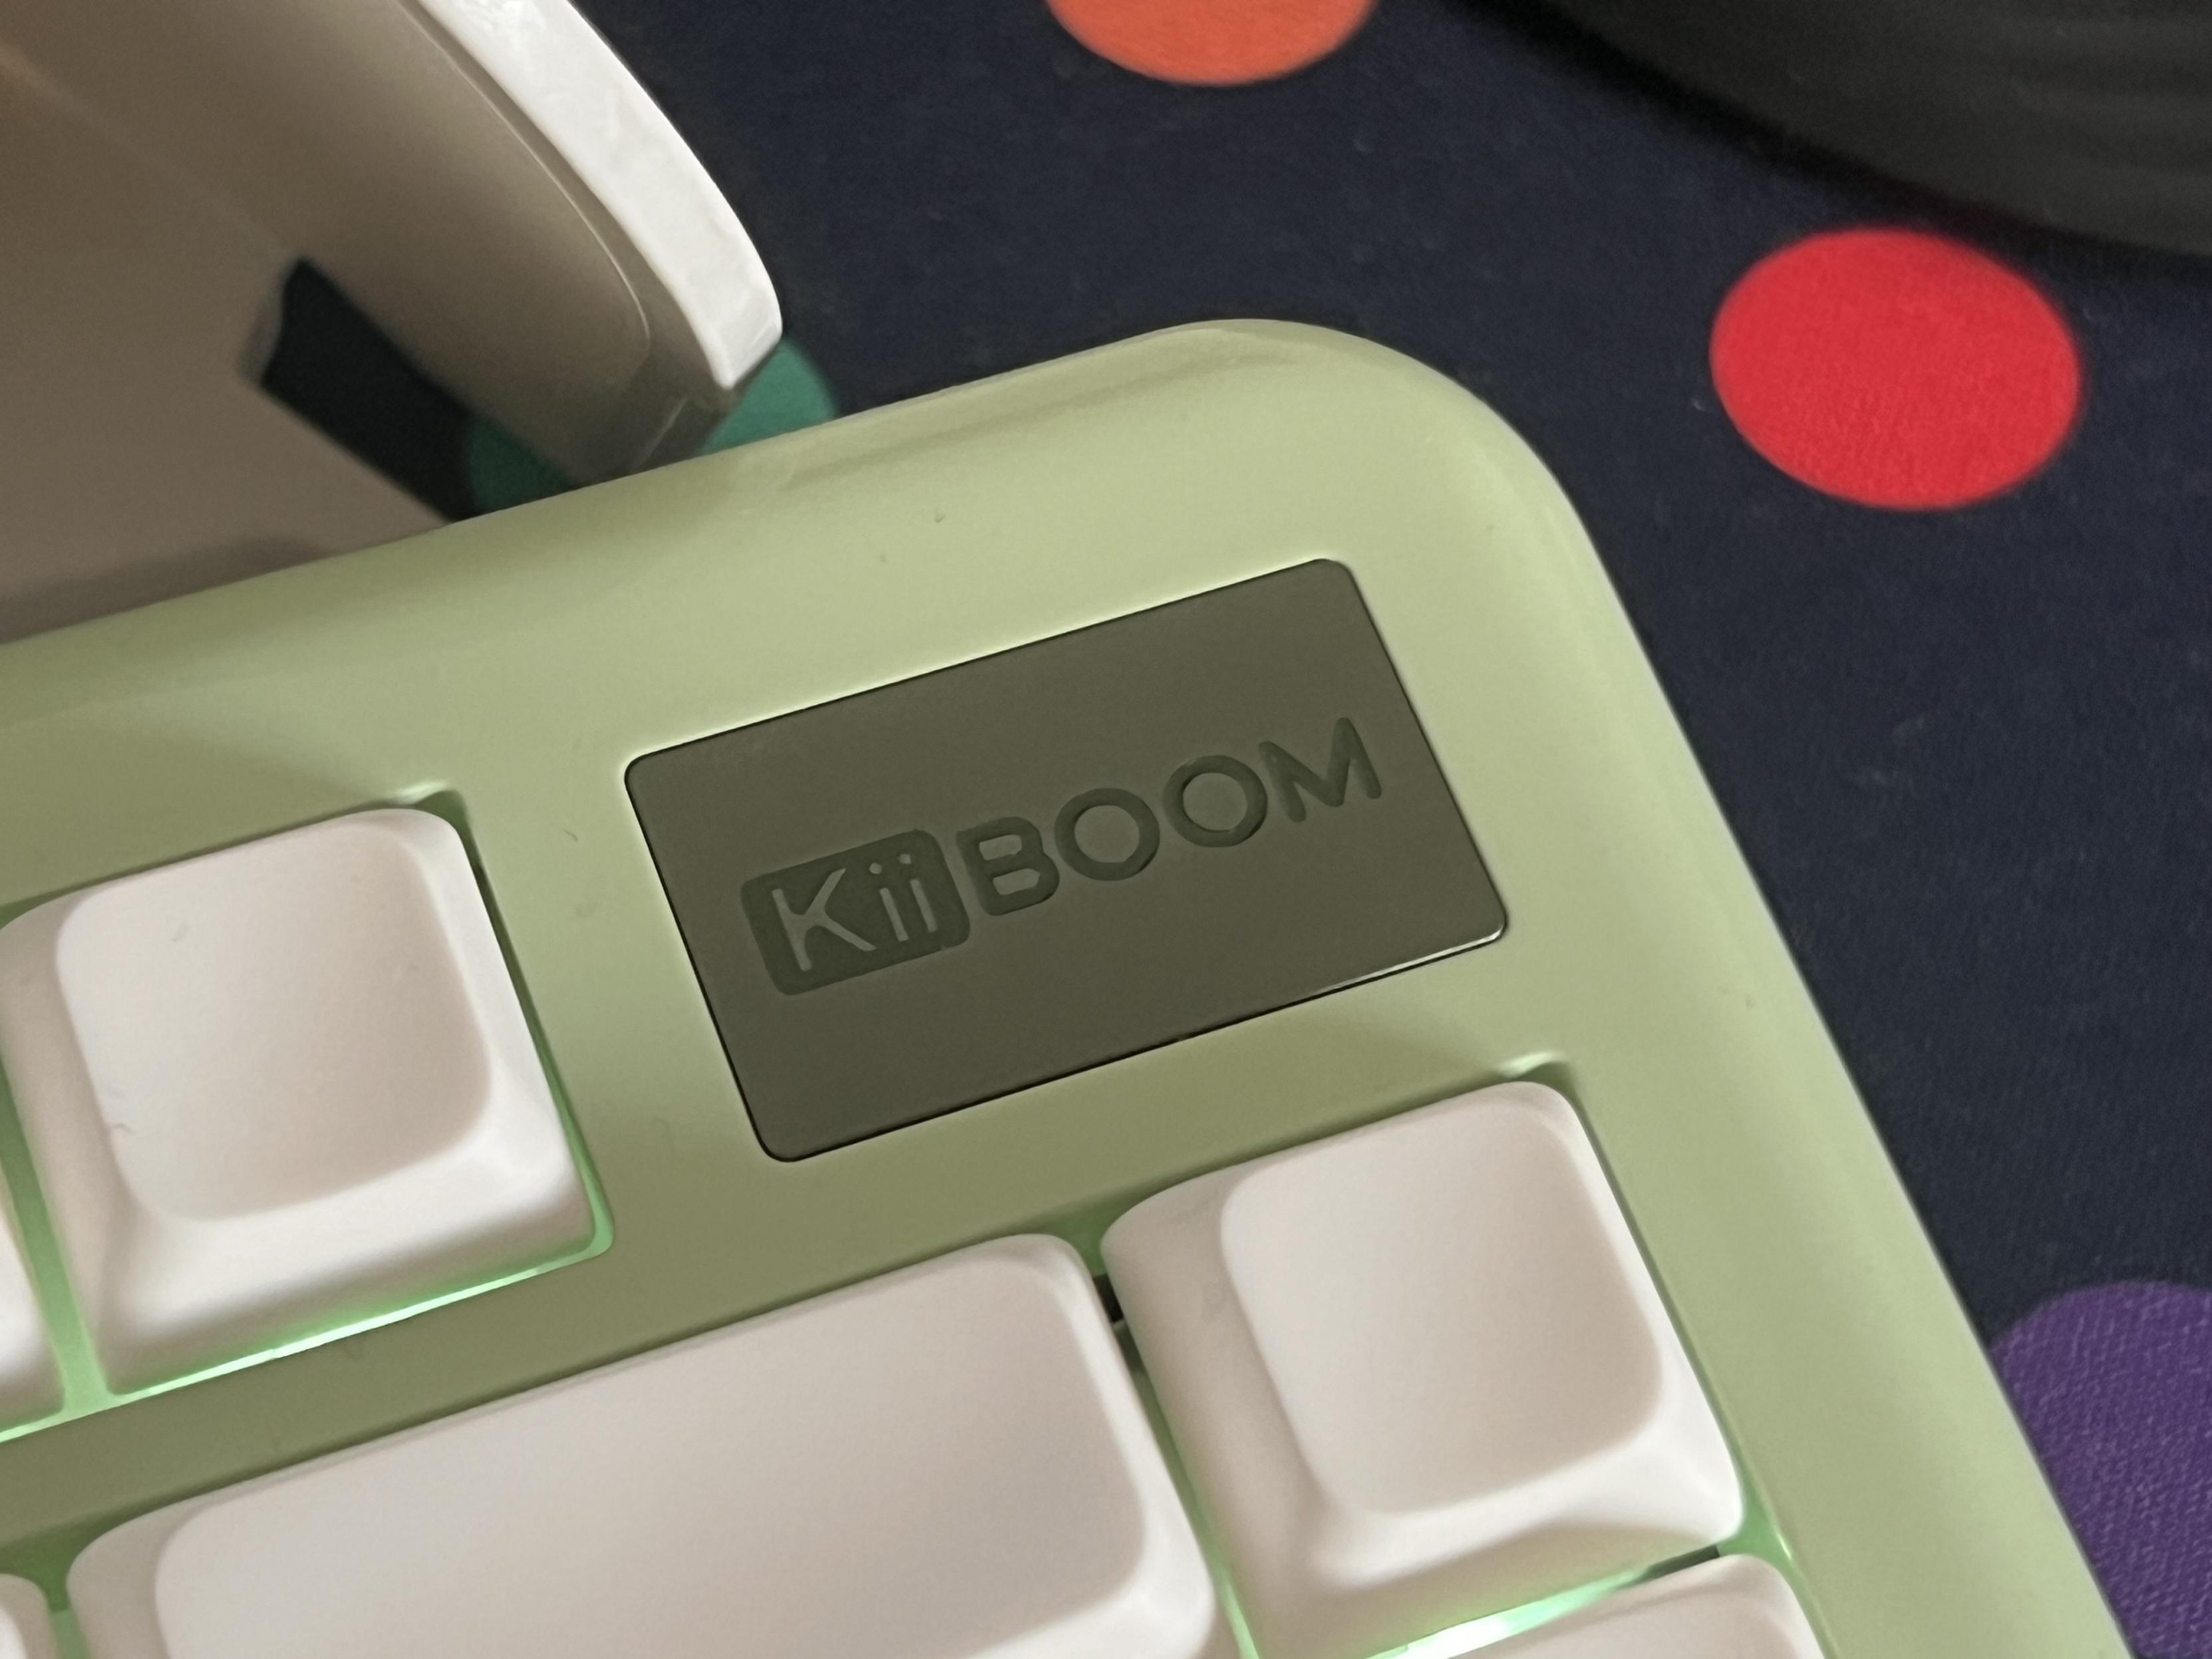
The clean simplicity of this badge, plus the way it totally matches the green board is just *chefs kiss*
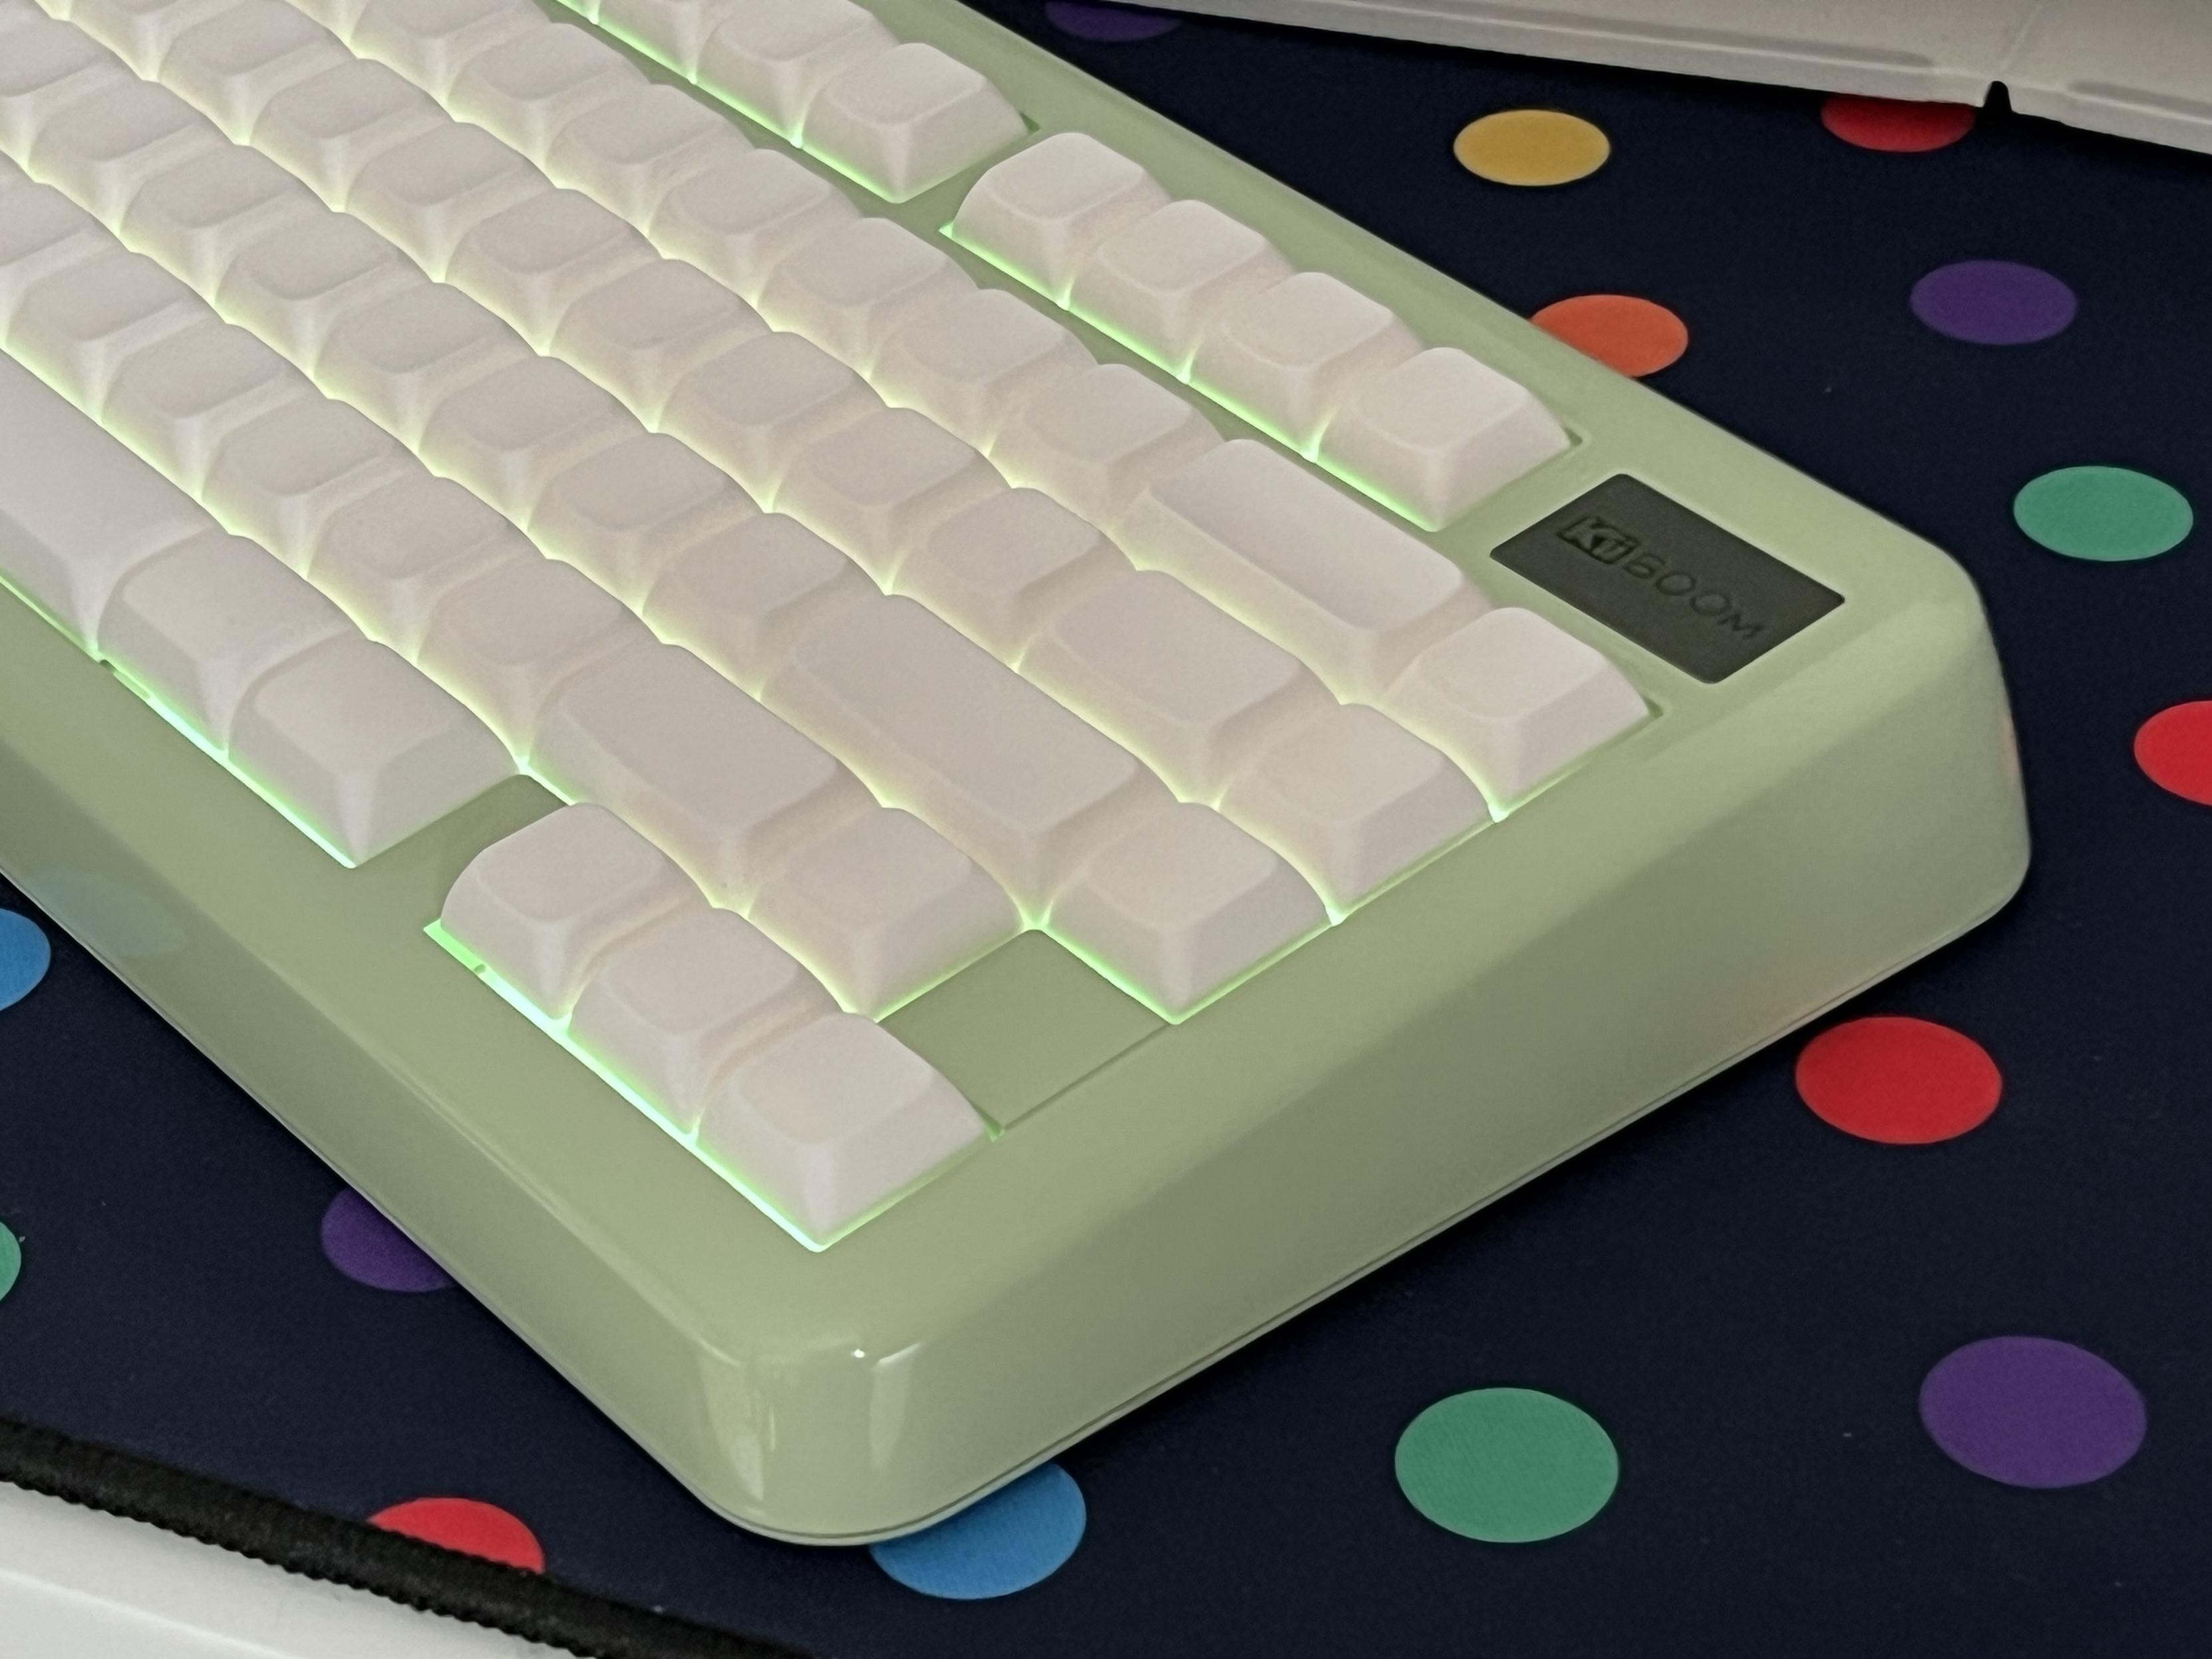
While it’s plastic the enclosure is curvy, clean and free of clutter. All variants include a nice metal KiiBOOM logo badge in the top-right corner and curiously there are empty LED placements on the PCB which might have hinted at KiiBOOM considering lighting the badge. I’m glad they didn’t. The board has enough illumination; a full complement of south-facing key backlights, diffused pleasantly by the white polycarbonate plate. Even an unpopulated key, below Page Down and above the right arrow key, has its own backlight LED.

Clean and simple, just a mode switch and USB C port.
On the back edge is the USB type-C port, tucked right over on the left-hand side, and next to it the traditional tri-mode switch for 2.4GHz, USB and Bluetooth. There’s no Mac/Windows switch here, since that’s been moved to Fn + A and Fn + S (you know, A for WAndows and S for macoS…) and- honestly- I’m mostly fine with this, even though the switch could potentially be abused (by changing the layers in VIA) as a quick Work vs Gaming toggle. As far as I’m aware, Fn + A or Fn + S still serve this purpose, changing the base layer to either 0 or 2, and the Fn layer to 1 or 3.
The Moa keycaps are… fine… (note: I never even snapped a photo of them, oh well! KiiBOOM already have plenty.) if you’re used to a non uniform profile (keys have different heights depending on their row) then you might want to tilt the keyboard up slightly. Thankfully – the beauty of plastic boards – there are simple flip-out feet giving a total of three possible typing angles. I found the maximum tilt angle to be most comfortable. The right flip-out foot is joined by a little clip-in recess for the USB dongle, a neat little place to hide something that might otherwise get lost or require an ugly recess along the back edge of the board.
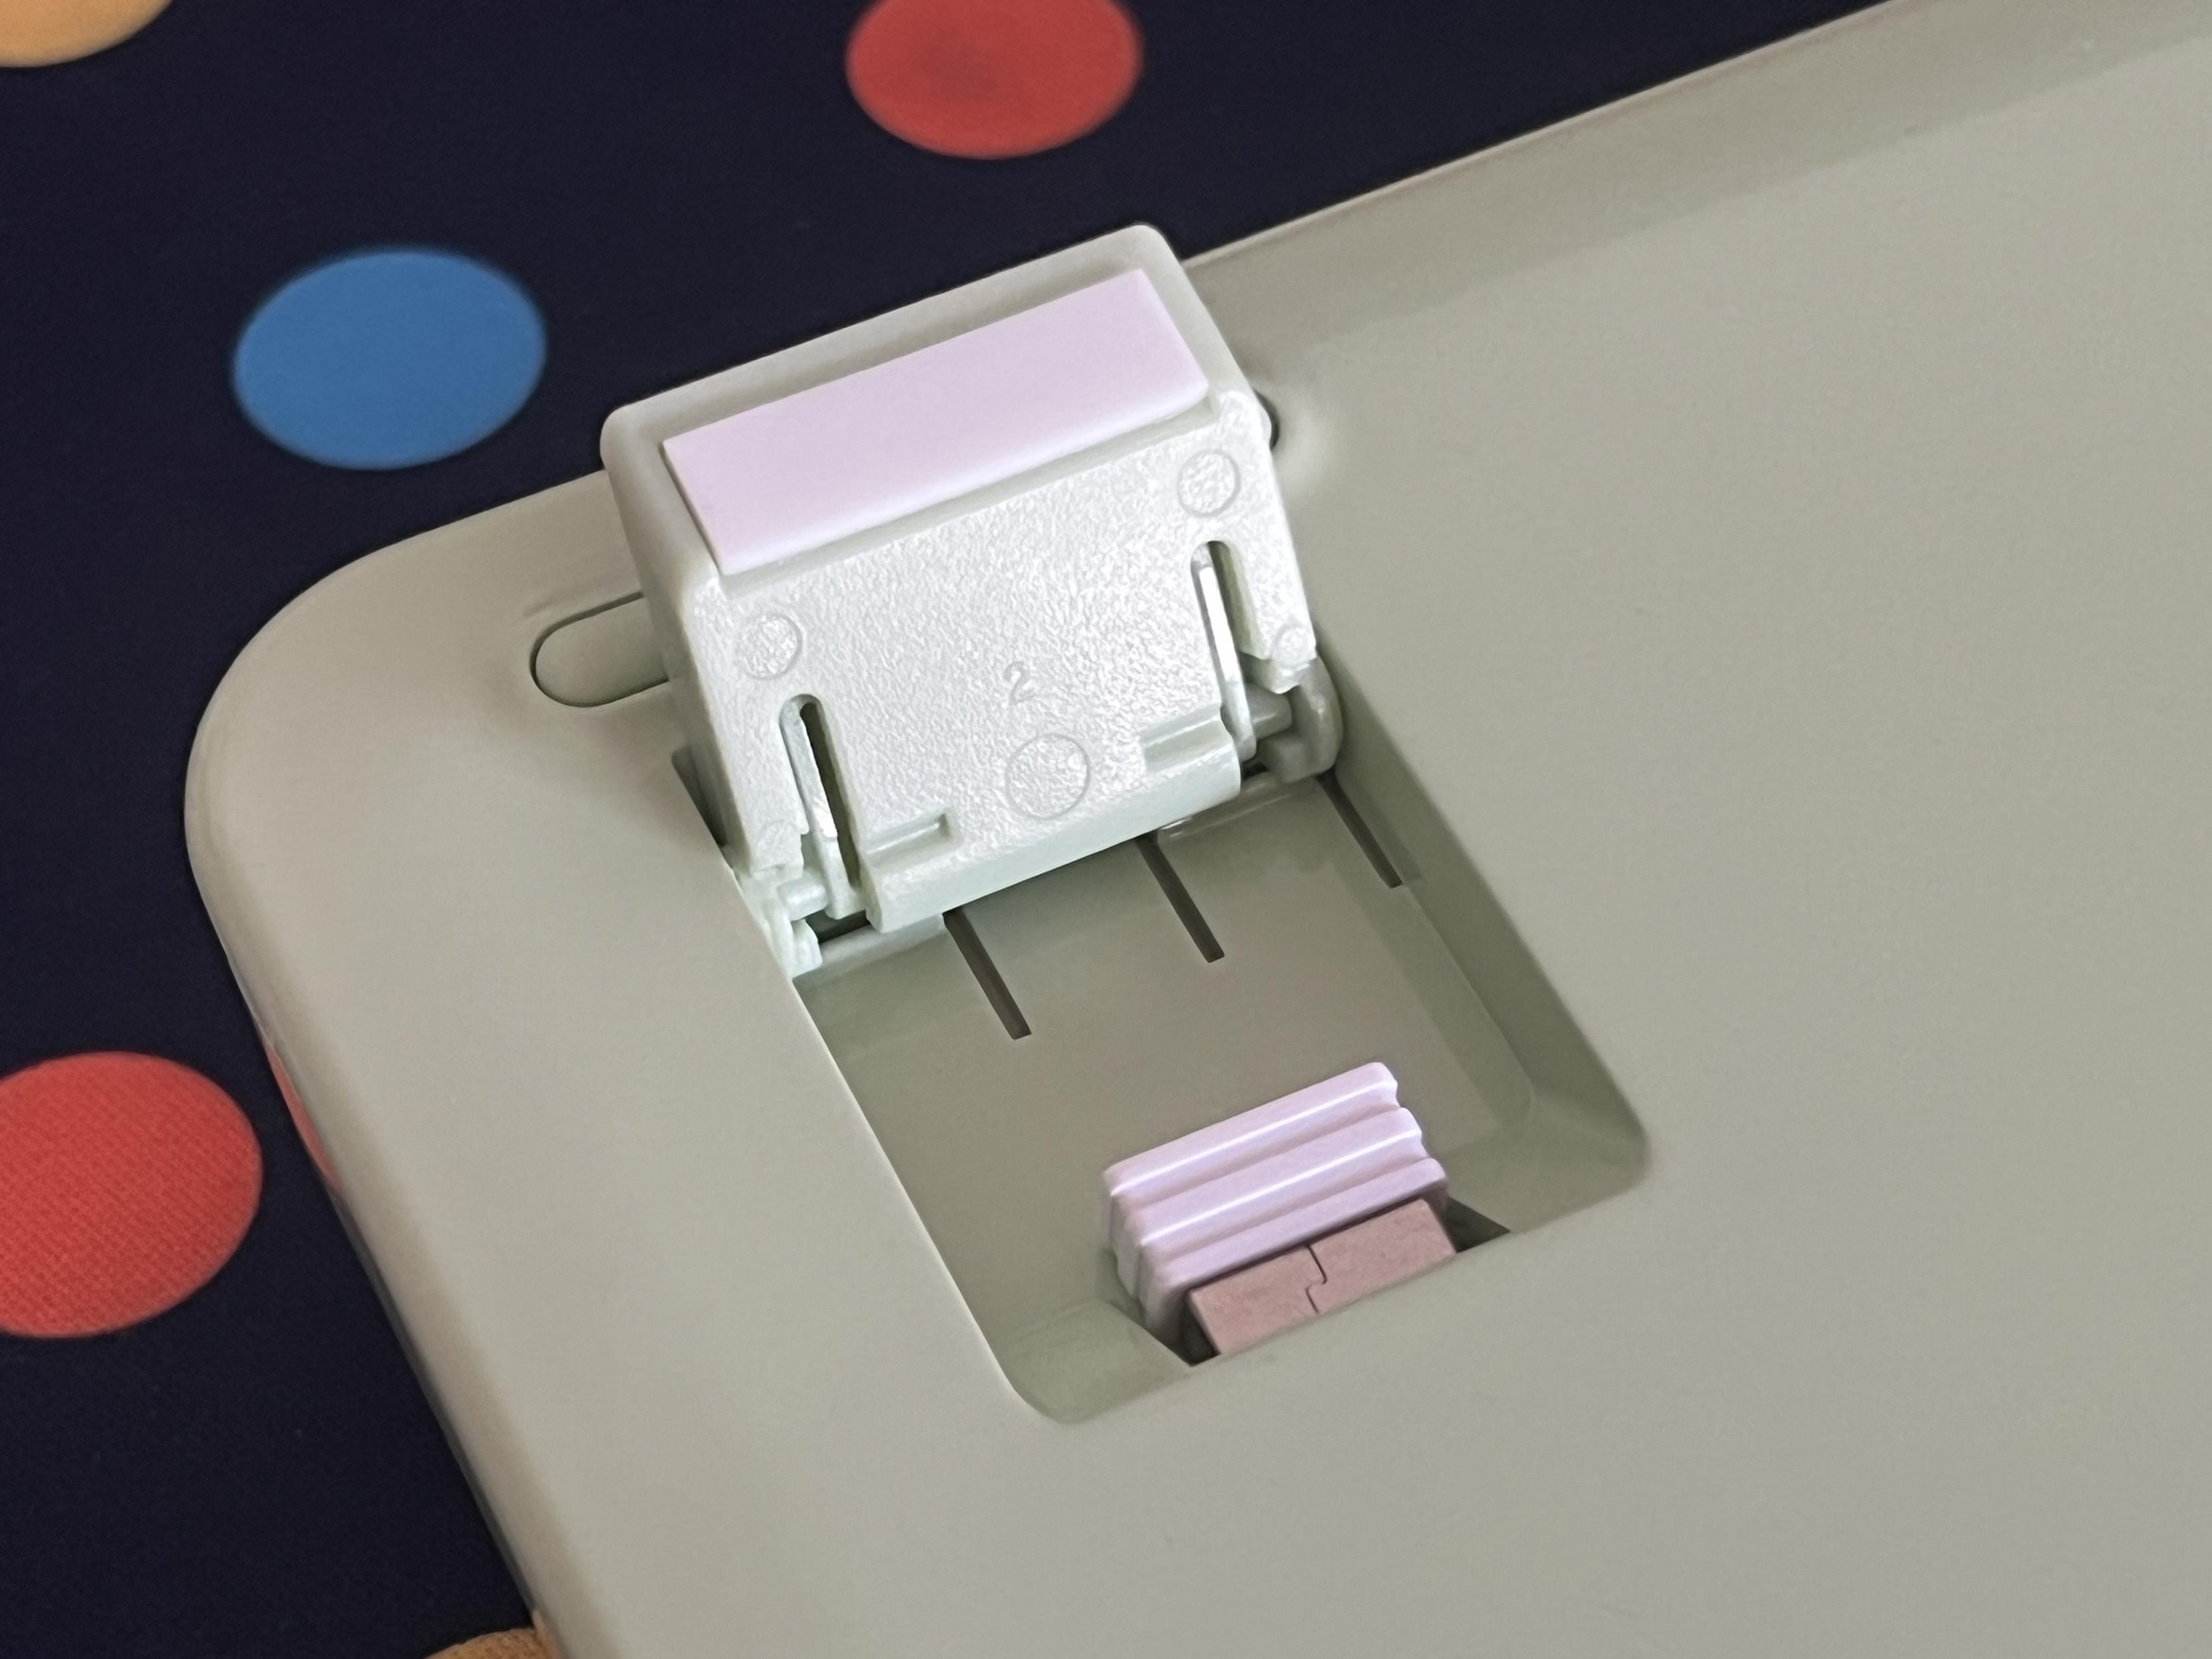
Plastic means flip out feet! But there’s also a nifty little storage slot for the dongle. A step up from clipping it to the USB cable.
Looking at the Phantom 81 Lite, you might be tempted to think it’s a bit naff, a bit plain, a bit basic. But don’t be fooled- its clean look and the simple, small considerations like the tucked away USB dongle, represent the kind of restraint and attention to detail that I rarely see but always appreciate. KiiBOOM have ascribed to the “less is more” principle here, and it absolutely works.
But this would all be for naught if it weren’t nice to type on, right? Well as I peck out this review on the Phantom 81 Lite I’m serenaded by the gentle clack of linear, “Mochi” switches and I reach two conclusions. For an entry-level mechanical keyboard, it’s not half bad. But it’s a touch loud for my preference- and, no doubt, that of anyone within earshot. Nonetheless, it feels nice to type on.
So it looks good, it sounds good and it feels good. But is it built good?
Build
The first hurdle when investigating the Phantom 81 Lite’s build quality is its screwless construction. Not entirely uncommon in plastic builds, it means instead of reaching for a screwdriver I’ve got to dig out my kit of pry tools and grow an extra three hands.
My initial attempts at prying it open were unsuccessful, so I did my usual run-my-finger-firmly-along-the-rubber-feet-underneath to satisfy myself that there were no hidden screws; there were none.
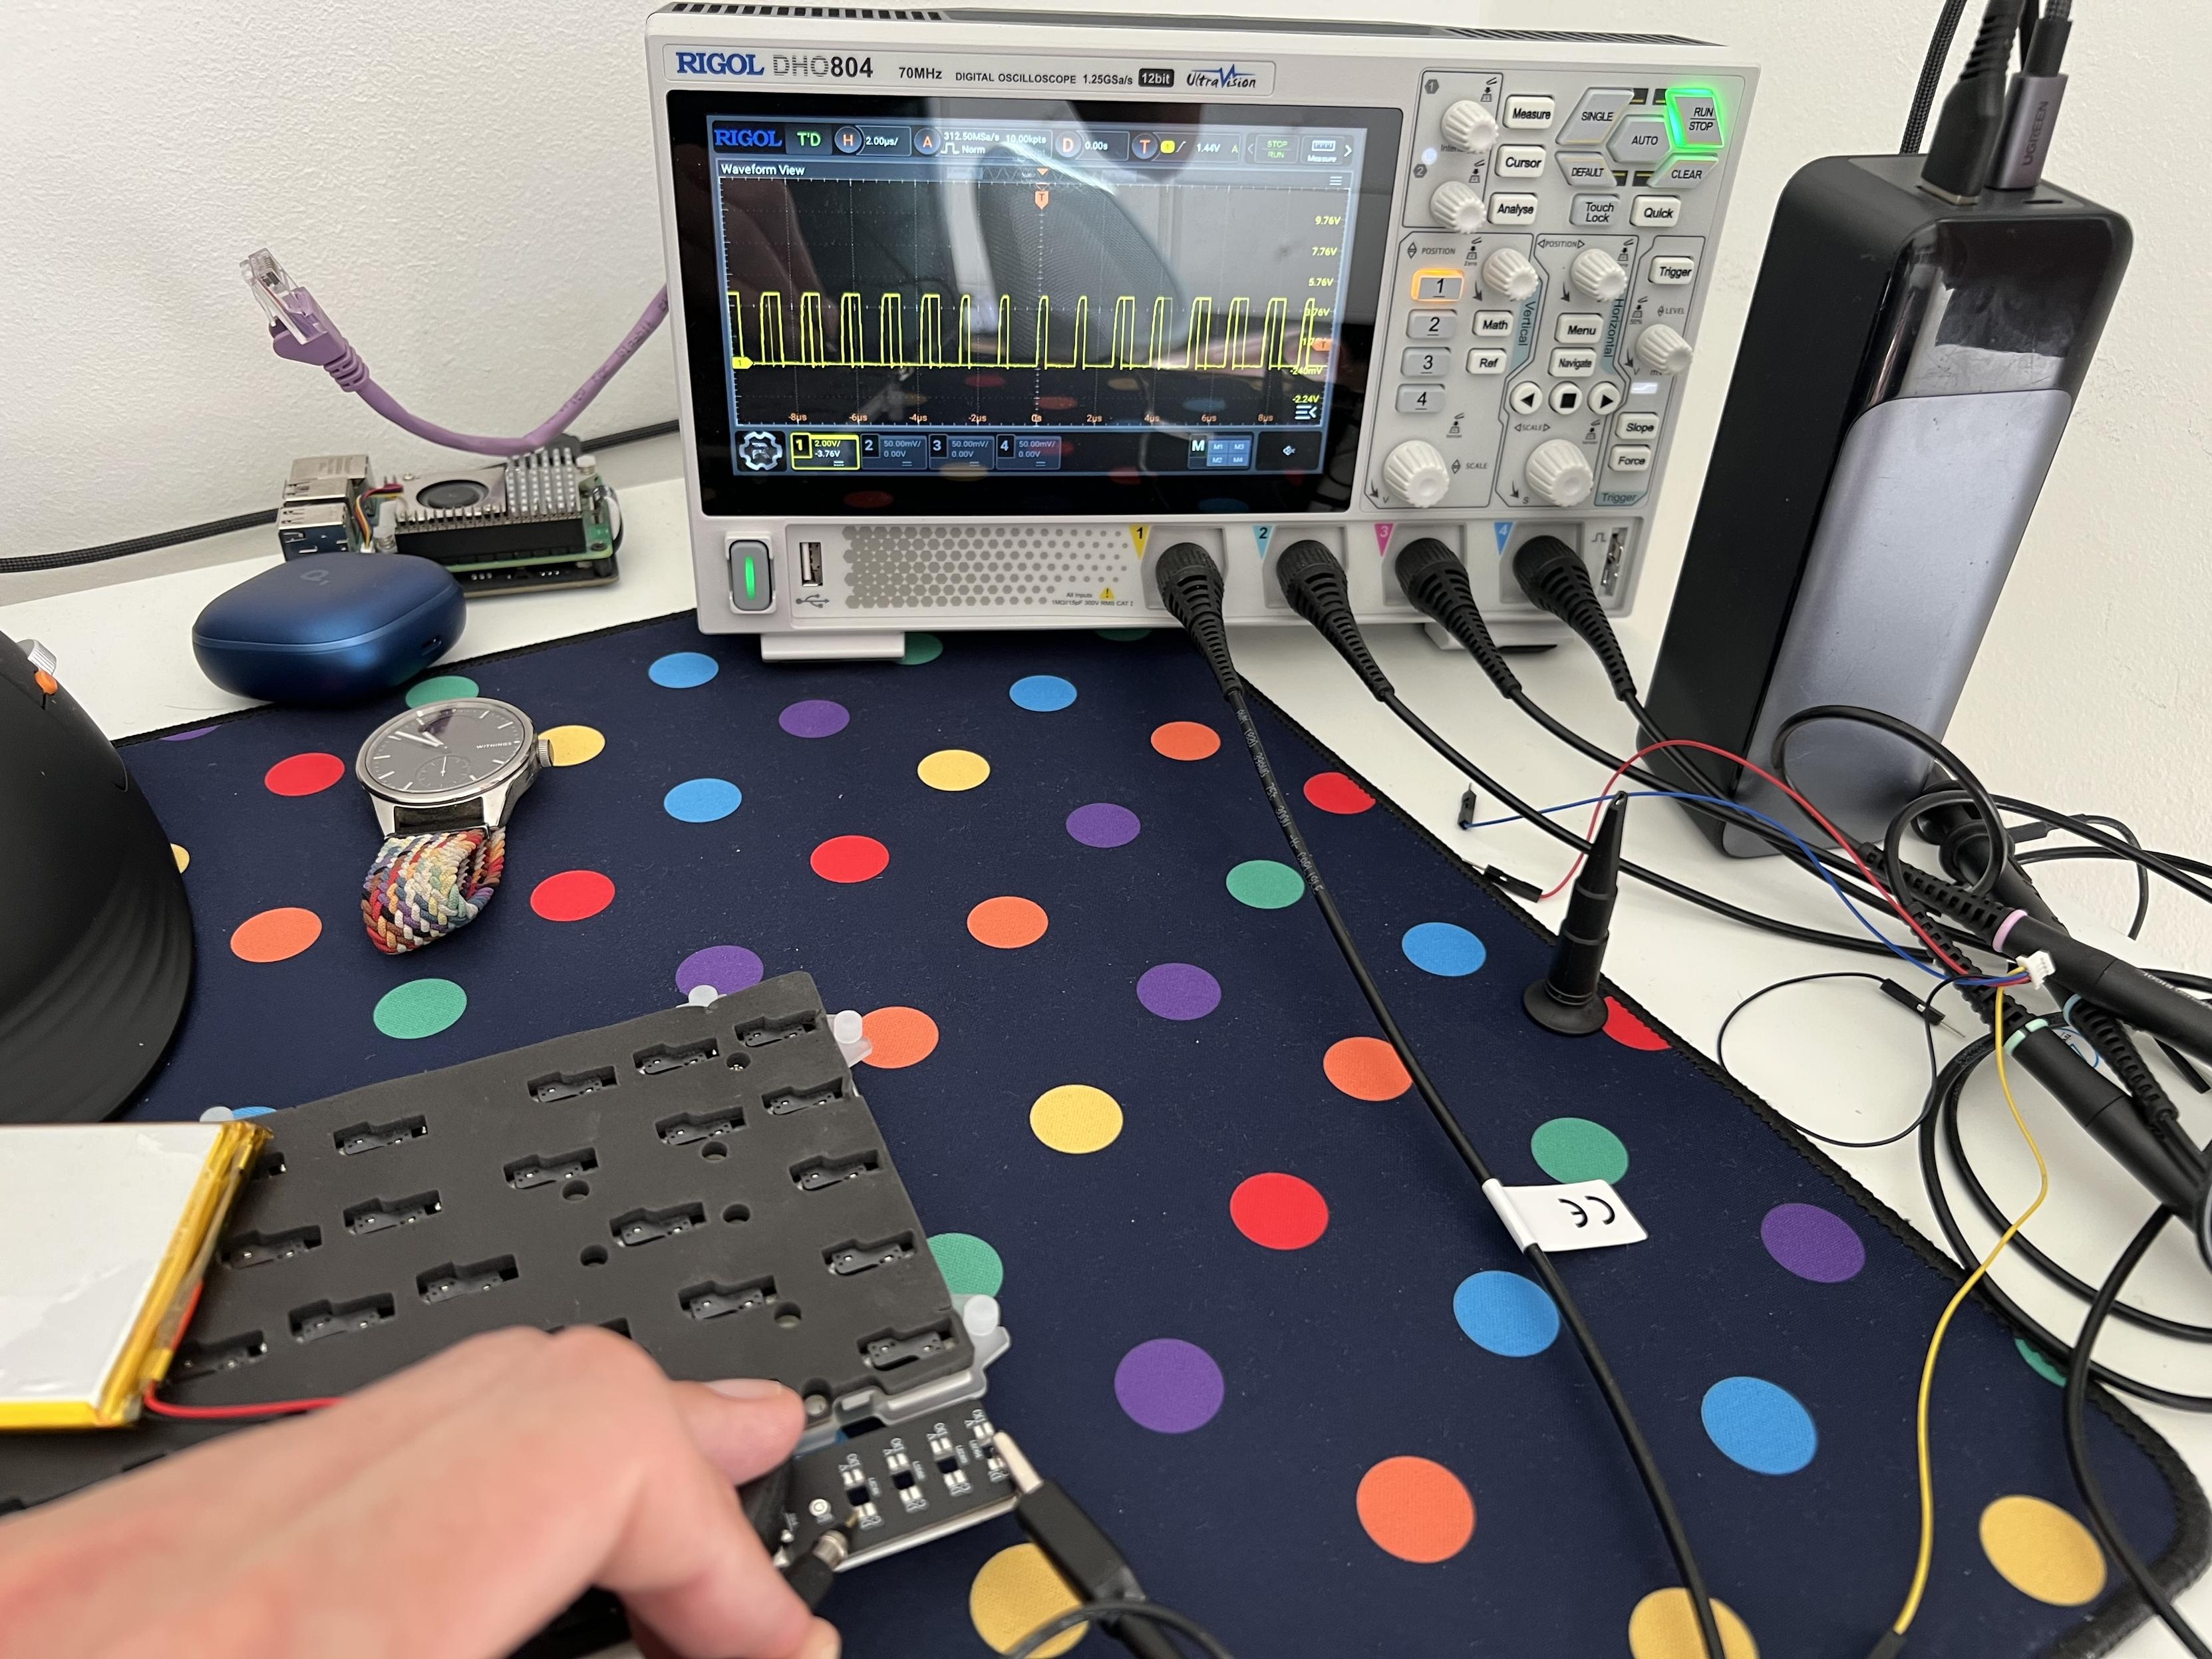
Armed with a cheap suction cup from an iPhone battery replacement kit (I seem to have a growing collection of them) and a 45 degree angled plastic spudger (no doubt from the same kit) I managed to squeeze into the small gap around the edge and get enough leverage to pop one of the clips. After that it’s a small matter of sliding the plastic tool around the circumference of the board and releasing the clips one by one with loud, worrying cracks. Fortunately the board is built well, and the clips are designed in such a way that prying them apart doesn’t easily break them. Twelve small springs should fall out and disappear over your desk, lap and floor, indicating you’ve successfully separated the keyboard parts.
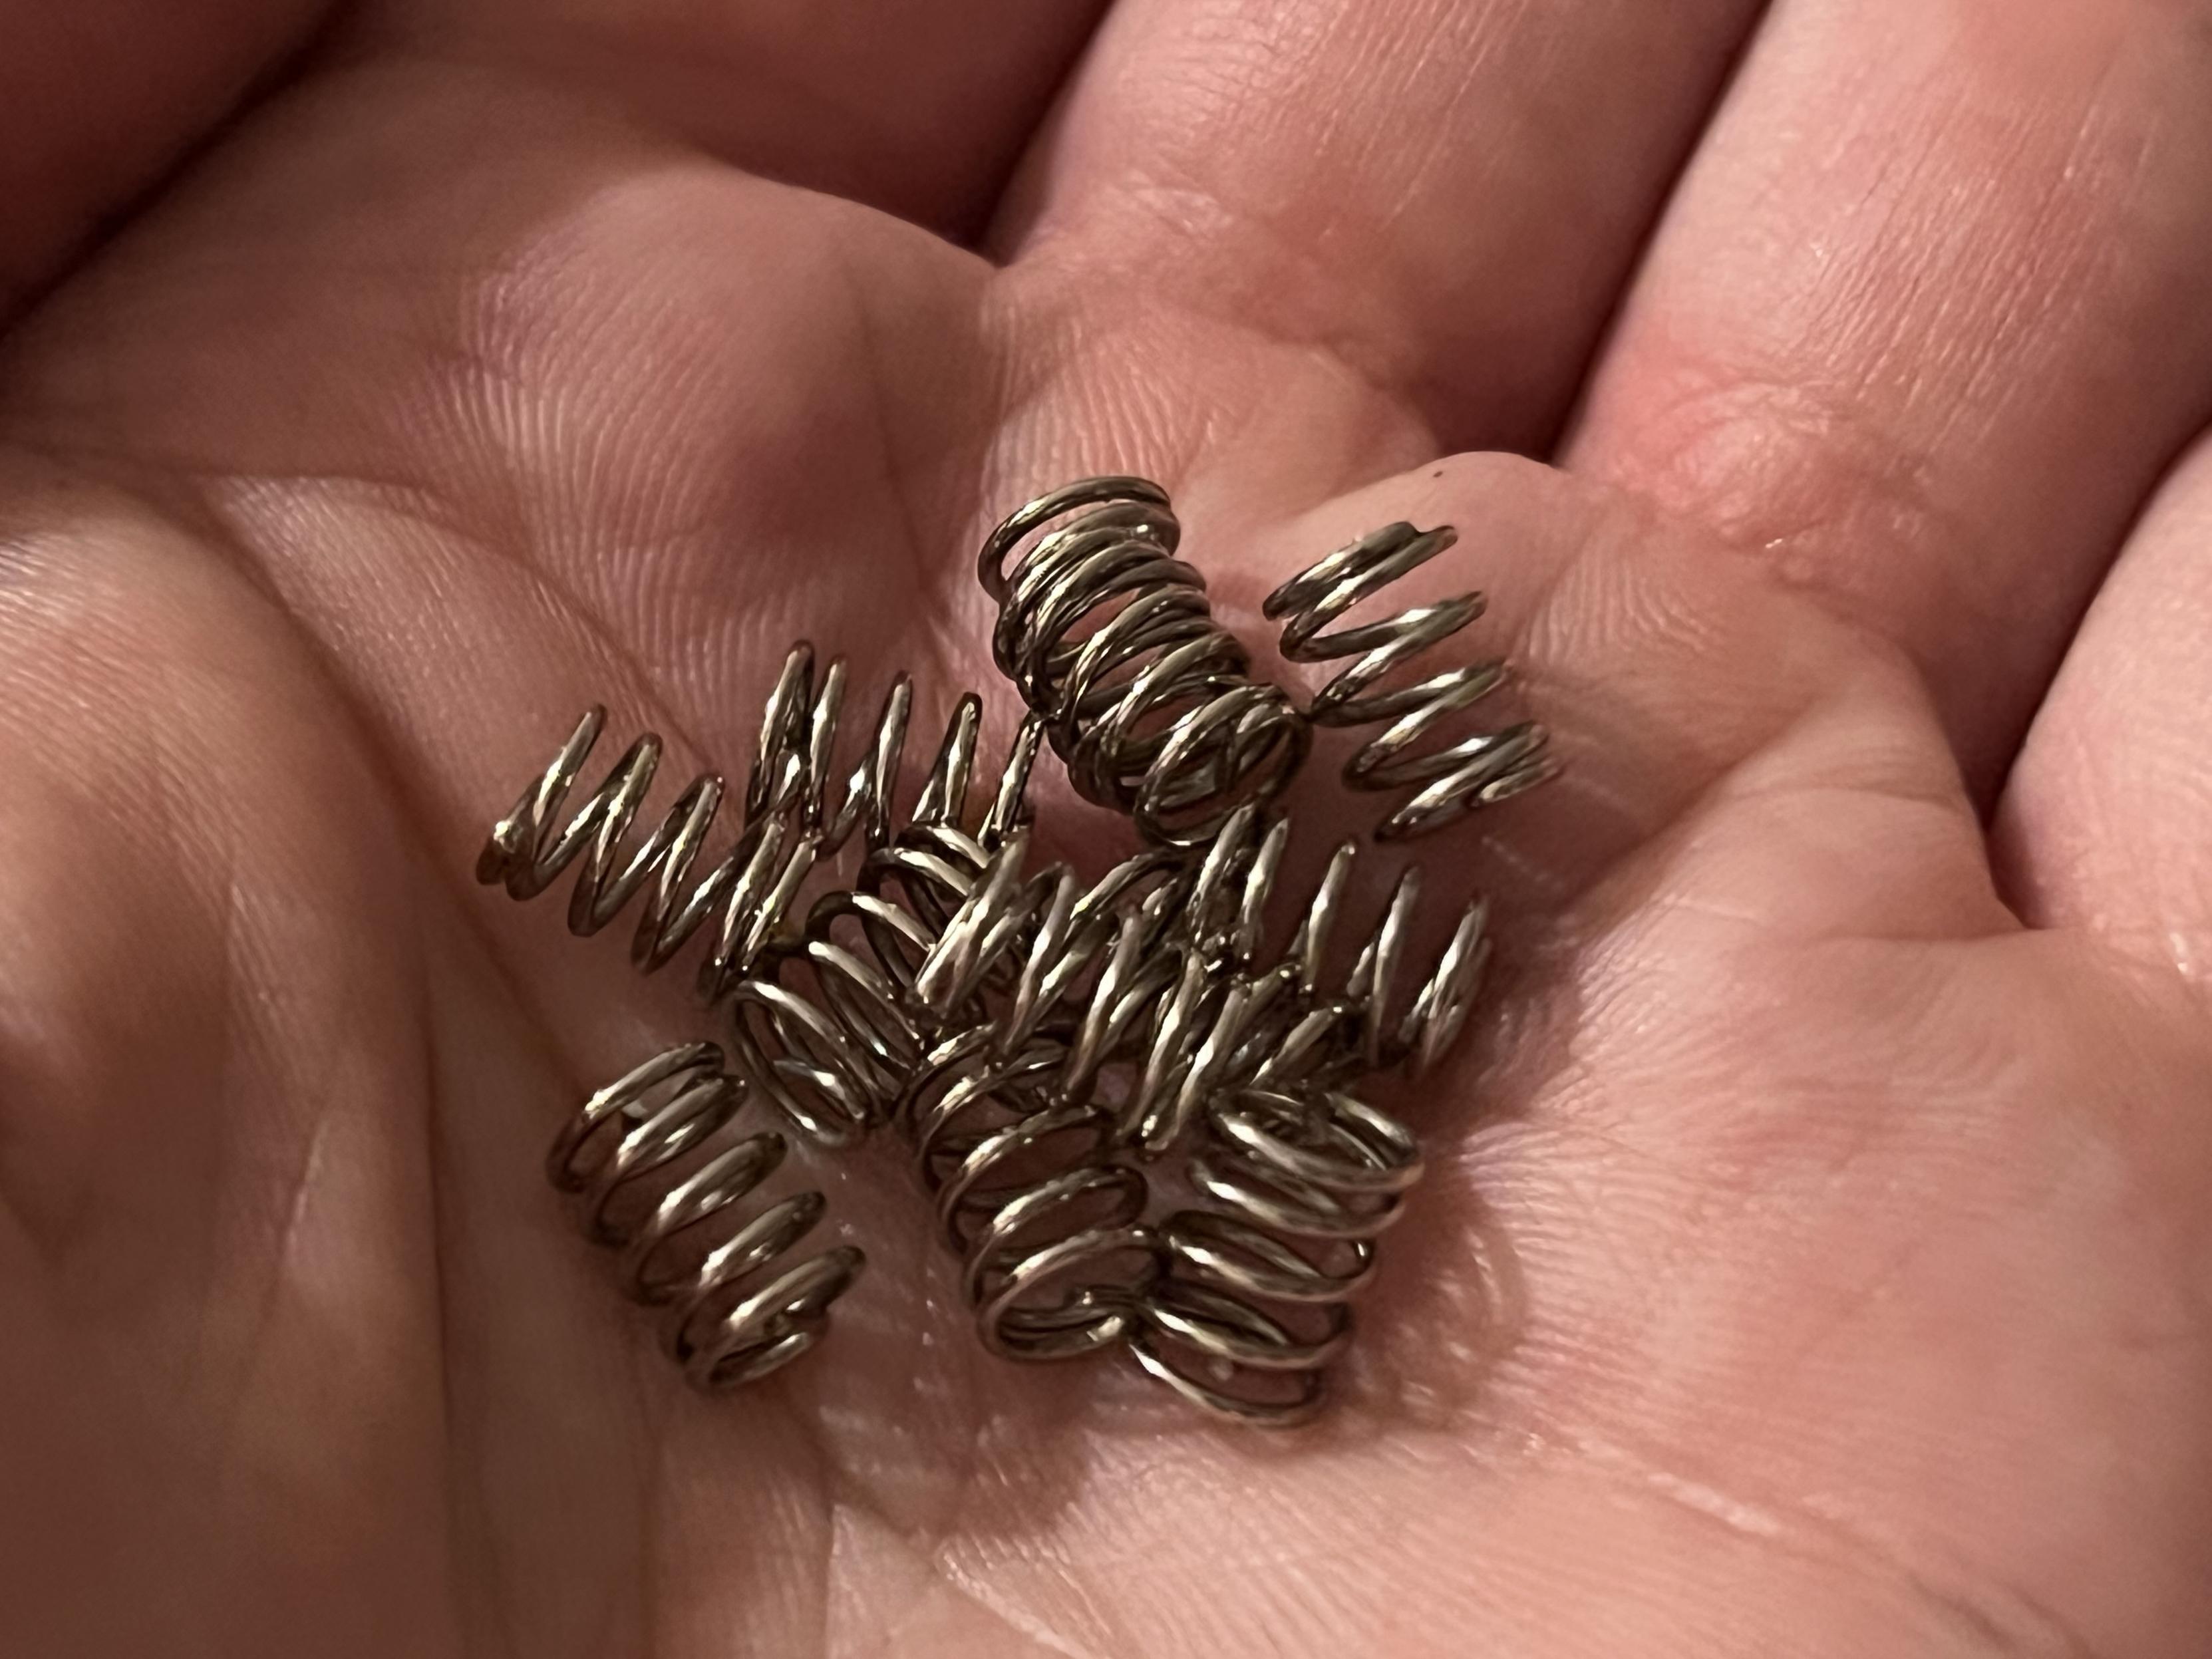
If you’re anything like me, these will end up on the floor at least twice.
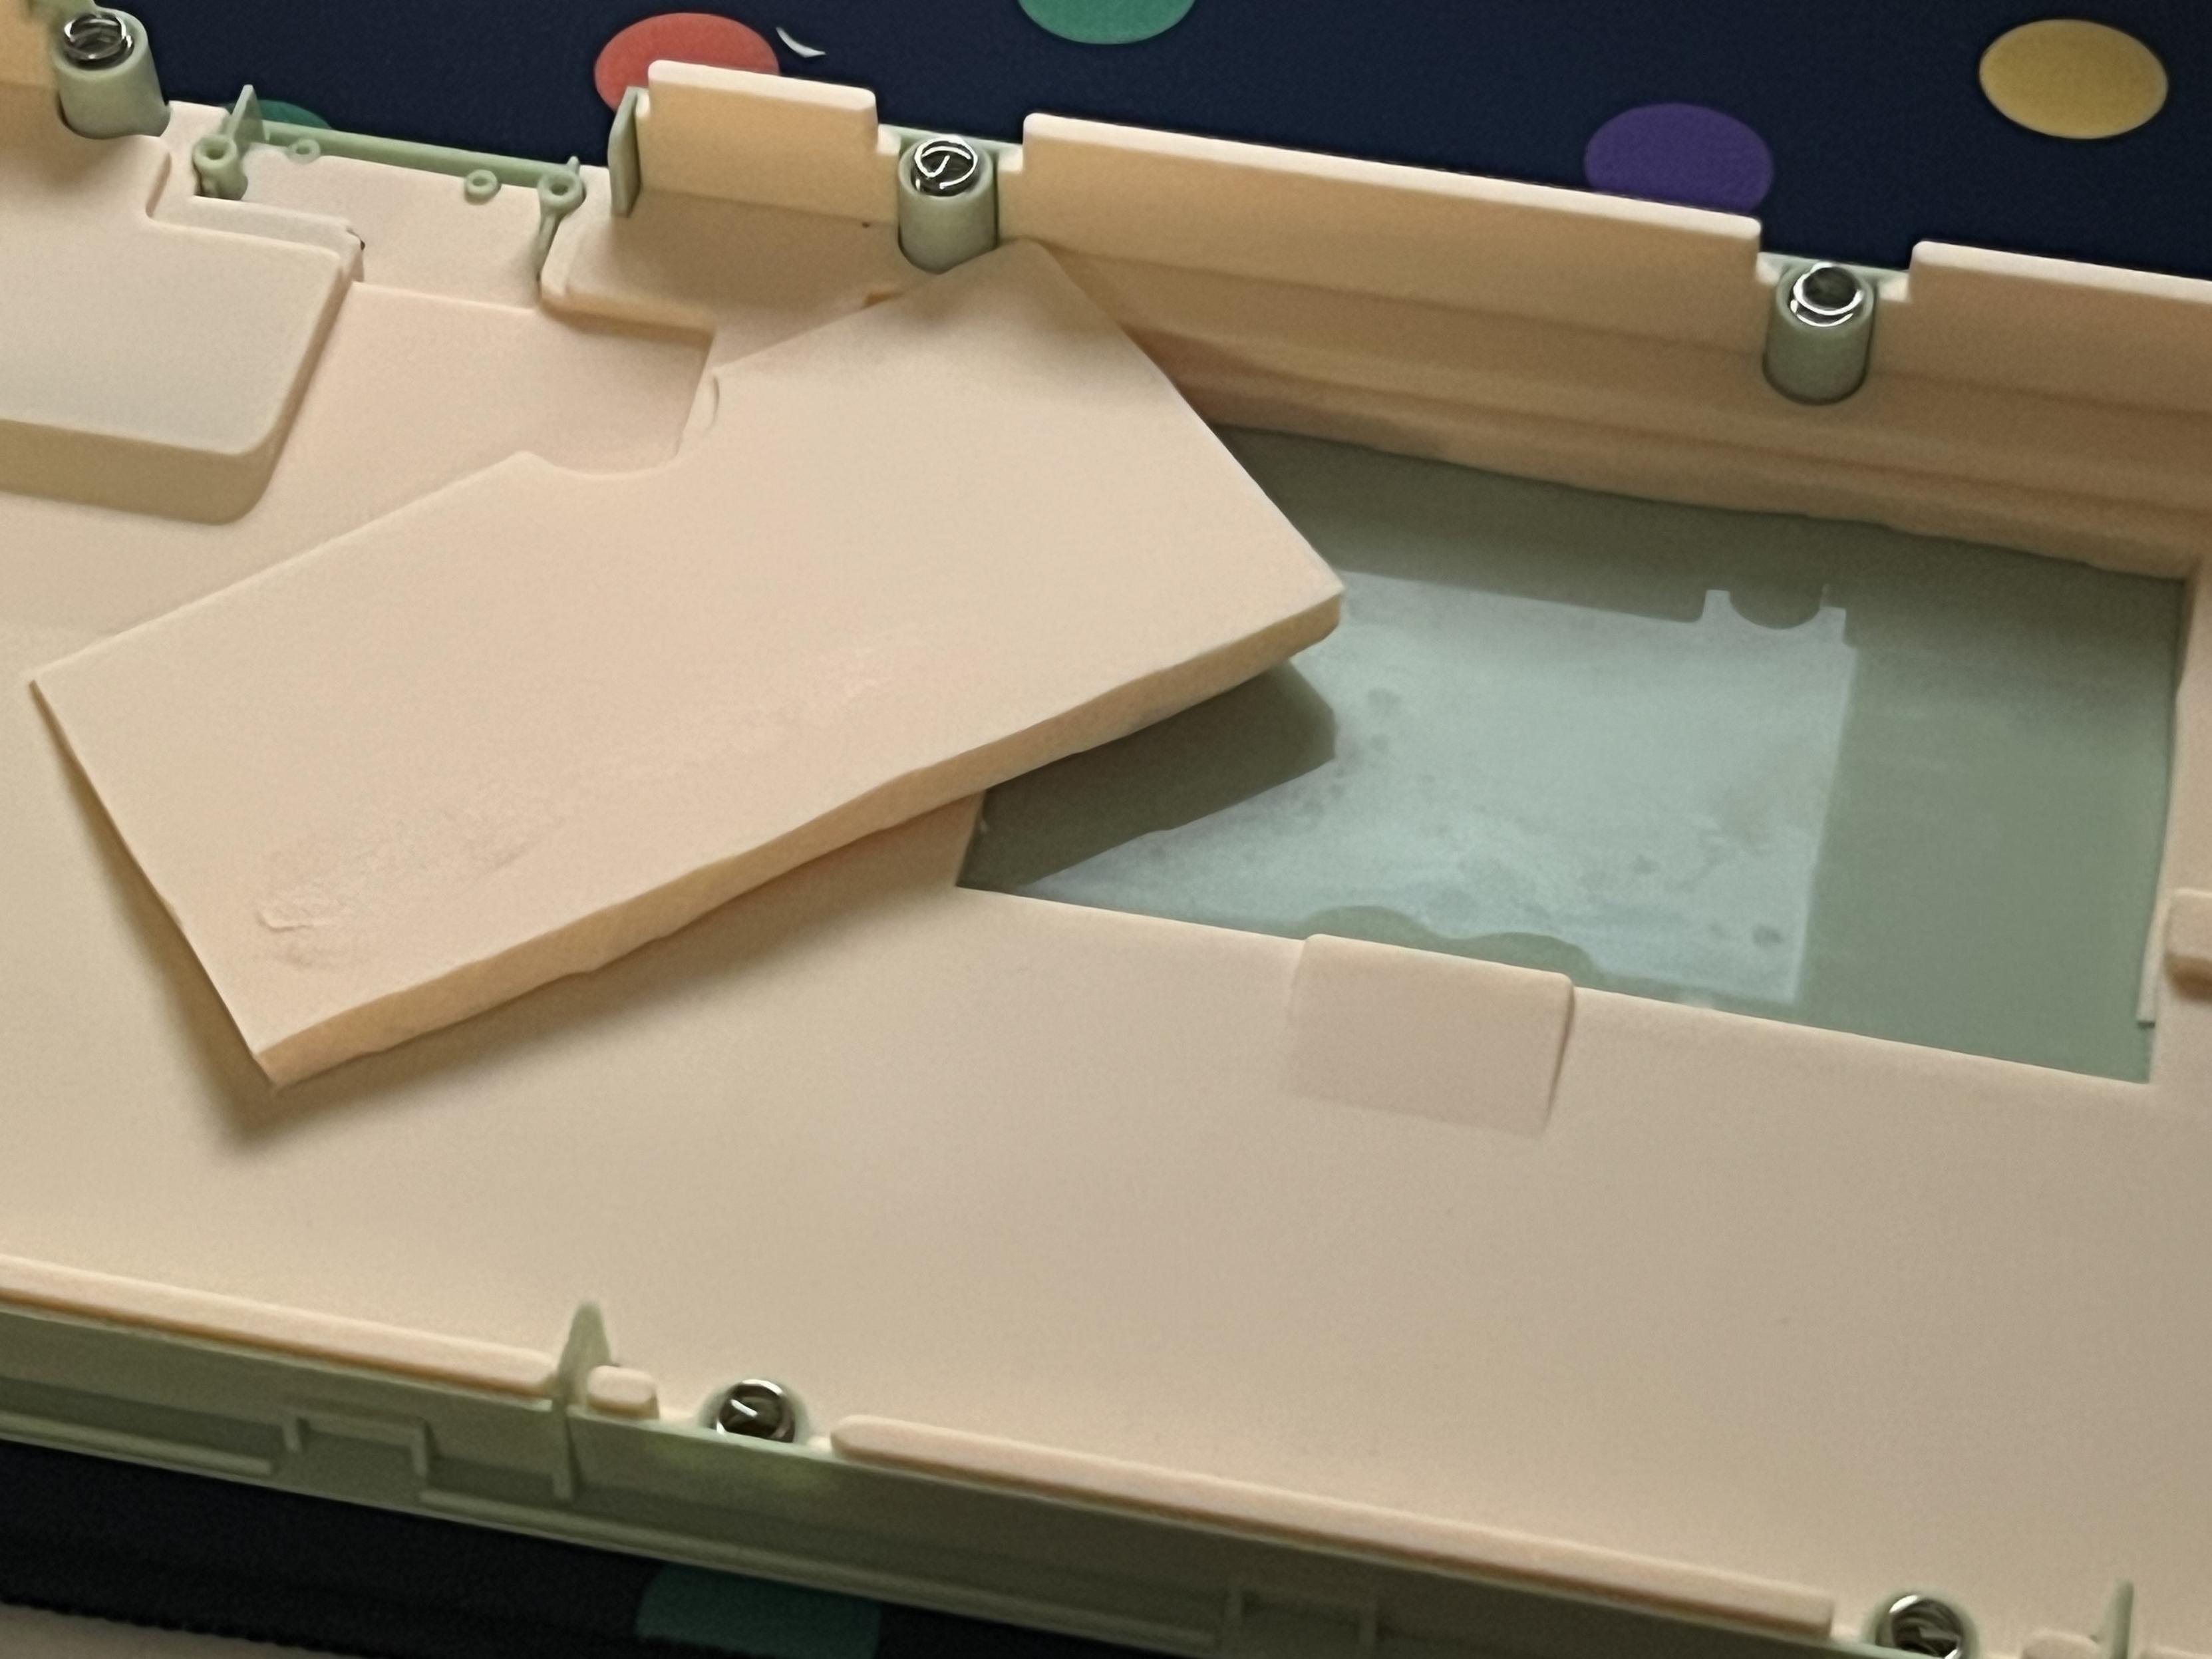
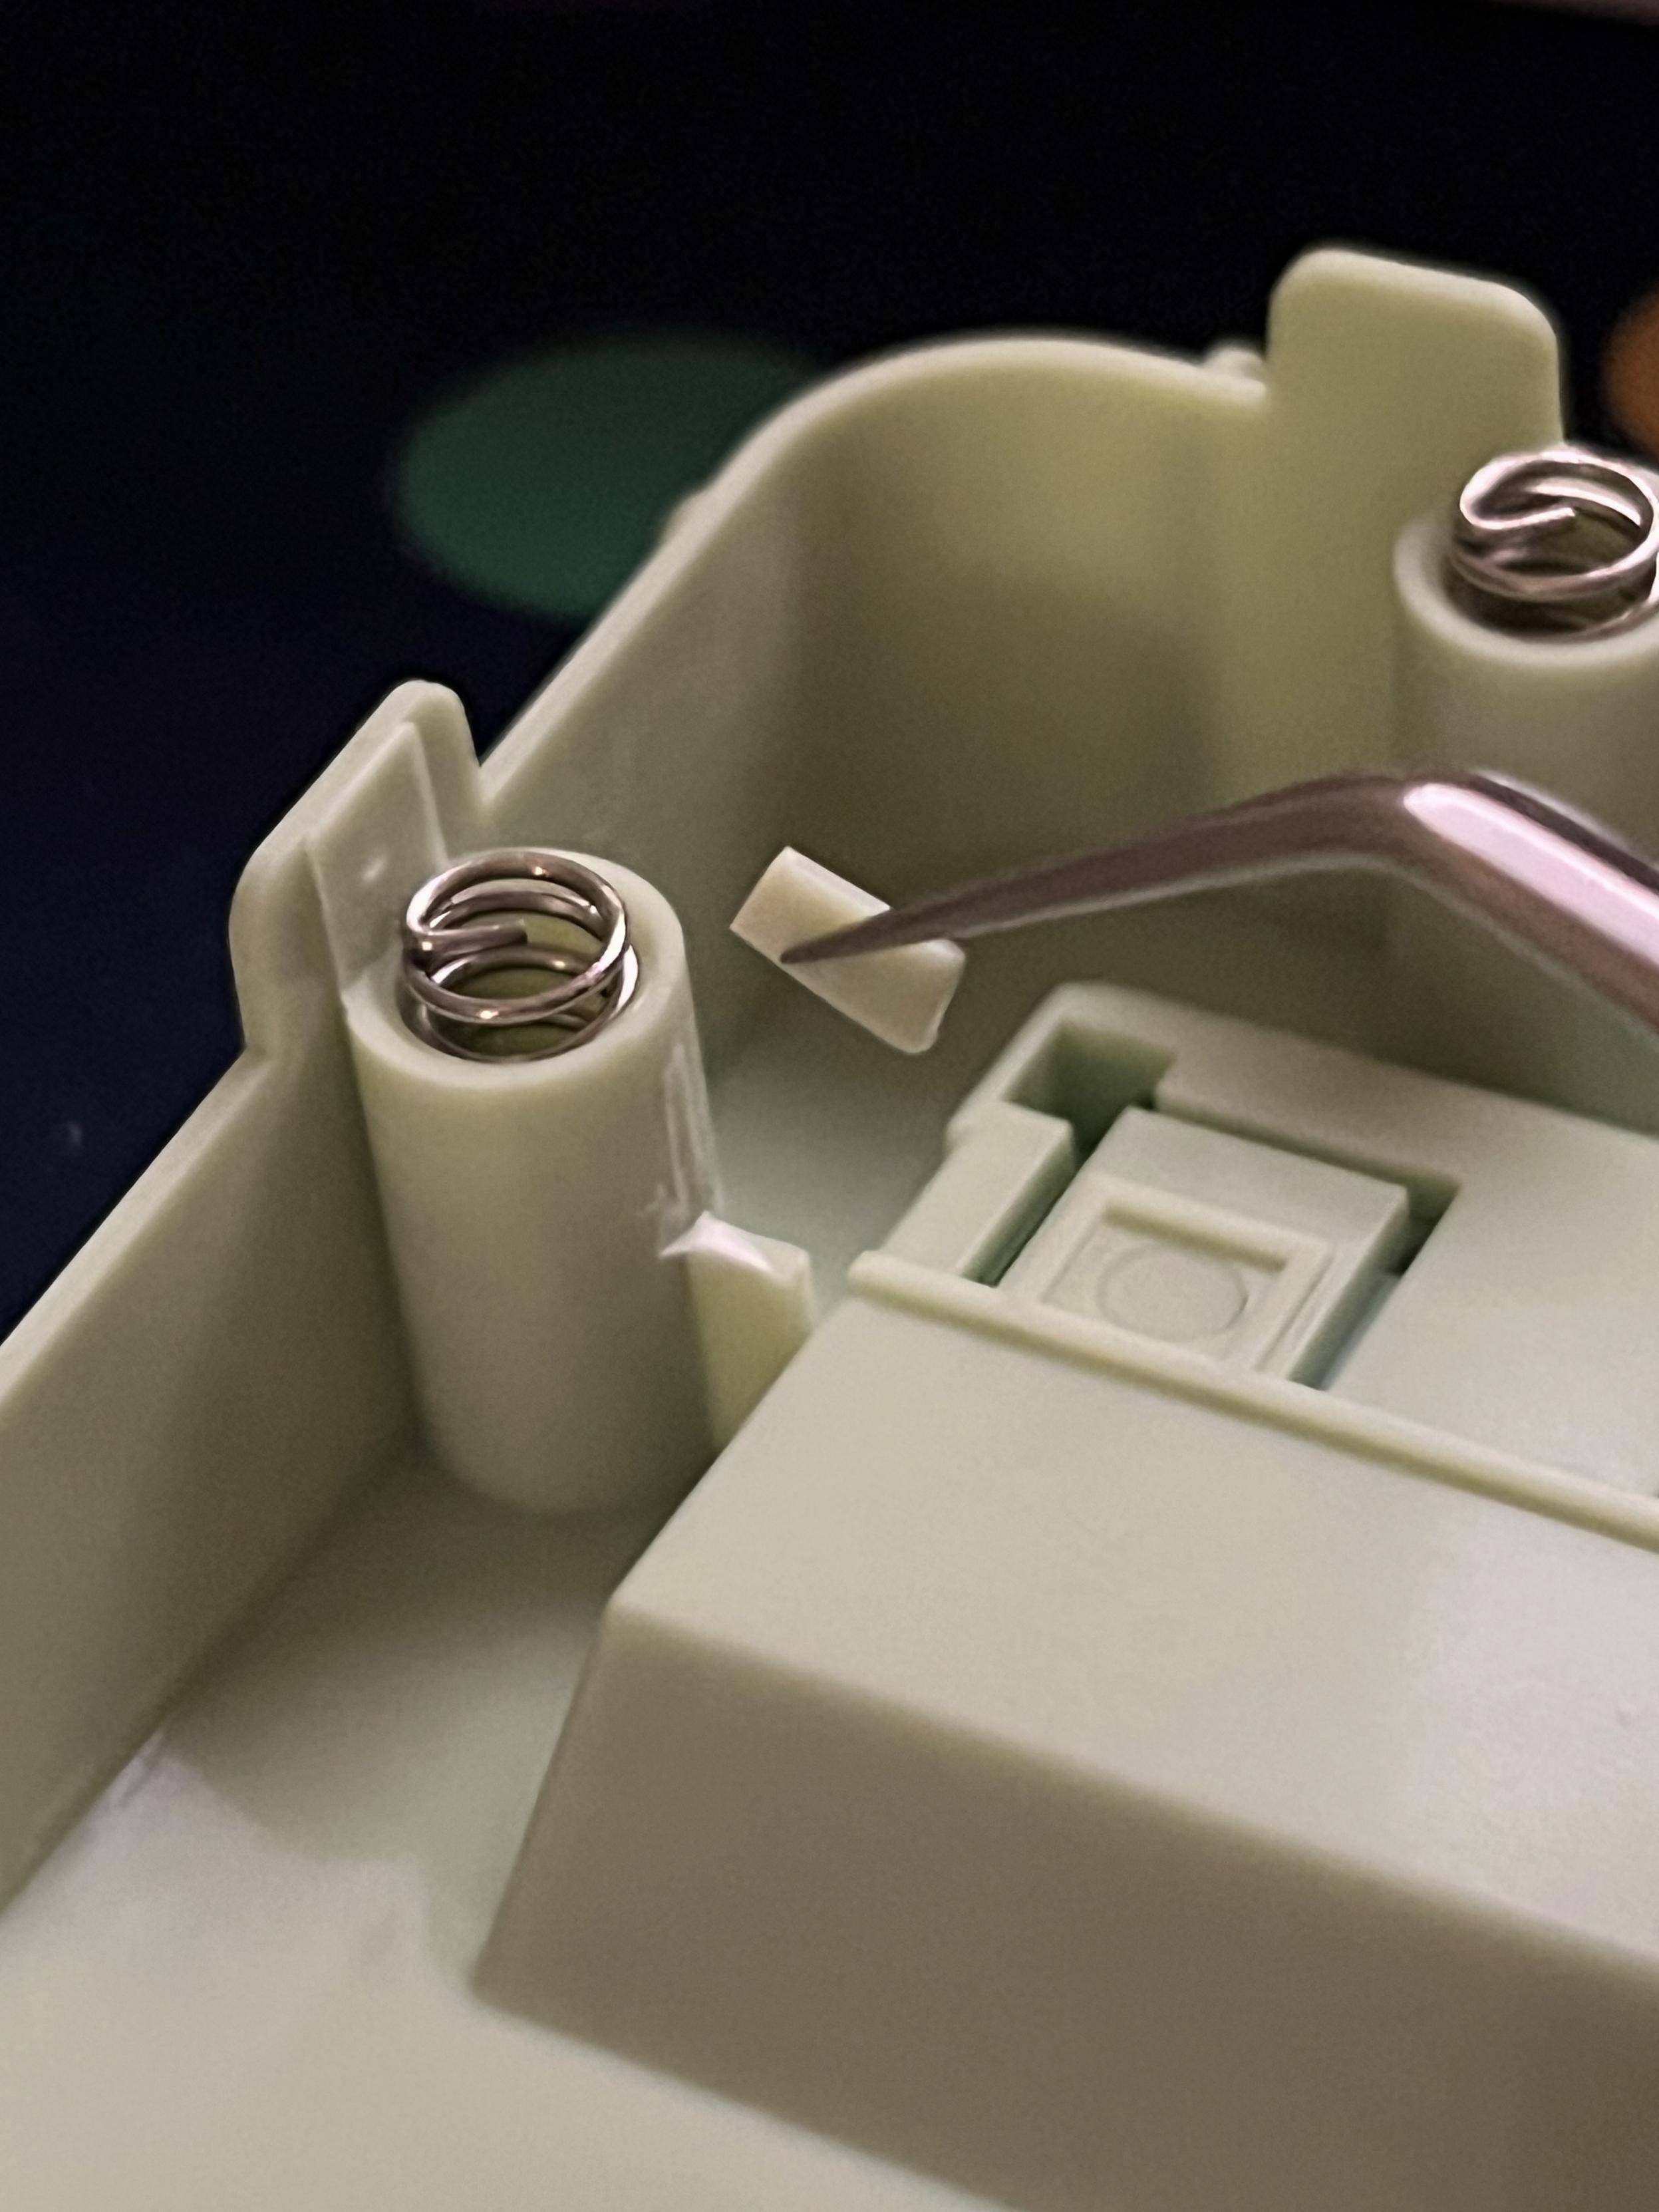
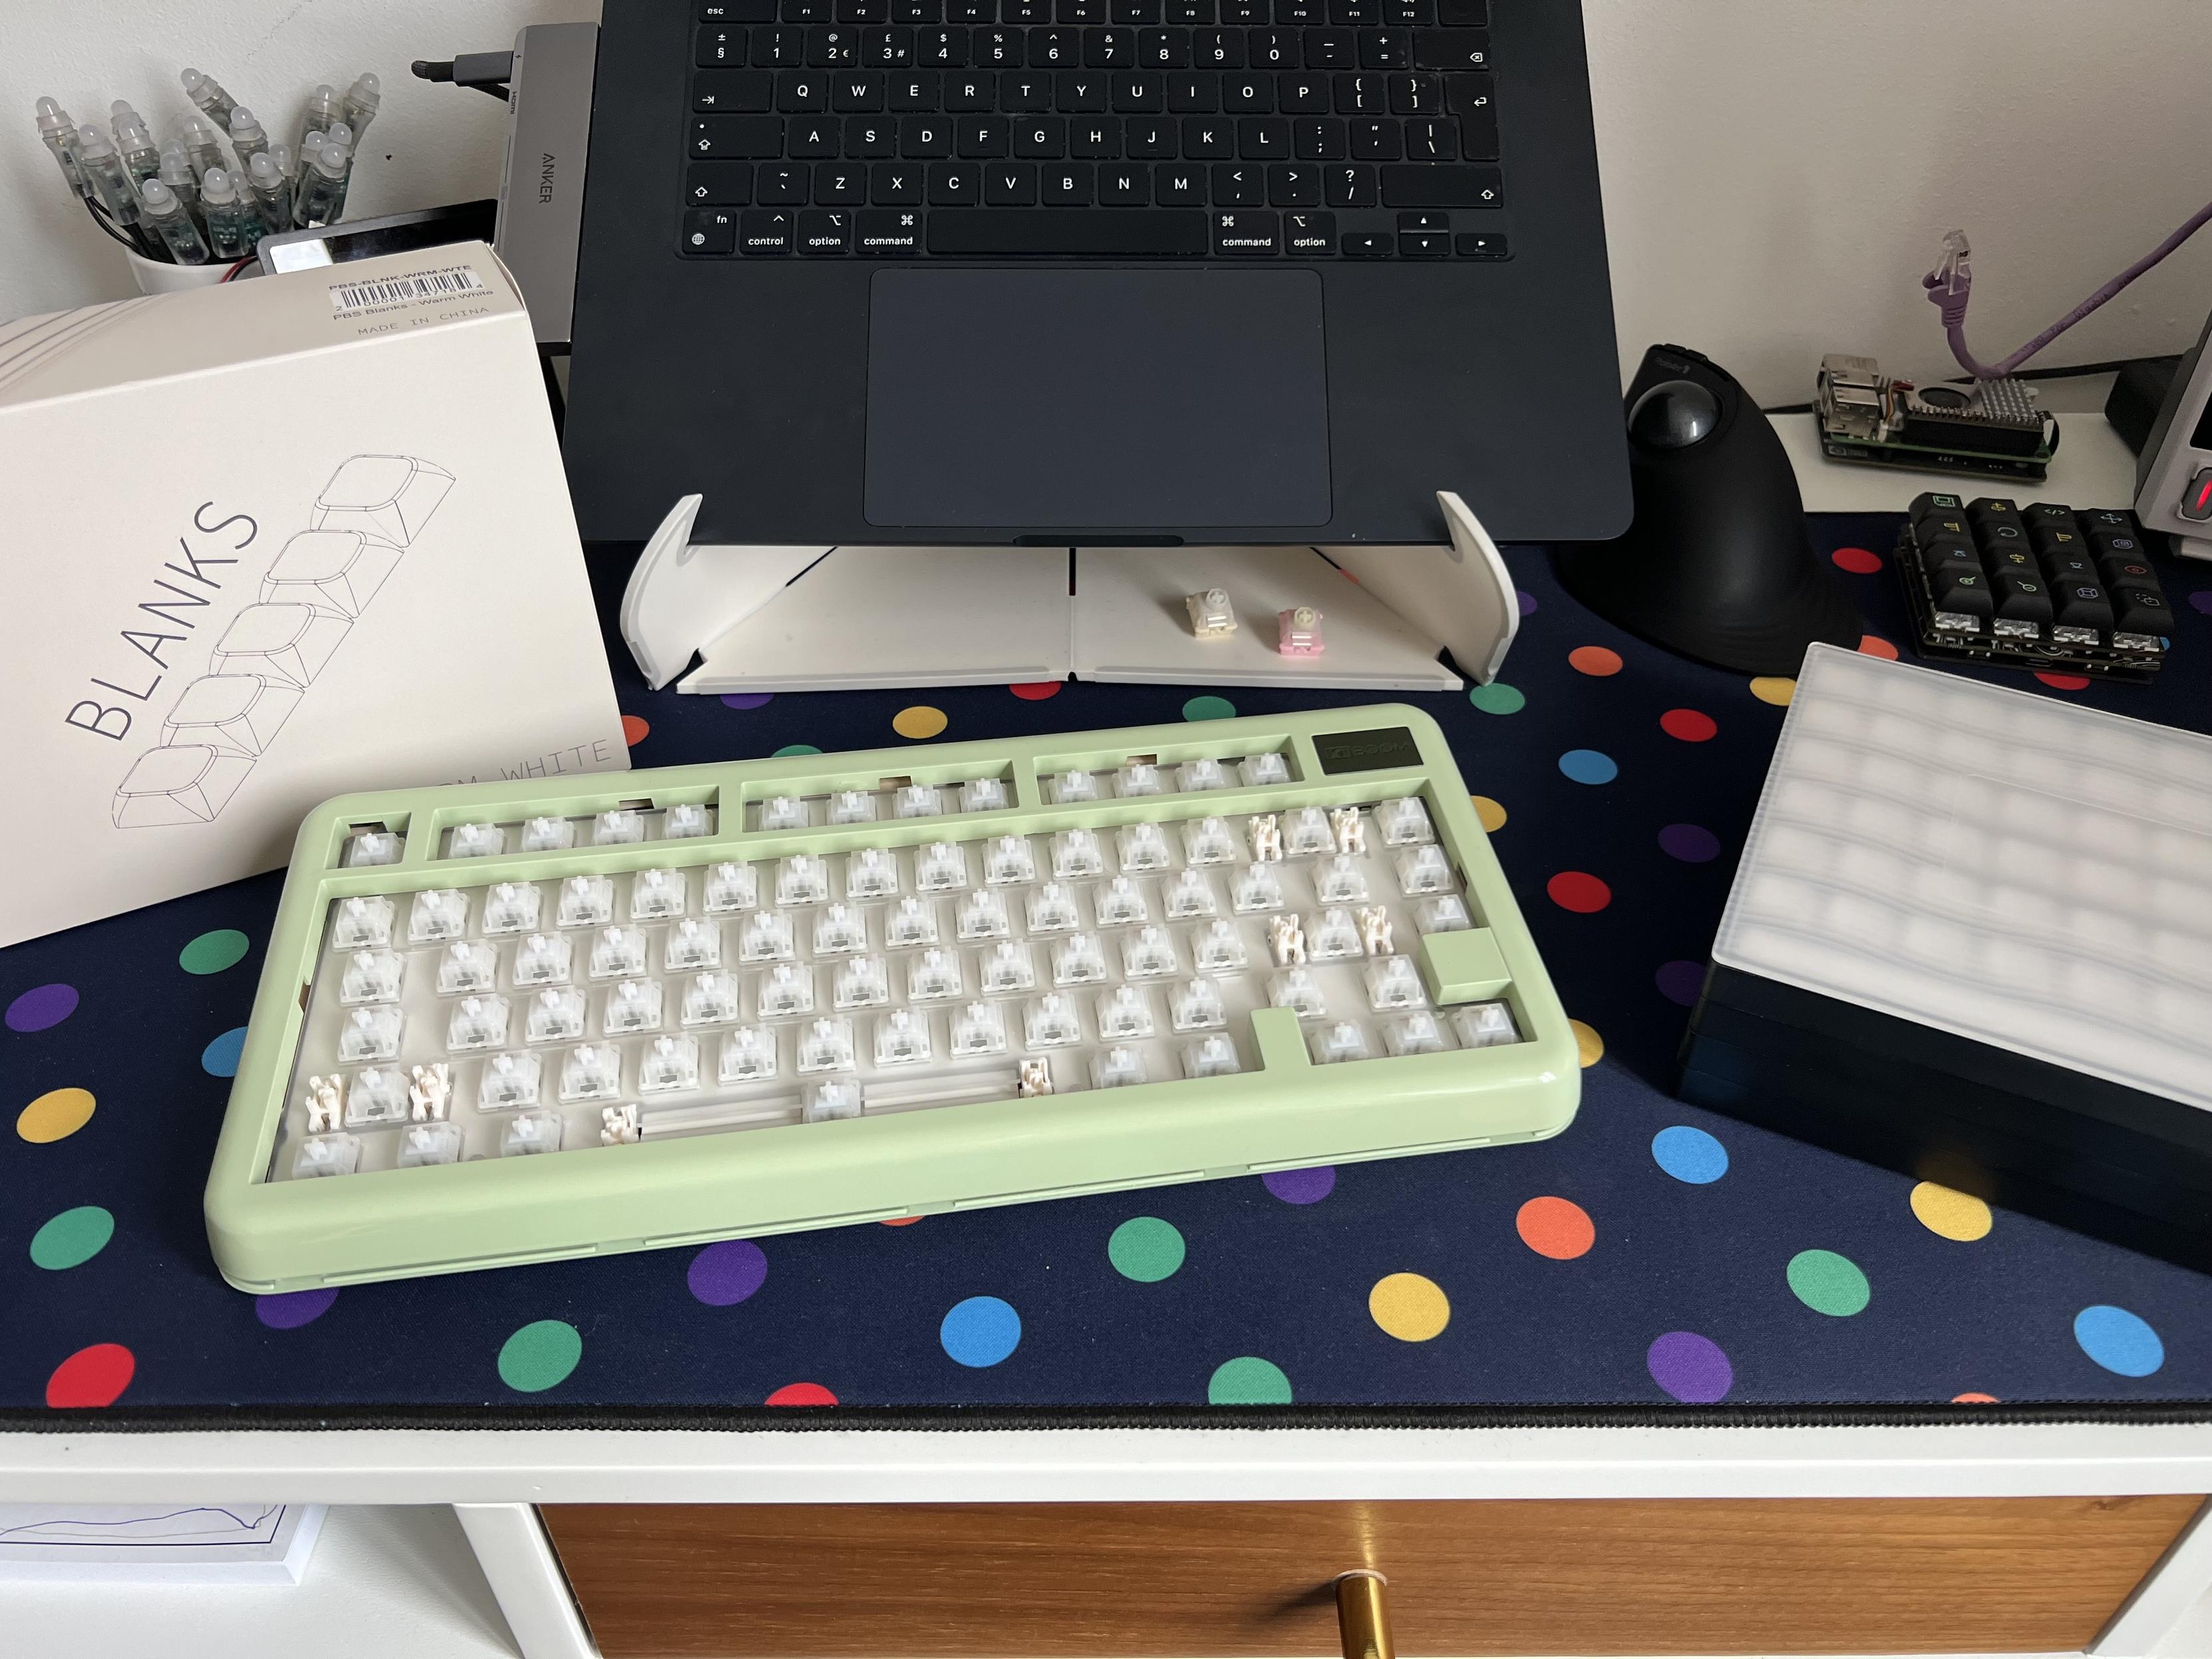
Once apart the Phantom 81 Lite was an absolute treasure trove of mystery and intrigue. For starters there’s a whole lot going on under the badge. Beneath the PCB and plate is a whole plastic moulded riser with screw posts presumably to mount an LCD display or similar. In the plate and foam are four cut-outs, and on the PCB are four unpopulated RGB LEDs presumably for illuminating the badge. I prodded the first LED landing in this loose end with a scope and revealed a signal- it’s quite possible that LEDs soldered here will light up and allow for some cool badge customisations.
There was- at some point- definitely a plan to put an LCD module here.
It’s possible KiiBOOM left some options open for something a notch above the Lite, or perhaps they explored and discounted the options but didn’t want to change the moulds, PCB layout and cut files for the various parts. Either way I’m happy they went with a simple, unlit metallic logo badge because it really gels with the fit and finish of the board. The badge, as it happens, is just stuck over a hole in the case (presumably for the aforementioned lighting or maybe LCD to peek through) and is easy to pop out. Potential mod opportunities abound!
Unpopulated LED placements behind the badge… I wonder if there’s a signal getting here…
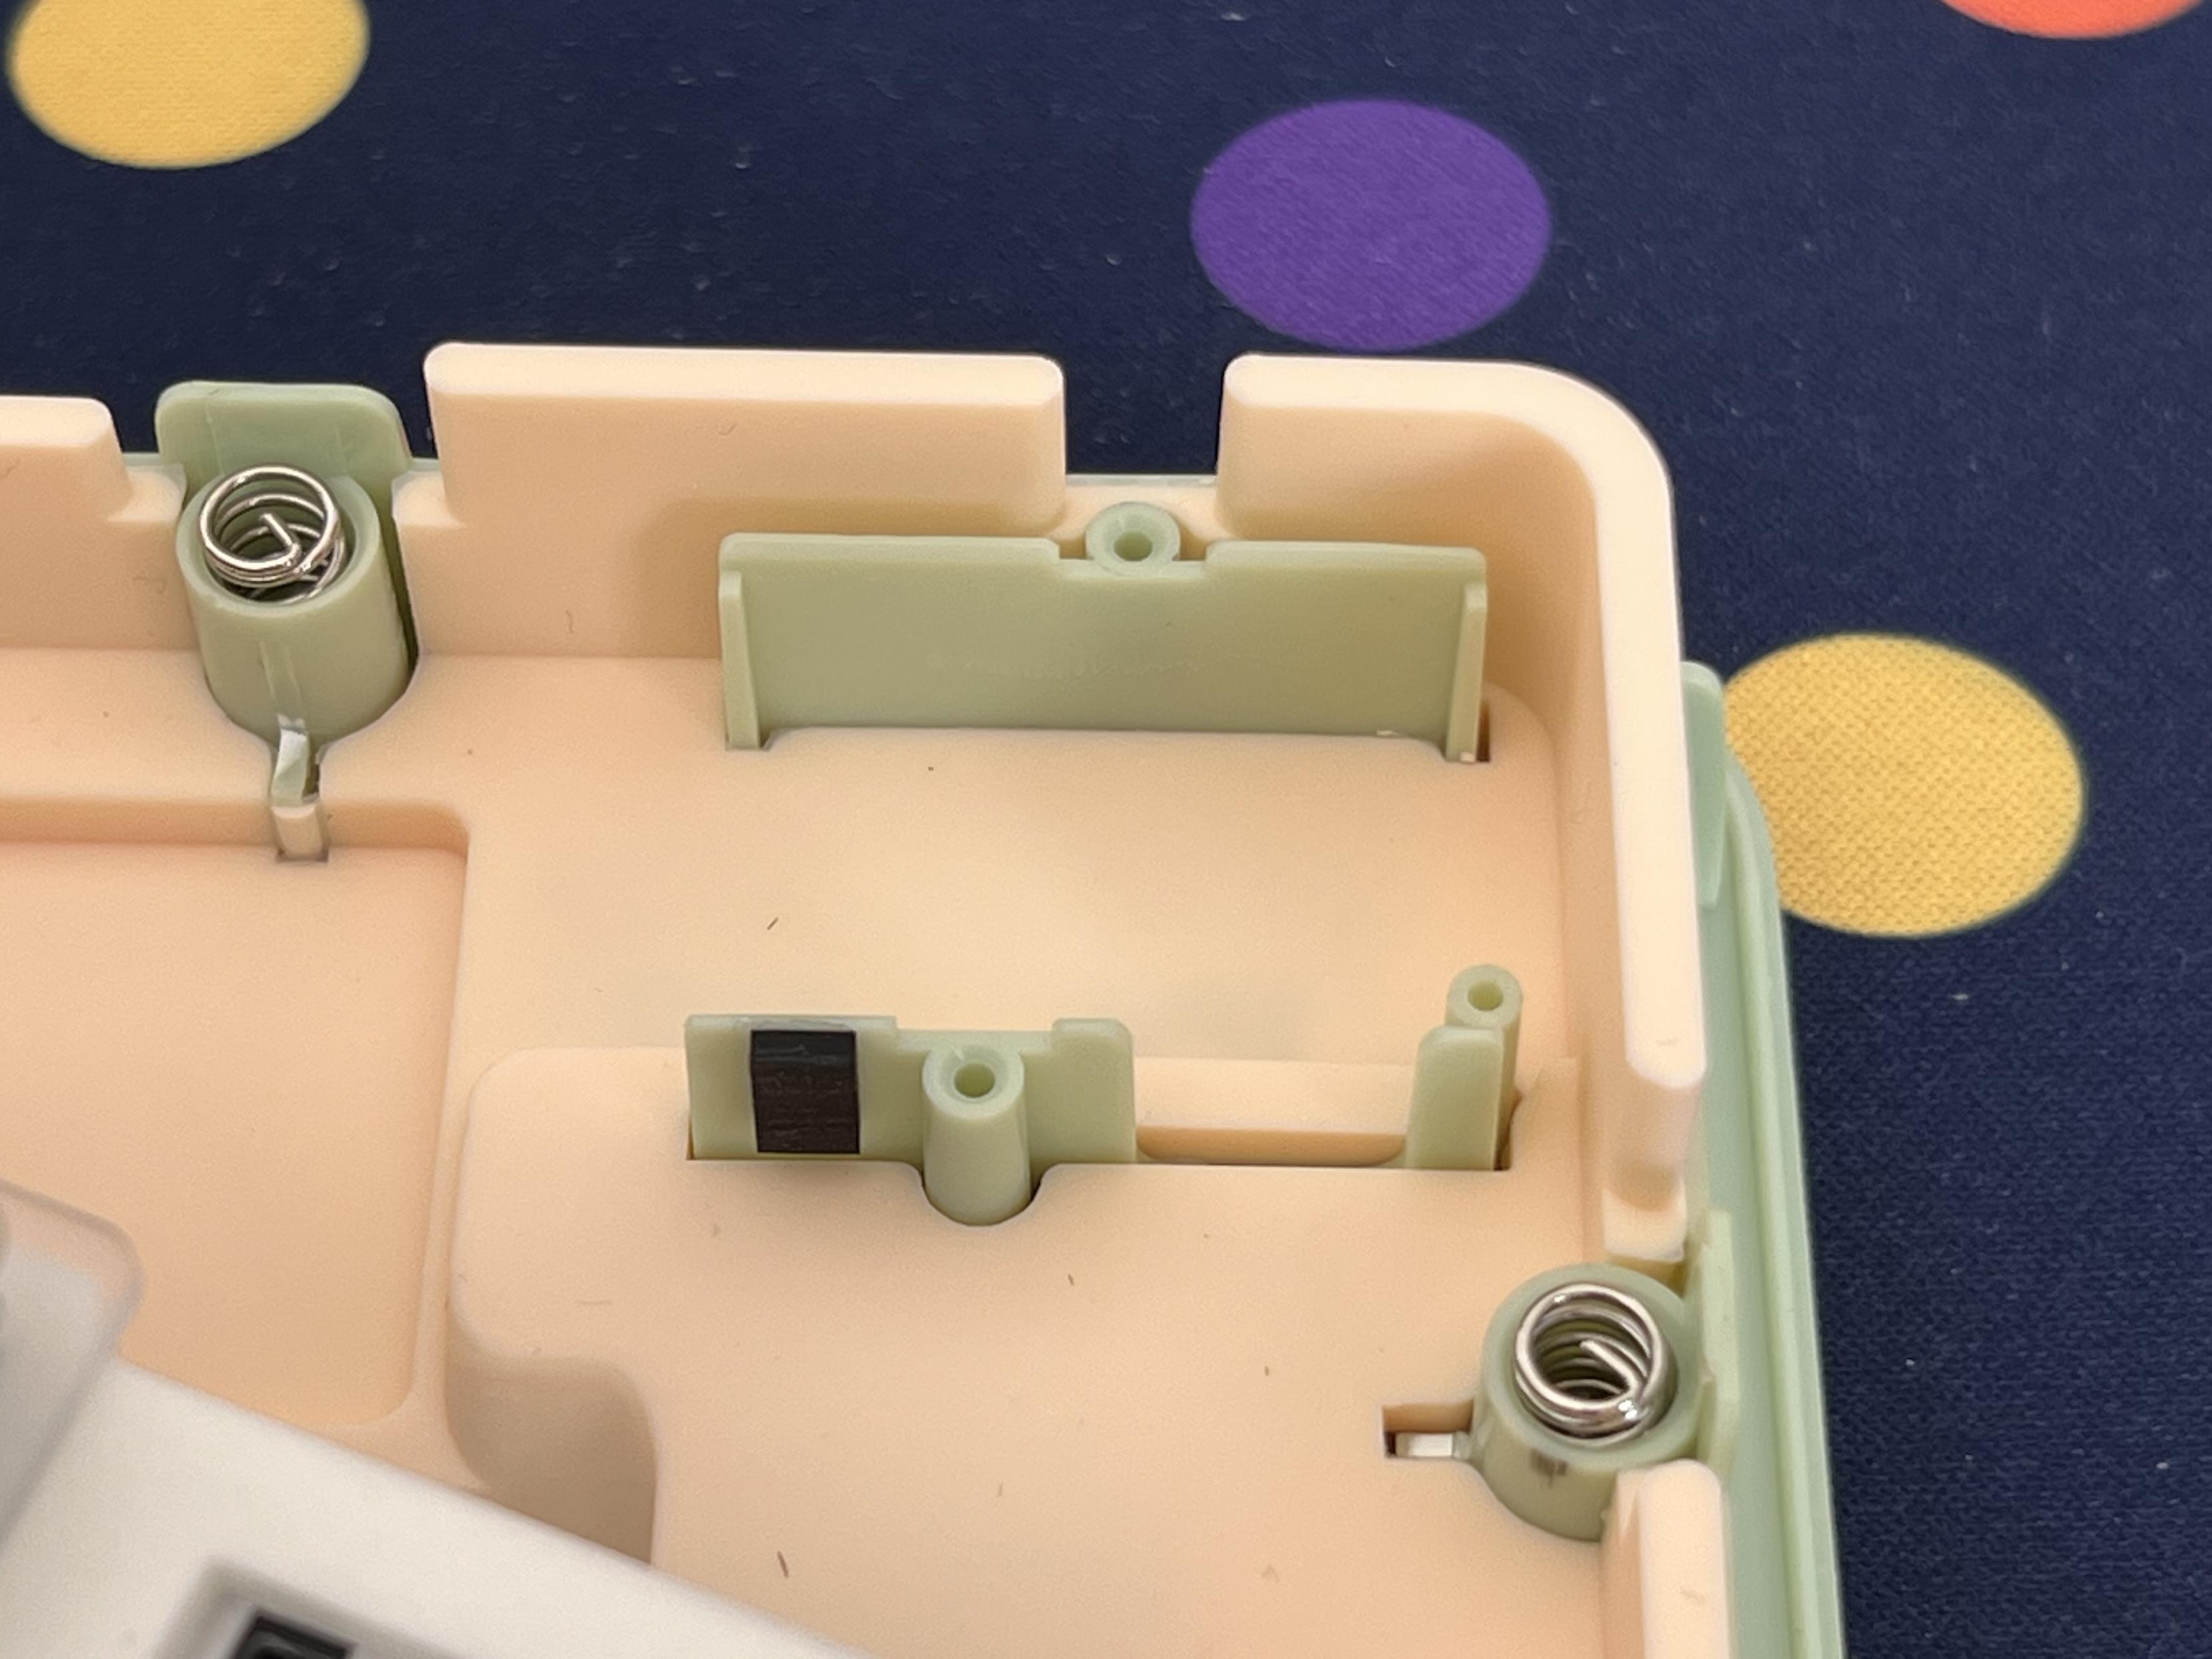
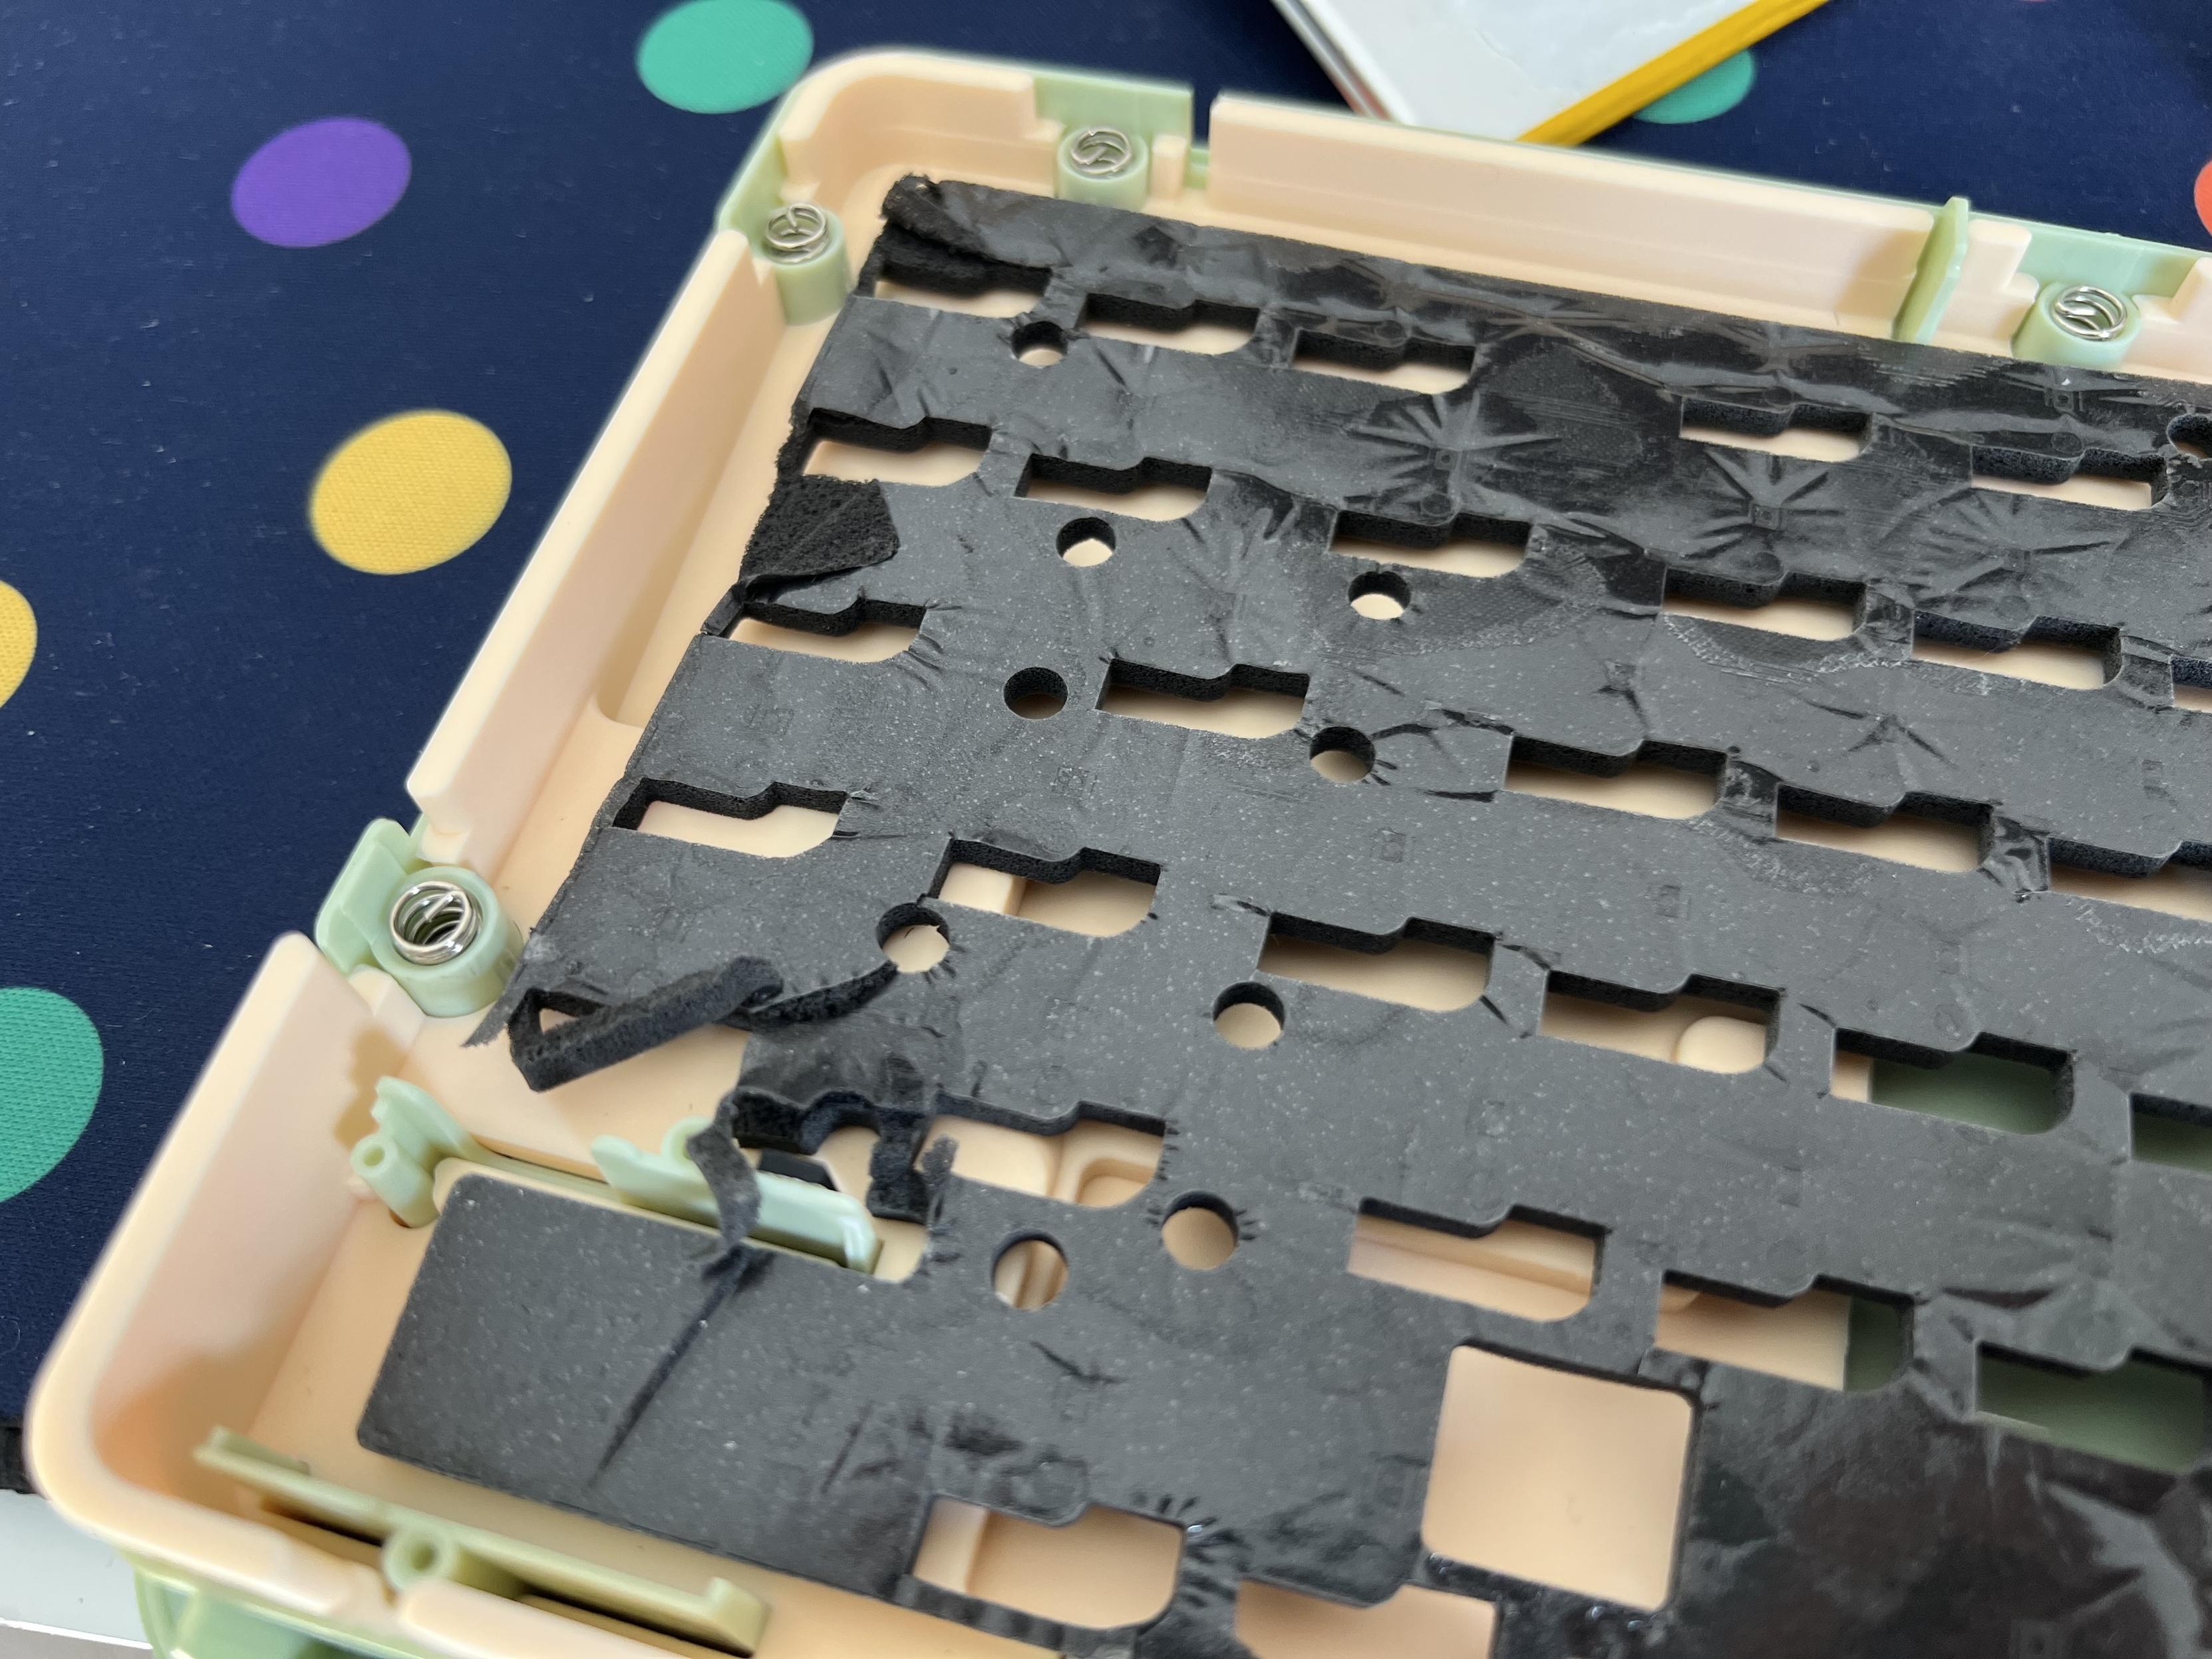
Somehow more striking than the bits beckoning for a badge bodge bonanza are the twelve silicone grommets around the circumference of the plate. Despite these the board is not simply a gasket/grommet style mount, but the grommets themselves locate into holes around the base, each of which includes a spring. Nothing about the unassuming exterior of the Phantom 81 Lite, or its Lite designation, had prepared me for anything more than a PCB just screwed to posts in the bottom shell. I expected a normal, boring, tray mount and instead got the most elaborate mounting setup I’ve seen in a keyboard to date.
Despite its complexity it doesn’t feel like this grommet/spring setup accomplishes much. Half the spring pockets include little plastic backstops that the PCB quickly bottoms-out on, turning what should be a springy, squashy board into something that feels tray mount as it stops abruptly. Naturally my first reaction – bear in mind I opened up the board before I even started writing this review – was to grab a hobby knife and simply cut these all off and set the keybed free.
Look I’m not saying cutting bits off a keyboard before you’ve really had a chance to test it is a great way to conduct a review- but it sure is fun 🤣
The battery, a 4000mAh single LiPo connected via a fairly standard (if small) JST connector, was glued down to the bottom of the board. Or, rather, stuck down to a large silicone insert that covered both the bottom and side of the board. As it happens it was rather easy to pry up what little of the battery was stuck to the bottom of the case, and then simply peel back the silicone insert from the battery adhesive. I then cut a chunk out of the silicone and stuck the battery back down into the bottom of the board to give the PCB a little more clearance.
Since the top was a nightmare to remove I also cut off half of the plastic clips and slightly blunted the others with a file. Now, armed with a suction cup, my angled plastic spudger and knowledge of which clips I’d sabotaged I could open up the case in seconds. Ready and prepared for any future modifications.
With no visible signs of my modifications on the outside, save for the slight marring of my previous efforts to pry open the case, the only way to tell the difference between a vanilla Phantom 81 Lite and my modified one is an exaggerated firm press of F12, which previously bottomed-out hard on the plastic backspot, now squashes right down. Well, uh, there’s also a bit of creak to the once rock-solid case now, too, but that’s only noticeable if you pick it up and twist it.
Did I actually accomplish anything with all this hackery? Honestly, I’m not sure. Did I make it easier to do more hackery? Yes!
While I was spelunking around in the keyboard’s innards I also noticed that the plastic mode switch hadn’t fallen off and disappeared under my desk. In typical KiiBOOM fashion, it was retained by two plastic clips that kept it together with the top shell.
The USB-C and mode switch daughter board- screwed directly to the bottom shell with two flanged, crosshead screws- also had its own bit of silicone damping material to close off the gap it’s installed through. Another nice touch, and perhaps a boon for acoustics though I’ll be damned if I can tell.
Oookay don’t plan on putting the foam back if you remove it 😭
The PCB foam, held onto the PCB via adhesive, was a nightmare to remove and broke in several places despite my best efforts to peel it away carefully. If you ever need to do board level repairs or modifications (I wanted the foam out of the way for soldering those mystery LEDs) then good luck removing it without destroying it. In my case I’m going to write it off and try a tape mod- in for a penny in for a pound!
Overall
Despite being a nightmare to open up for modification and repairs, KiiBOOM’s Phantom 81 Lite is a solid entry level mechanical keyboard with a bafflingly fancy grommet/spring mounting system that seems far out of its price grade. The clean, smooth lines of the case and the lack of any fussy design, tell tales of a brand who are confident in what they’re making. It also feels very evocative of an IBM Selectric and I think this green, froggy board would look phenomenal with some vintage computing or typewriter inspired caps. Hold on- let me stick my PBS Blanks on- yup, can confirm, it looks phenomenal!
Decided to swap the froggy themed Moa keycaps on the KiiBOOM Phantom 81 Lite with my PBS Blanks. Very clean. Very nice. Very vintage.
(Note: you will have to forgive the chronology of these caps appearing in earlier photos… I am a hot mess.)
I’ll spare you my standard rant about QMK and VIA, and side-loading JSON but if you’re planning to use the QMK functionality of this board you should be prepared for a little mild hoop jumping.
You can pick up the Phantom 81 Lite directly from KiiBOOM for just over $100.